3
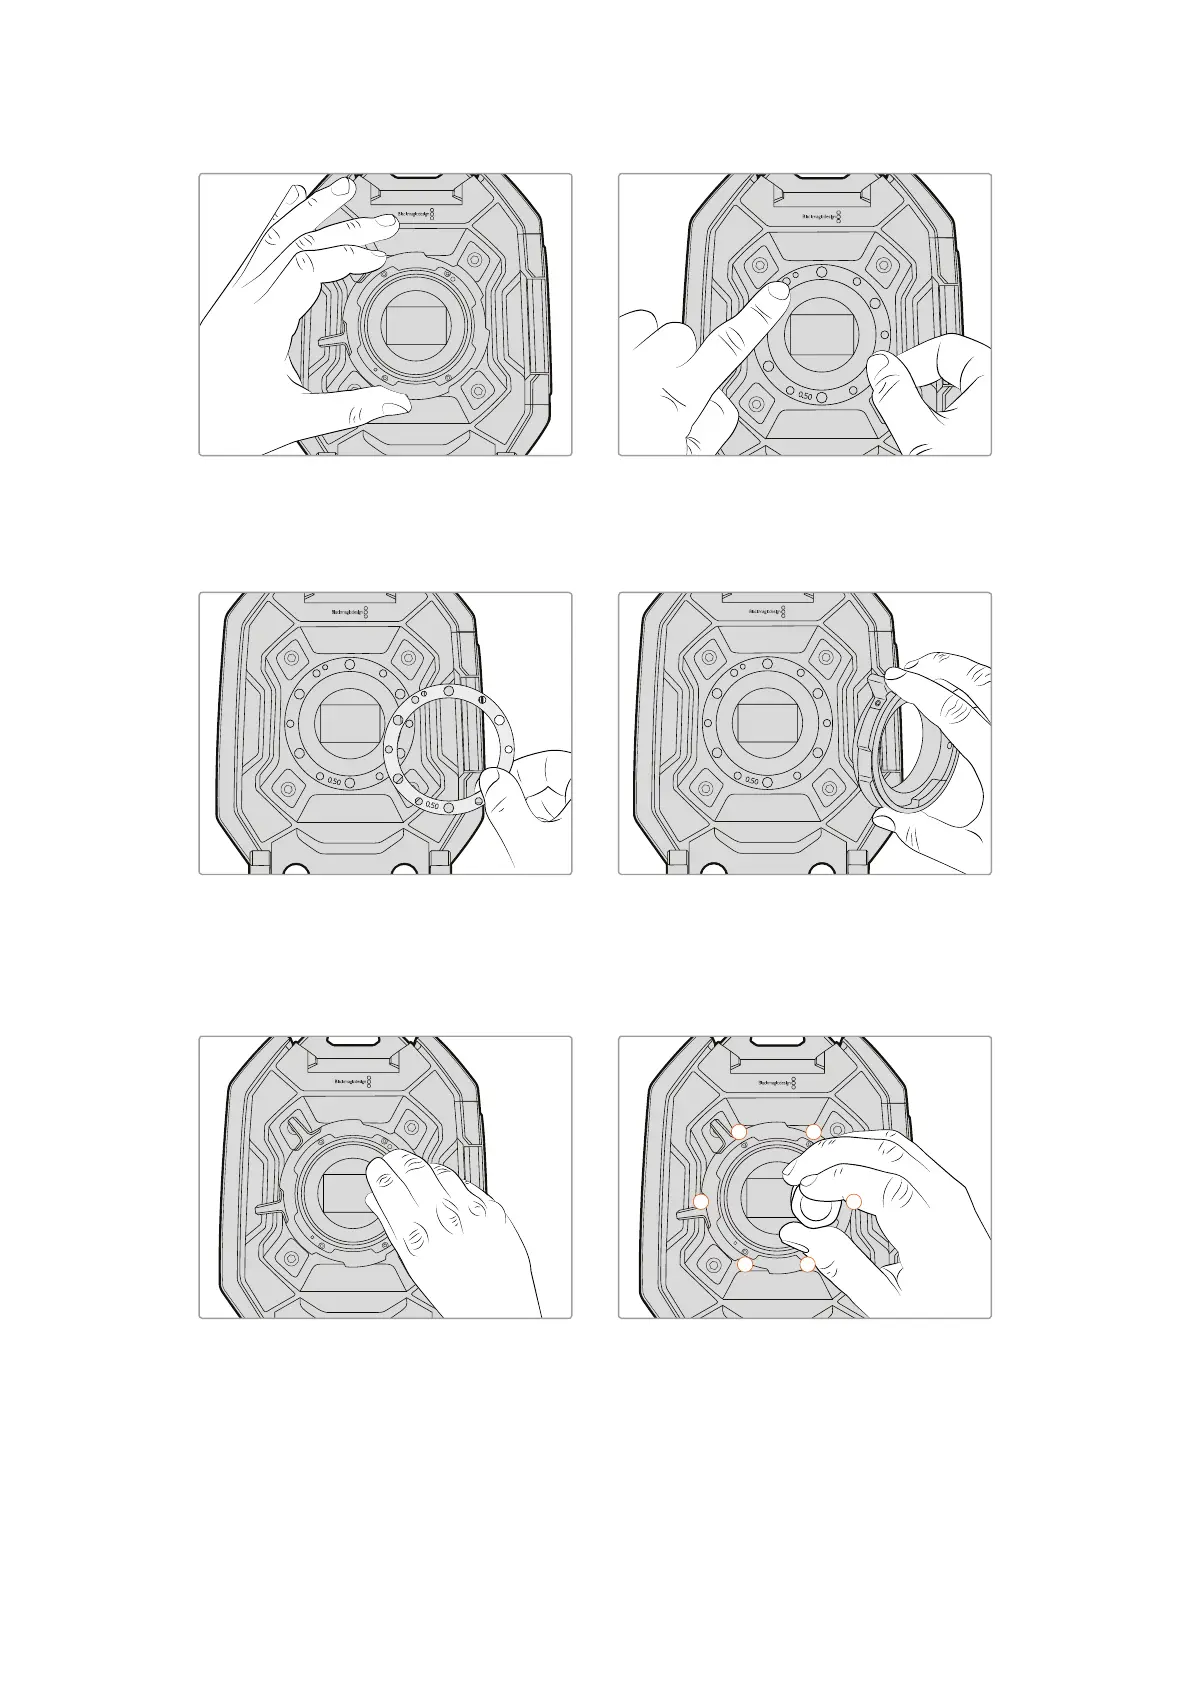
Carefully lift the lens mount away from
the camera body. Keep the screws safely
located close to the lens mount.
4
Note the alignment of the existing
0.50mm shim with the alignment pin at
the 11 o’clock position.
5
Remove the existing 0.50mm shim and
replace with the appropriate shim thickness
needed to bring your lens focus marks into
alignment with the focal distance.
6
Place the lens mount onto the camera
body ensuring the alignment hole is
aligned with the alignment pin at the
11o’clock position.
7
Loosely turn the six mounting screws until
initial contact is made with the shoulder of
the lens mount.
8
Using the torque wrench and 2.0mm hex
key, apply one full turn of pressure to
mounting screw 1, followed by one full turn
to screw 2, repeat for screws 3 and 4, then
5 and 6. Continue to apply one full turn to
each screw in the sequence above until
all screws have reached the maximum
torque of 0.45Nm.
72Shimming the PL Mount