CAPINTEC, INC. CAPTUS
®
4000e
8-6 WIPE TESTS November 16
ADDING WIPE LOCATIONS TO PRESET GROUPS
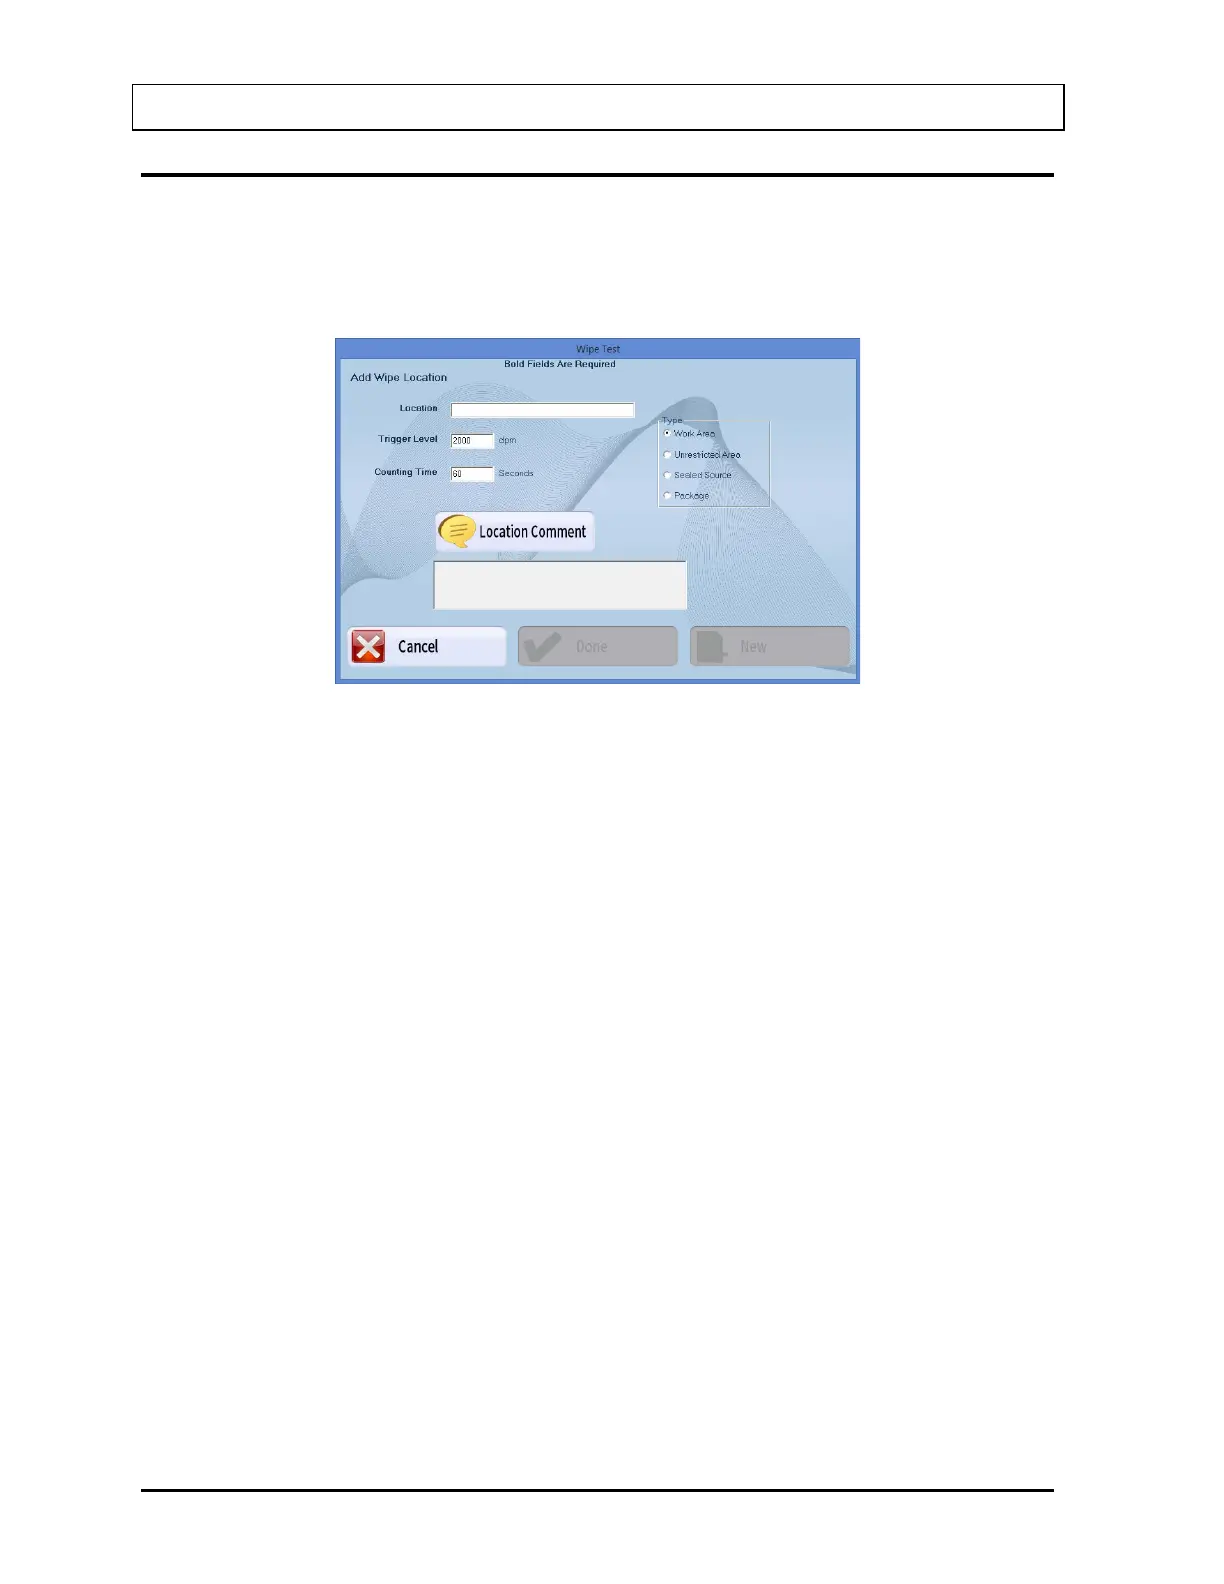
Note: All fields in bold are required before the Done button becomes enabled.
1. Select the Add button on Figure 8-2 Wipe Test Main Screen. Figure 8-5 Add Wipe
Location Screen will appear.
Figure 8-5 Add Wipe Location Screen
2. Input the wipe location name in the Location text box (e.g. Patient Waiting Area or Lab
Room No. 421, etc.). Any combination of up to 32 alphanumeric characters and spaces
may be used.
3. To select a wipe type (Preset Group), select the appropriate radio button in the Type
frame. Changing the Type will automatically apply the Trigger Level and Counting Time
according to the values entered in Figure 8-3 Wipe Test Setup Screen.
4. To change the Trigger Level or Counting Time for this wipe location, click in the
appropriate text box and input the new number.
5. To add a comment about the wipe location, select the Location Comment button or
press Alt+L.
Note: The comments entered will be displayed in the Wipe Comment box immediately
below the Wipe Locations box on Figure 8-2 Wipe Test Main Screen when the
location is selected. The comments will also appear in the Wipe Test results.
6. To add more wipe locations, select the New button or press Alt+N.
7. Select the Done button or press Alt+D to save changes or select the Cancel button or
press Alt+C to cancel the changes and return to Figure 8-2 Wipe Test Main Screen.