CAPINTEC, INC. CAPTUS
®
4000e
August 22 QUALITY ASSURANCE 5-5
To return to the CAPTUS
®
4000e Main screen from the QA Tests screen, select the
Exit button or press the Esc Key.
Rest the pointer close to each module title on Figure 5-1 Quality Assurance Main
Screen to read a brief description of that function.
Setup values can be conveniently changed later if needed from any QA Test screen.
Keep a record of the parameters set above. To do so, on Figure 5-1 Quality
Assurance Main Screen, click the System Parameters button. The System
Parameters windows will appear. Click the Print button.
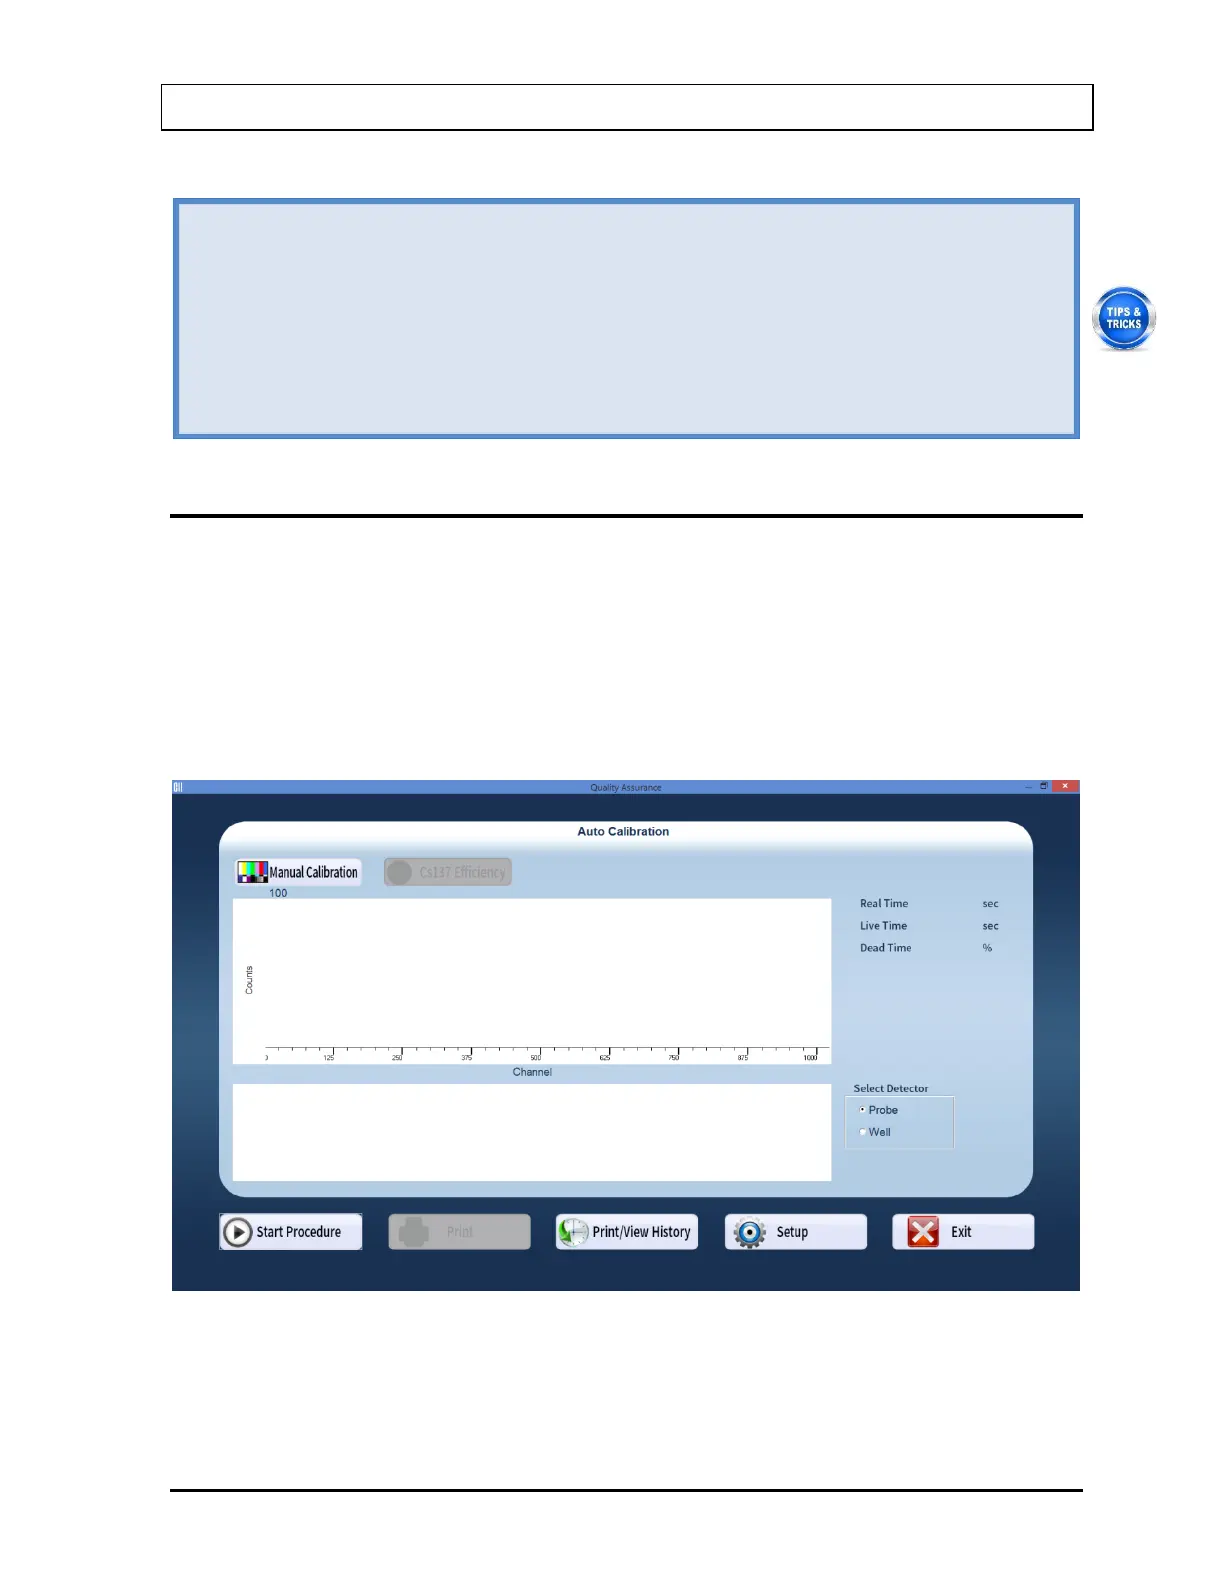
AUTO CALIBRATION
Calibration is done with Cs137 and Eu152 standard sources.
1. Select the Auto Calibration button or press Alt+A on Figure 5-1 Quality Assurance Main
Screen. Figure 5-3 Auto Calibration Screen will appear. When the procedure is started,
the spectrum appears in the upper half of the screen as it is being collected and displays
the measurement time elapsed in the upper right corner. Note that the Cs137 Efficiency
button at the top of the screen is enabled only after calibration has been done at least
once on that day.
Figure 5-3 Auto Calibration Screen
2. Note that in the Select Detector frame, PROBE is selected by default. To change the
detector to Well, select the radio button marked WELL.