566 Configuring Routing
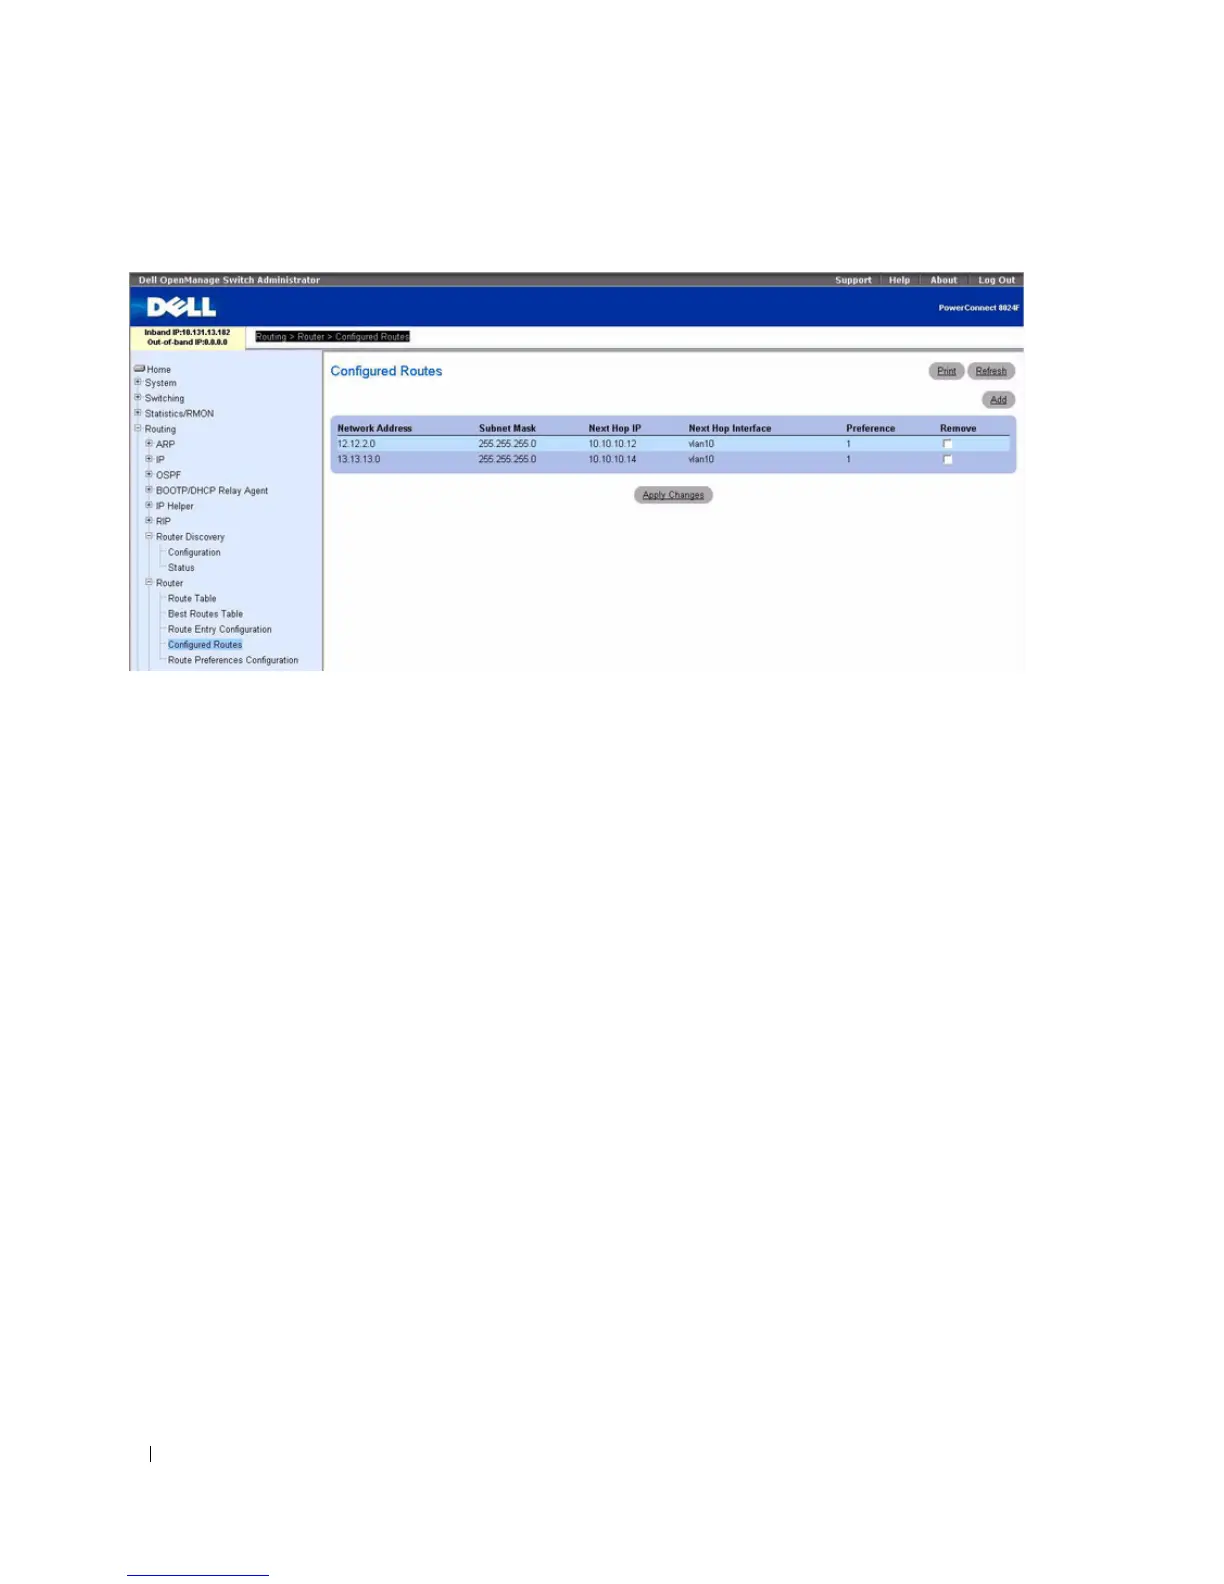
Figure 9-39. Configured Routes
The Configured Routes page displays the following fields:
•
Network Address
— The IP route prefix for the destination.
•
Subnet Mask
— Also referred to as the subnet/network mask, this indicates the portion of the IP
interface address that identifies the attached network.
•
Next Hop IP
— The outgoing router interface to use when forwarding traffic to the destination.
•
Preference
— Displays the preferences configured for the added routes.
•
Remove
— Use this check box to remove a configured route.
Adding a Router Route
1.
Open the
Configured Routes
page.
2.
Click
Add
.
The
Router Route Entry Configuration
page displays, as Figure 9-37 shows.
3.
Next to
Route Type,
use the drop-down box to add a
Default
route or a
Static
route.
Default
— Enter the default gateway address in the
Next Hop IP Address
field. Figure 9-37 shows the
fields that display when the
Route Type
value is Default.
Static
— Enter values for
Network Address
,
Subnet Mask
,
Next Hop IP Address
, and
Preference
.
Figure 9-38 shows the fields that display when the
Route Type
value is Static.
4.
Click
Apply Changes
.
The new route is added, and you are returned to the Configured Routes page.

 Loading...