Chapter 4 Disassembly/Assembly and Adjustment
4.2 Disassembly/Assembly
4-32
REP4.4 ACTUATOR ASSY REGI (PL4.1.19)
<Removal>
1) Pull the LEVER FRONT R and LEVER FRONT L toward you and open the COVER ASSY FRONT.
2) Remove the COVER ASSY STACK CL. (REP1.7)
3) Remove the COVER ASSY PWB. (REP9.5)
4) Remove the COVER ASSY TOP CL. (REP1.4)
5) Remove the COVER SIDE LEFT CL. (REP1.1)
6) Remove the COVER ASSY RIGHT CL. (REP1.2)
7) Remove the COVER MIDDLE CL. (REP1.3)
8) Remove the FRAME BASE RTD TRAY HN. (Refer to REP 3.5)
9) Remove the FUSER ASSY CL CH. (REP7.3)
10) Remove the GEAR ASSY. (REP7.1)
11) Remove the REGISTRATION ASSY. (REP4.2)
12) Remove the PWBA SENSOR. (REP4.7)
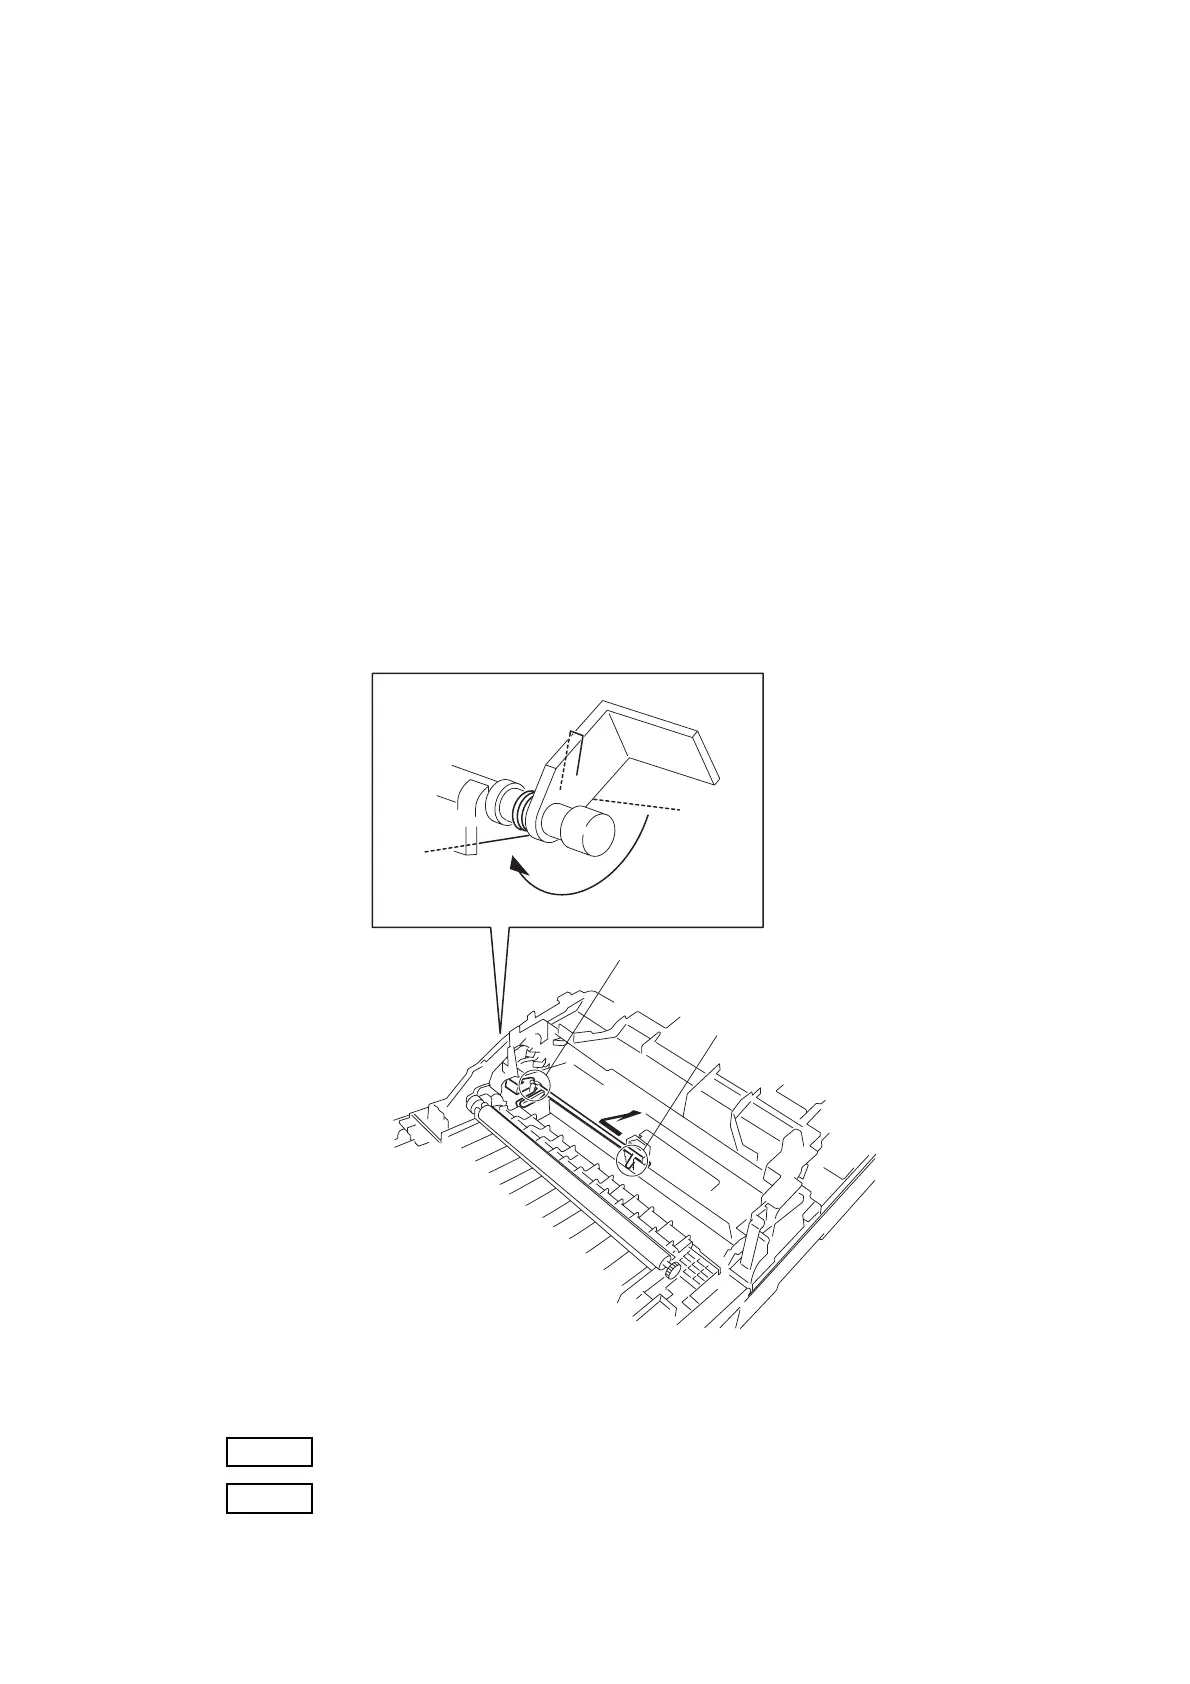
13) Release the hook of left-side shaft on the ACTUATOR ASSY REGI and remove the ACTUATOR
ASSY REGI to the arrow direction.
<Replacement>
Perform the removal procedures in the reverse order.
NOTE
When replacing the ACTUATOR ASSY REGI, fix the spring properly.
NOTE
When replacing the ACTUATOR ASSY REGI, align the projection of ACTUATOR
ASSY REGI with the hole at the center of the FRAME REGI.
13)-1
AZS433CA
13)-2
Hook
Projection
 Loading...


