Chapter 4 Disassembly/Assembly and Adjustment
4.2 Disassembly/Assembly
4-45
REP5.8 (SCC) FEED MOTOR ASSY (PL5.1.28)
<Removal>
1) Pull the LEVER FRONT R and LEVER FRONT L toward you and open the COVER ASSY FRONT.
2) Remove the COVER ASSY STACK CL. (REP1.7)
3) Remove the COVER ASSY PWB. (REP9.5)
4) Remove the COVER ASSY TOP CL. (REP1.4)
5) Remove the COVER SIDE LEFT CL. (REP1.1)
6) Remove the COVER ASSY RIGHT CL. (REP1.2)
7) Remove the COVER MIDDLE CL. (REP1.3)
8) Remove the GEAR ASSY. (REP7.1)
9) Remove the CHASSIS ASSY CONTROLLER. (REP9.2)
10) Remove the ROS ASSY. (REP10.1)
11) Remove the FRAME ASSY MAIN. (REP9.8)
12) Remove the BASE CHASSIS ASSY with the LVPS 230 and AZUSA HVPS. (REP9.9)
13) Remove the GUIDE ASSY FRONT. (REP5.2)
14) Remove the FEEDER ASSY. (REP5.3)
15) Remove the GEAR ASSY CST. (REP5.7)
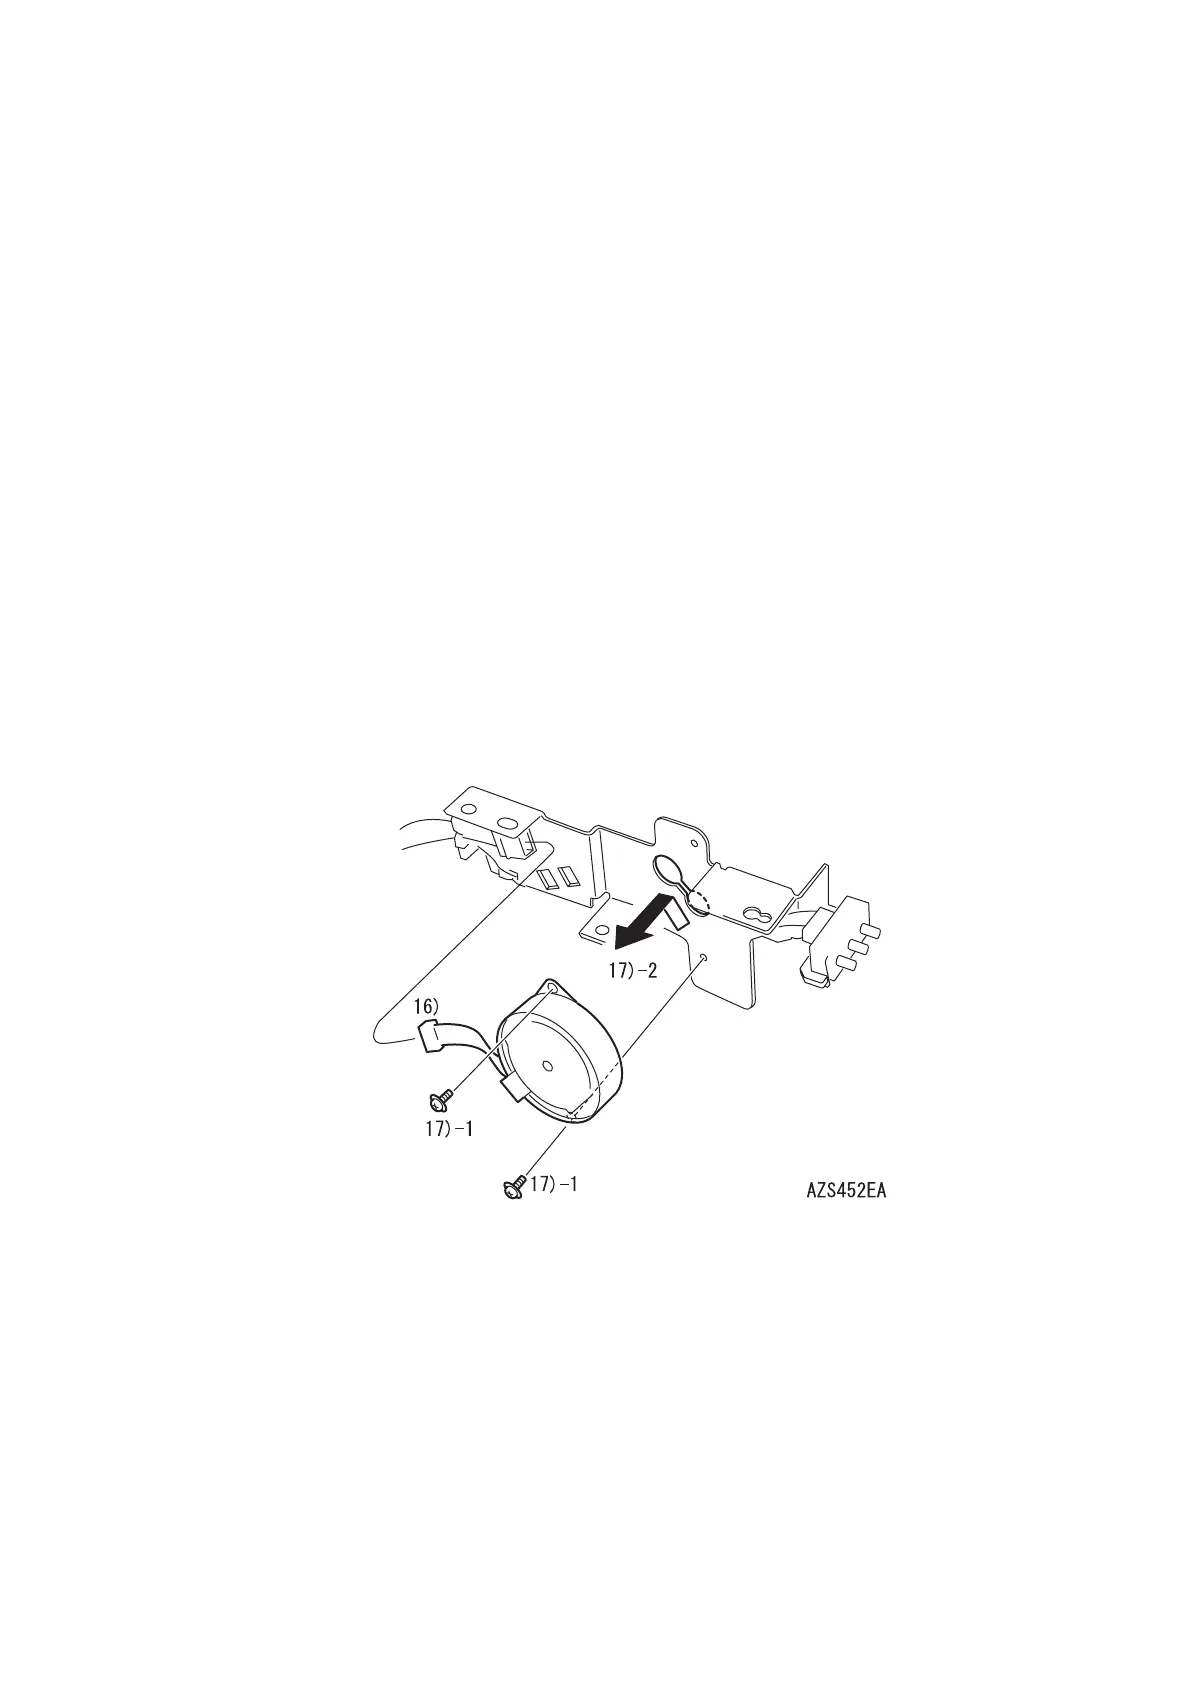
16) Disconnect the FEED MOTOR ASSY connector (P/J1003).
17) Remove the two screws (gold, with washer, 8mm) securing the FEED MOTOR ASSY on the
GEAR ASSY CST, slide the FEED MOTOR ASSY to the arrow direction and remove.
<Replacement>
Perform the removal procedures in the reverse order.
 Loading...


