Chapter 4 Disassembly/Assembly and Adjustment
4.2 Disassembly/Assembly
4-37
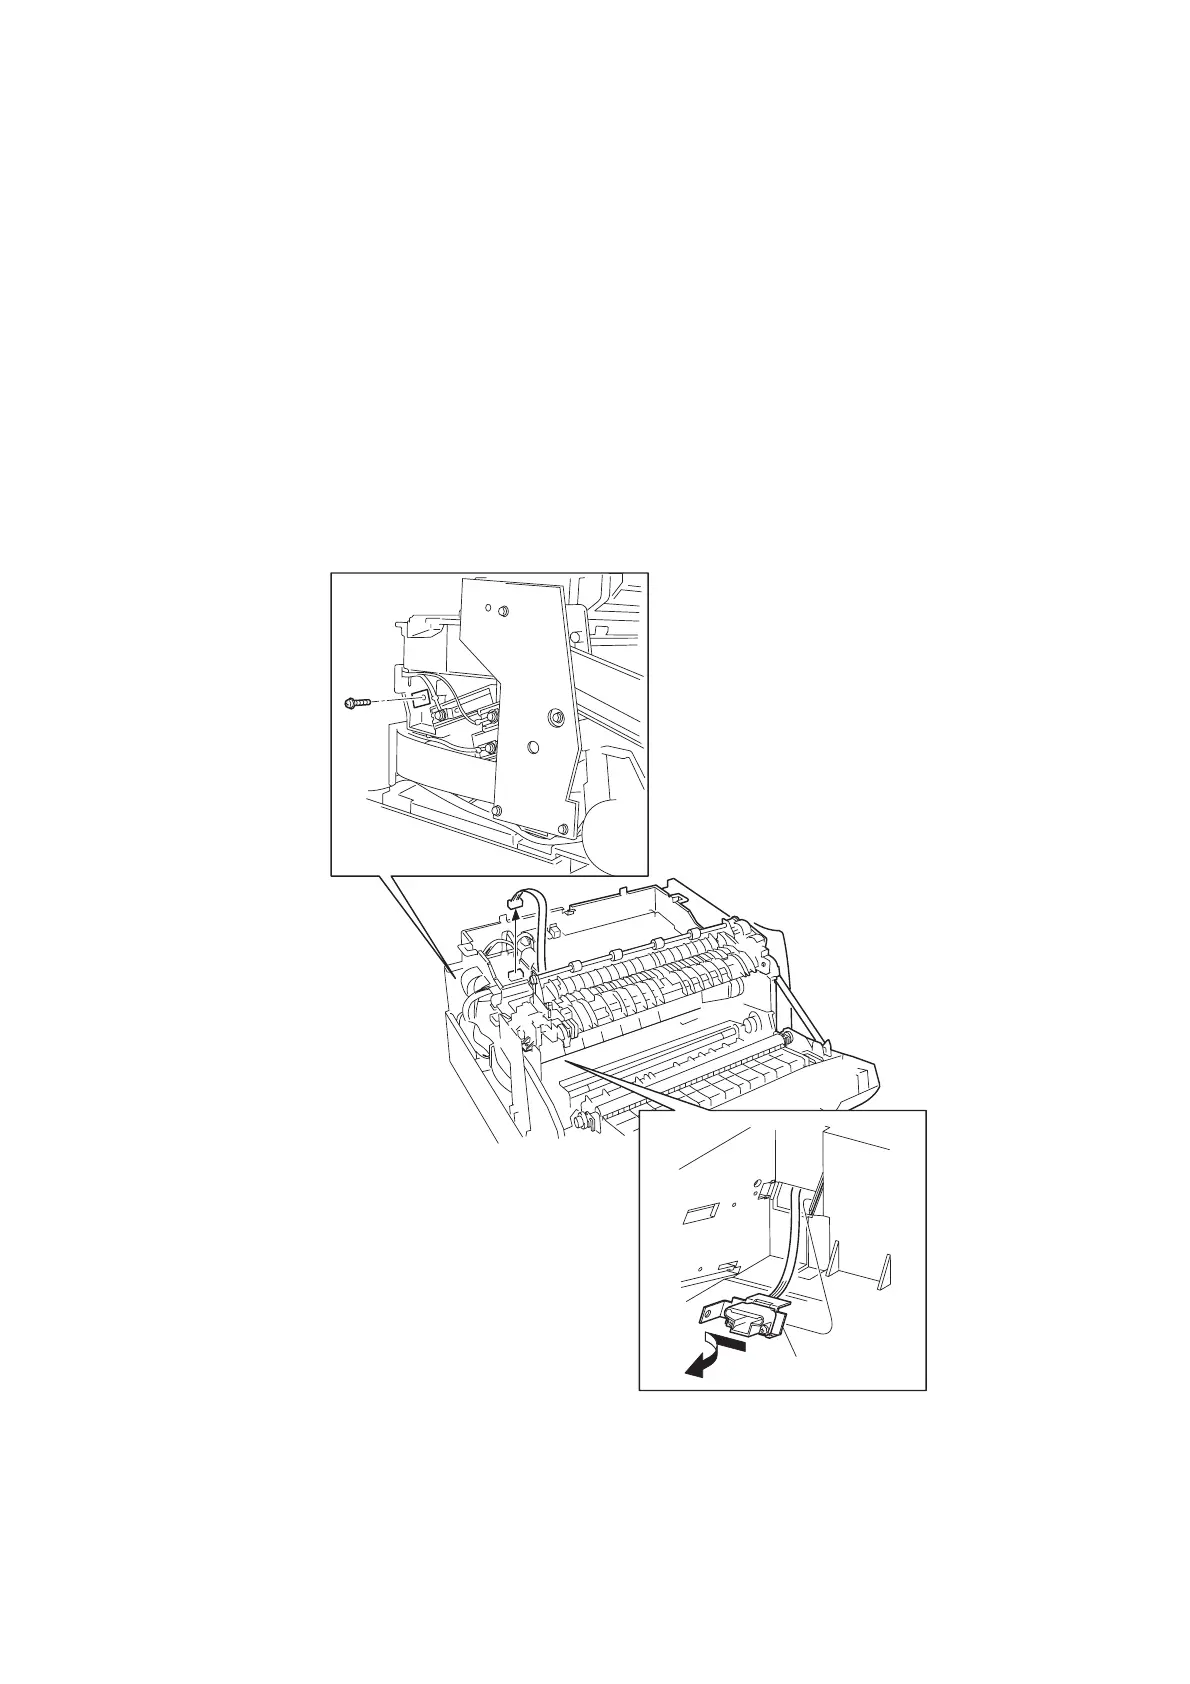
REP4.8 HARNESS ASSY CRUM (PL4.1.12)
<Removal>
1) Pull the LEVER FRONT R and LEVER FRONT L toward you and open the COVER ASSY FRONT.
2) Remove the COVER ASSY STACK CL. (REP1.7)
3) Remove the COVER ASSY PWB. (REP9.5)
4) Remove the COVER ASSY TOP CL. (REP1.4)
5) Remove the COVER SIDE LEFT CL. (REP1.1)
6) Disconnect the PWBA MCU XFABK(B) (PL9.1.25) connector (P/J111).
7) Remove a screw (gold, with flange, tap, 8mm) securing the CONNECTOR ASSY EP SNR
(PL4.1.10), release the convex of the CONNECTOR ASSY EP SNR from the slit of the printer, and
pull out the harness.
8) Remove the two screws (silver, 10mm) from the BRACKET CONNECTOR (PL4.1.11), remove the
two nuts and pull out the HARNESS ASSY CRUM.
<Replacement>
Perform the removal procedures in the reverse order.
Tab
6)
7)-1
7)-2
AZS497CA
 Loading...


