X35 Monitor Air Seeder Setup
6.47
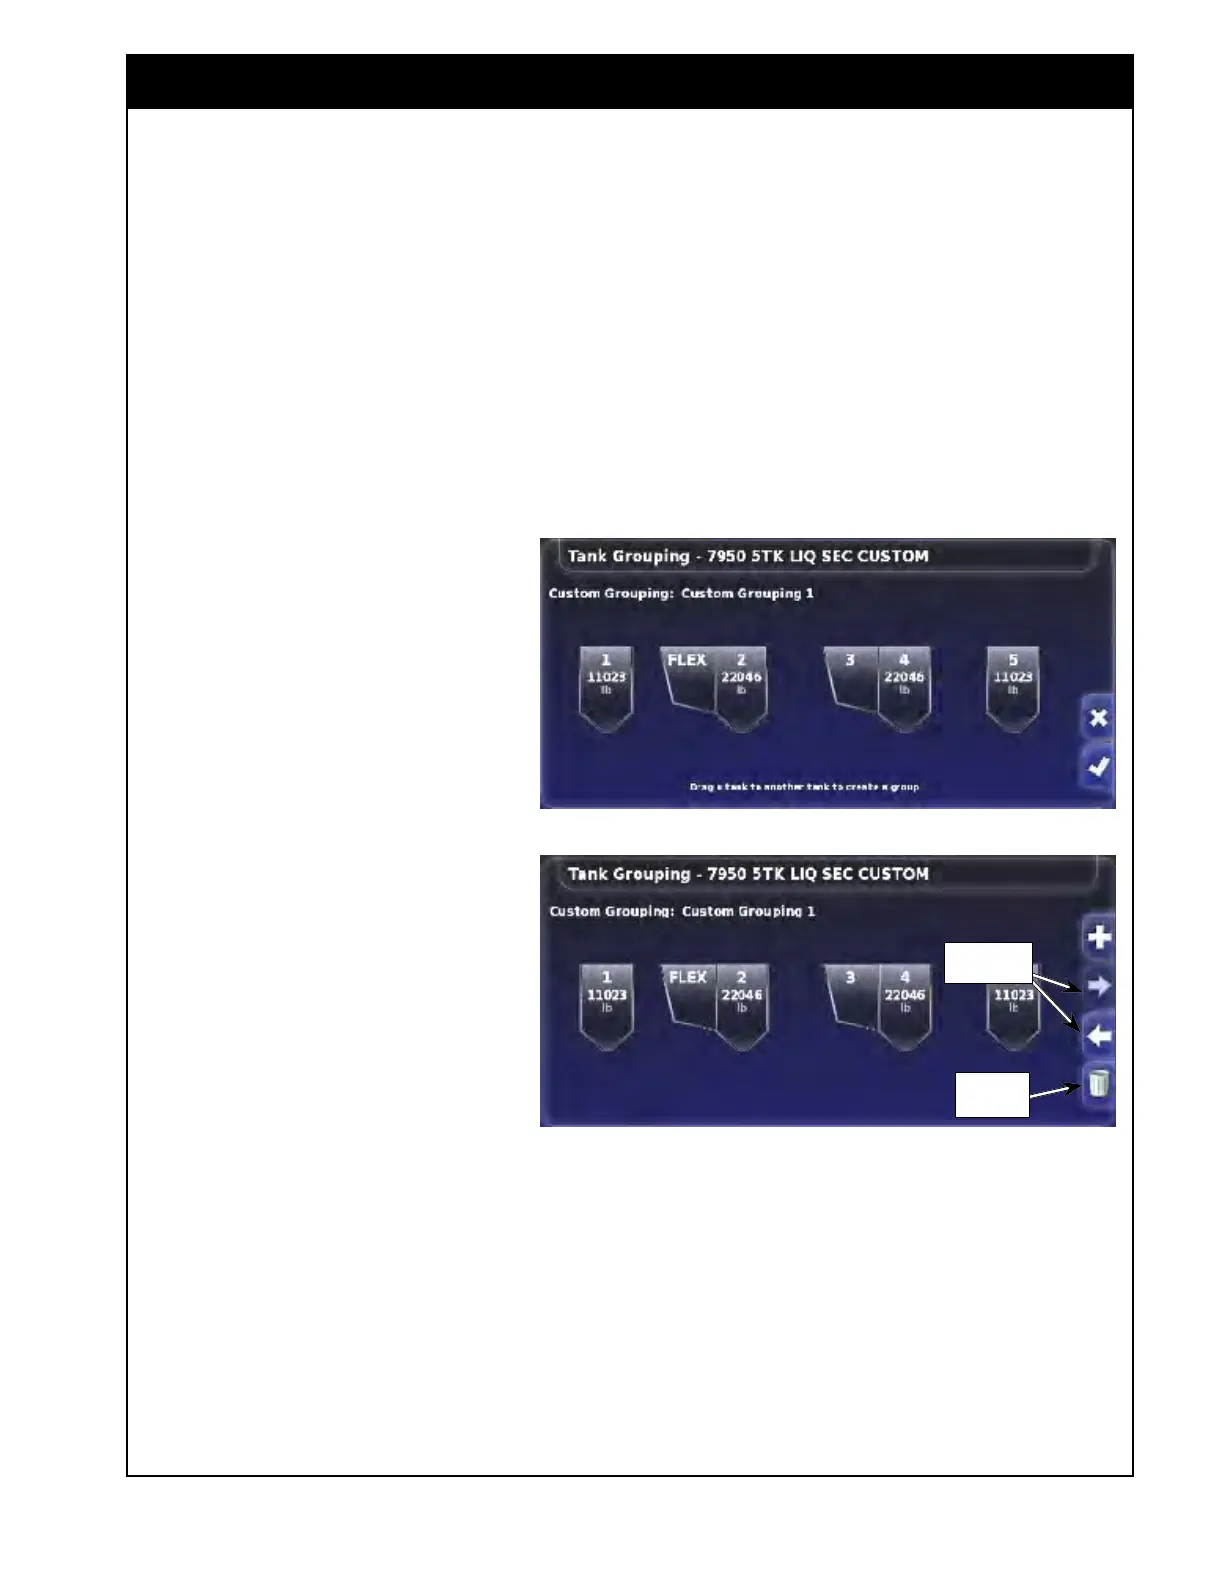
Refer to Figure 6.64.
4. Select the tank that you would like to add, to
another tank (combine them using interconnect
covers).
a. While
holding the tank button, drag it to
the tank you wish to combine it with.
b. Release when the two tanks are touching.
i. These two tanks will appear
connected.
c.
Using a drag and drop method create your
custom tank configurations.
i. Ensure to drag the tank that
will have its meter disabled.
d. If it is required to separate
tanks (ex. connected by mistake
or in case of not supported
combination), select one of the
tanks and while holding it and
drag it away until they are clearly
separated and release.
e. Once you are satisfied with the
new configurations, confirm by
selecting the green check mark
button.
Y
ou
can create additional tank groupings
for the future use with this implement
profile.
Refer to Figur
e 6.65.
When more
than one grouping is
available, the left/right scroll buttons and
delete buttons will become enabled.
1. Use left/right scroll buttons to move
between different tank groupings.
If a particular tank grouping is not being used, or
required it can be deleted.
1. Using the arrows bring up the grouping you
would like to delete and then select the delete
button.
Figure 6.64 - Custom Tank Grouping
Figure 6.65 - Custom Tank Grouping - Additional Controls
Scroll
Buttons
Delete
Button
Important
Only tanks that have interconnect covers
between them can be combined. Do not create
groupings that are not physically possible on the
tank.
Saddle tank (#5) can not be combined with any
tanks.