X35 ConsoleGeneral Operations
8.28
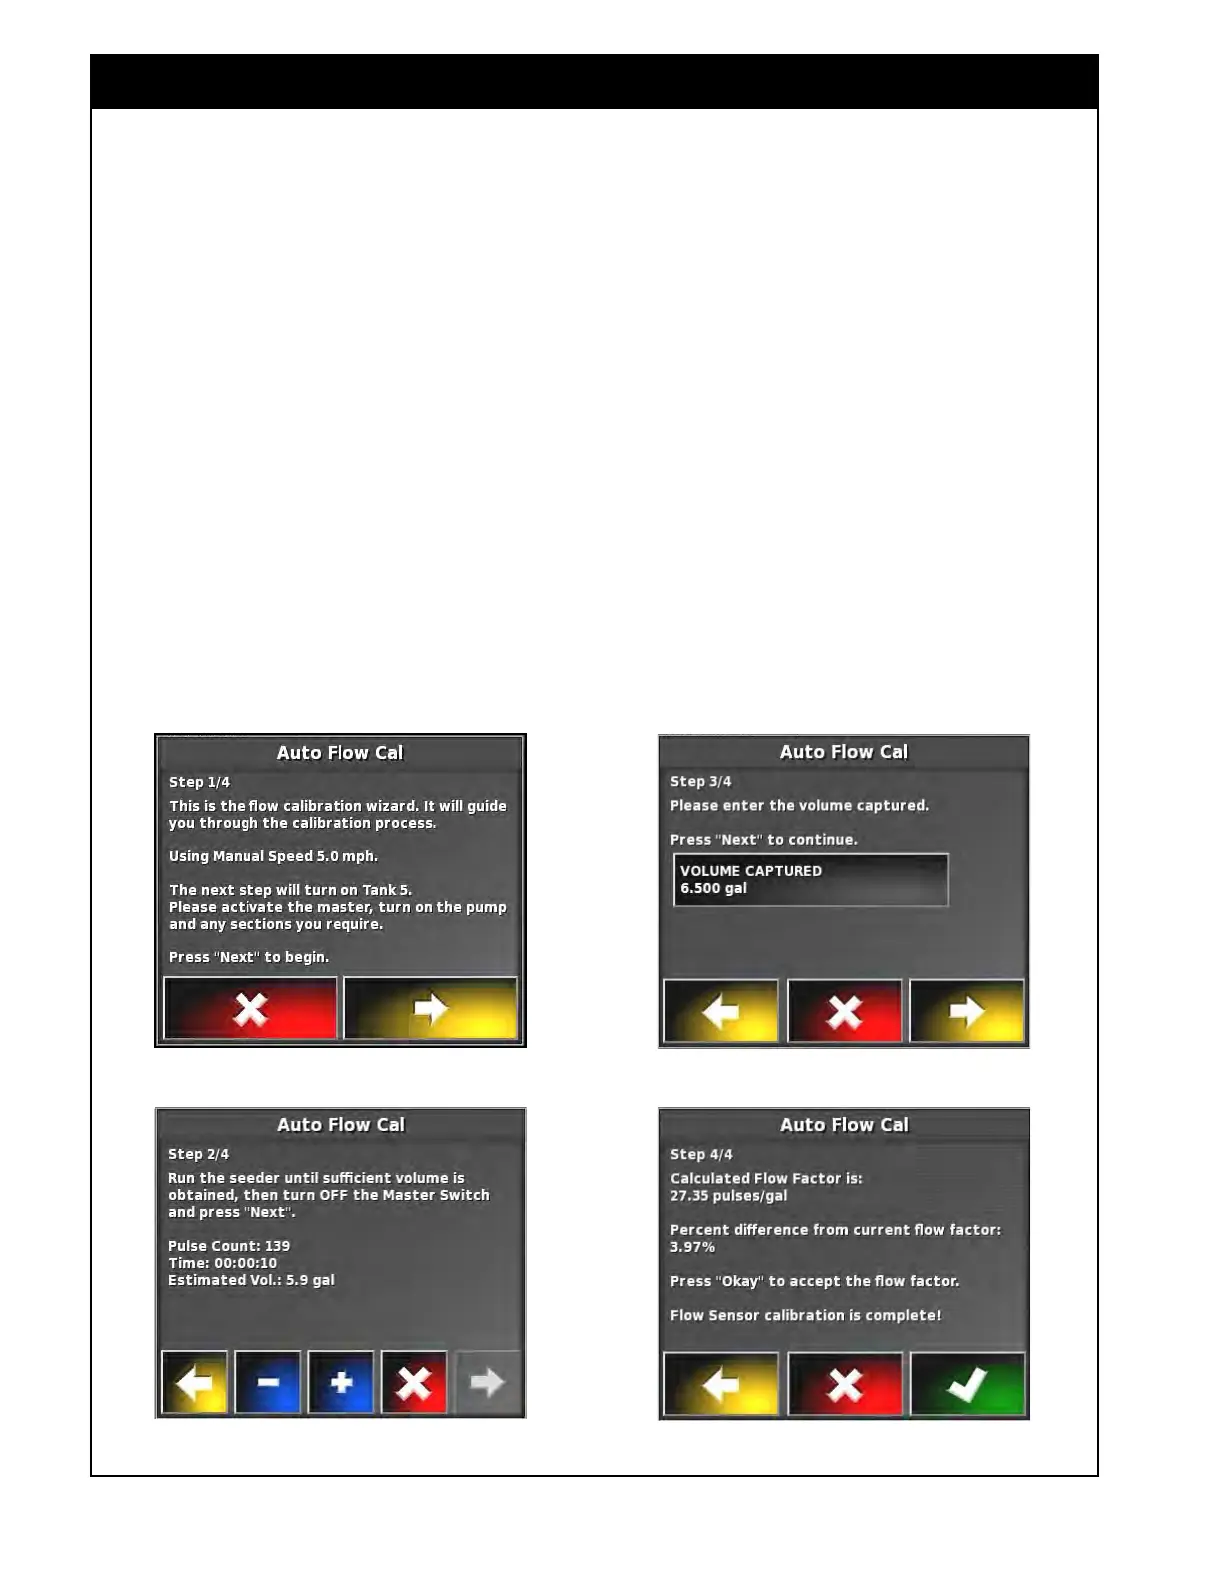
Figure 8.53 - Liquid Calibration Wizard - Screen 1
Figure 8.54 - Liquid Calibration Wizard - Screen 2
Figure 8.55 - Liquid Calibration Wizard - Screen 3
Figure 8.56 - Liquid Calibration Wizard - Screen 4
8.6.1 Flow Calibration
1. To prepare, disconnect the outlet hose that is
connected to the distribution system on the
tillage unit and place the end in a container.
a. Use as large a container as practical to
achieve the most accurate results.
2. Select Automatic Calibration (Item D, refer to
Figure 8.51).
a.
The liquid calibration wizard window will
appear, refer to Figure 8.53.
b.
Read and follow instructions.
c. Proceed to the next step.
3. Refer to Figure 8.54. The application rate can
be
adjusted using "+" and "-" buttons.
a. To see the application rate value, it is
recommended to have Seeder Controller
mini-view open on liquid tank tab, as
application rate is not displayed on the
wizard window.
b. Obtain a sample in the container.
c. Turn OFF the master switch and proceed
to the next step.
4. Refer to Figure 8.55. Measure the volume.
a. Select
the Volume Captured button and
using calculator enter the value.
b. Proceed to the next step.
5. Refer to Figure 8.56. The system will
automatically
determine the calibration flow
factor and percent difference from current flow
factor. If satisfied, confirm results.
6. Flow sensor calibration is complete.