3 - 29
Chapter 3 Removal and Replacement Procedures (RRPs)
Version 2 2007.03.20
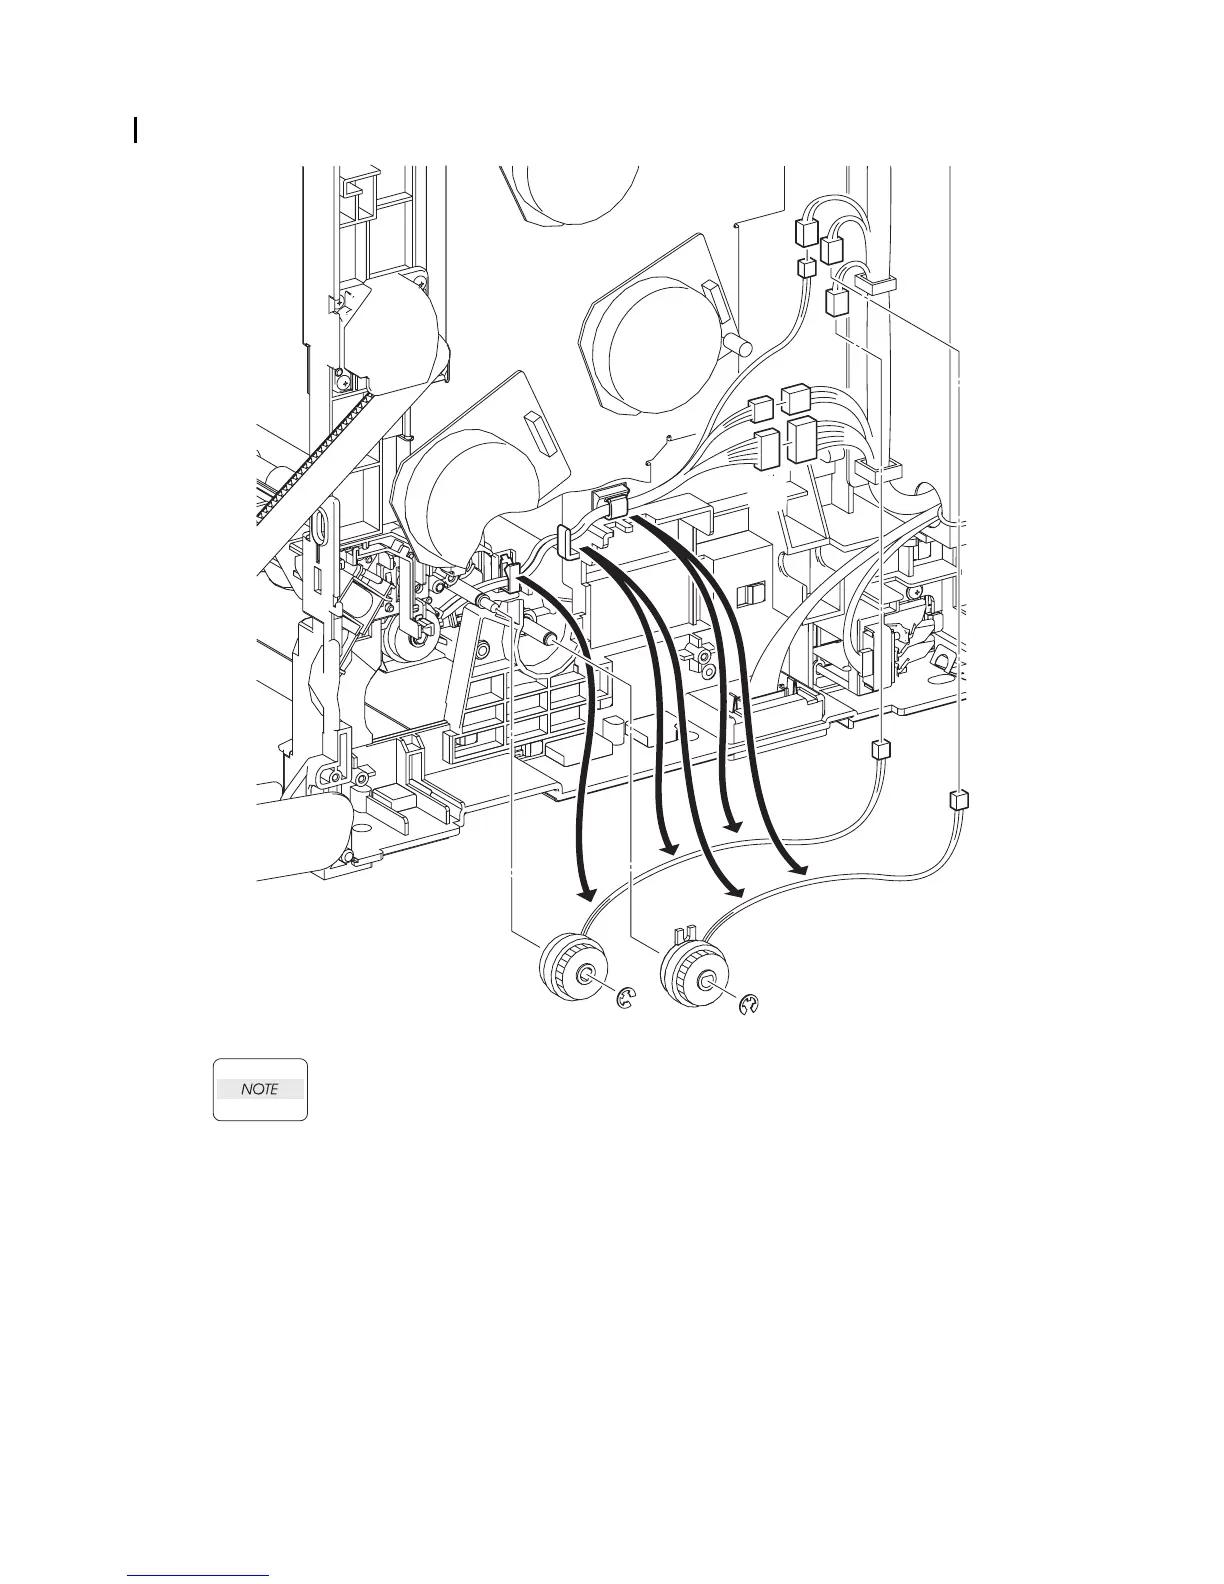
Removal 16 INTEGRATED FEEDER ASSEMBLY (PL3.2.99)
When performing the step below, leave the junction connector on the printer side cable.
13) Disengage the connectors (P/J232 and P/J241) of the INTEGRATED FEEDER ASSEMBLY
(PL3.2.1).
14) Disengage the connector (P/J233) of the CLUTCH ASSY PH REGI (PL3.2.23), the connector
(P/J235) of the CLUTCH ASSY PH FEED (PL3.2.24), and the connector (P/J234) of the
CLUTCH ASSY PH TURN (PL.3.2.25).
15) Release the each harness from the clamps on the INTEGRATED FEEDER ASSEMBLY and
printer.
16) Remove the e-rings that fix the CLUTCH ASSY PH REGI and the CLUTCH ASSY PH FEED
to the INTEGRATED FEEDER ASSEMBLY.
17) Remove the CLUTCH ASSY PH REGI and the CLUTCH ASSY PH FEED from the
INTEGRATED FEEDER ASSEMBLY.
Continues to the next page.
Gnb03023KA
13)
14)
14)
15)
15)
15)
15)
15)
16)
16)
17)
17)
14)