GE
P
ART NUMBER FN091065, REVISION 2 VS5 N AND VS6 N SERVICE MANUAL
8-22 Section 8-2 - Cover Replacement Procedures
PRELIMINARY
8-2-9 Tray Replacement Procedure
8-2-9-1 Tools
None
8-2-9-2 Preparations
Shut down the Vivid S5 N or Vivid S6 N ultrasound unit, as described in 4-2-3 "Power Shut Down" on
page 4-7.
8-2-9-3 Tray Removal Procedure
1) Remove all contents from the tray.
2) Working from the rear of the system, hold the tray with both hands and carefully lift it upwards and
towards you to release it from the two snap-lock securing clips - one on either side of the main
support column - see Figure 8-23.
3) Remove the tray.
8-2-9-4 Tray Installation Procedure
1) Working from the rear of the system, return the tray to its original position on the main support
column.
2) Holding the tray with both hands, carefully push it downwards to secure it on the two snap-lock
securing clips - one on either side of the column - refer to Figure 8-23.
3.) Proceed to perform the following functionality test:
- “Arm Movement Test” on page 4-35
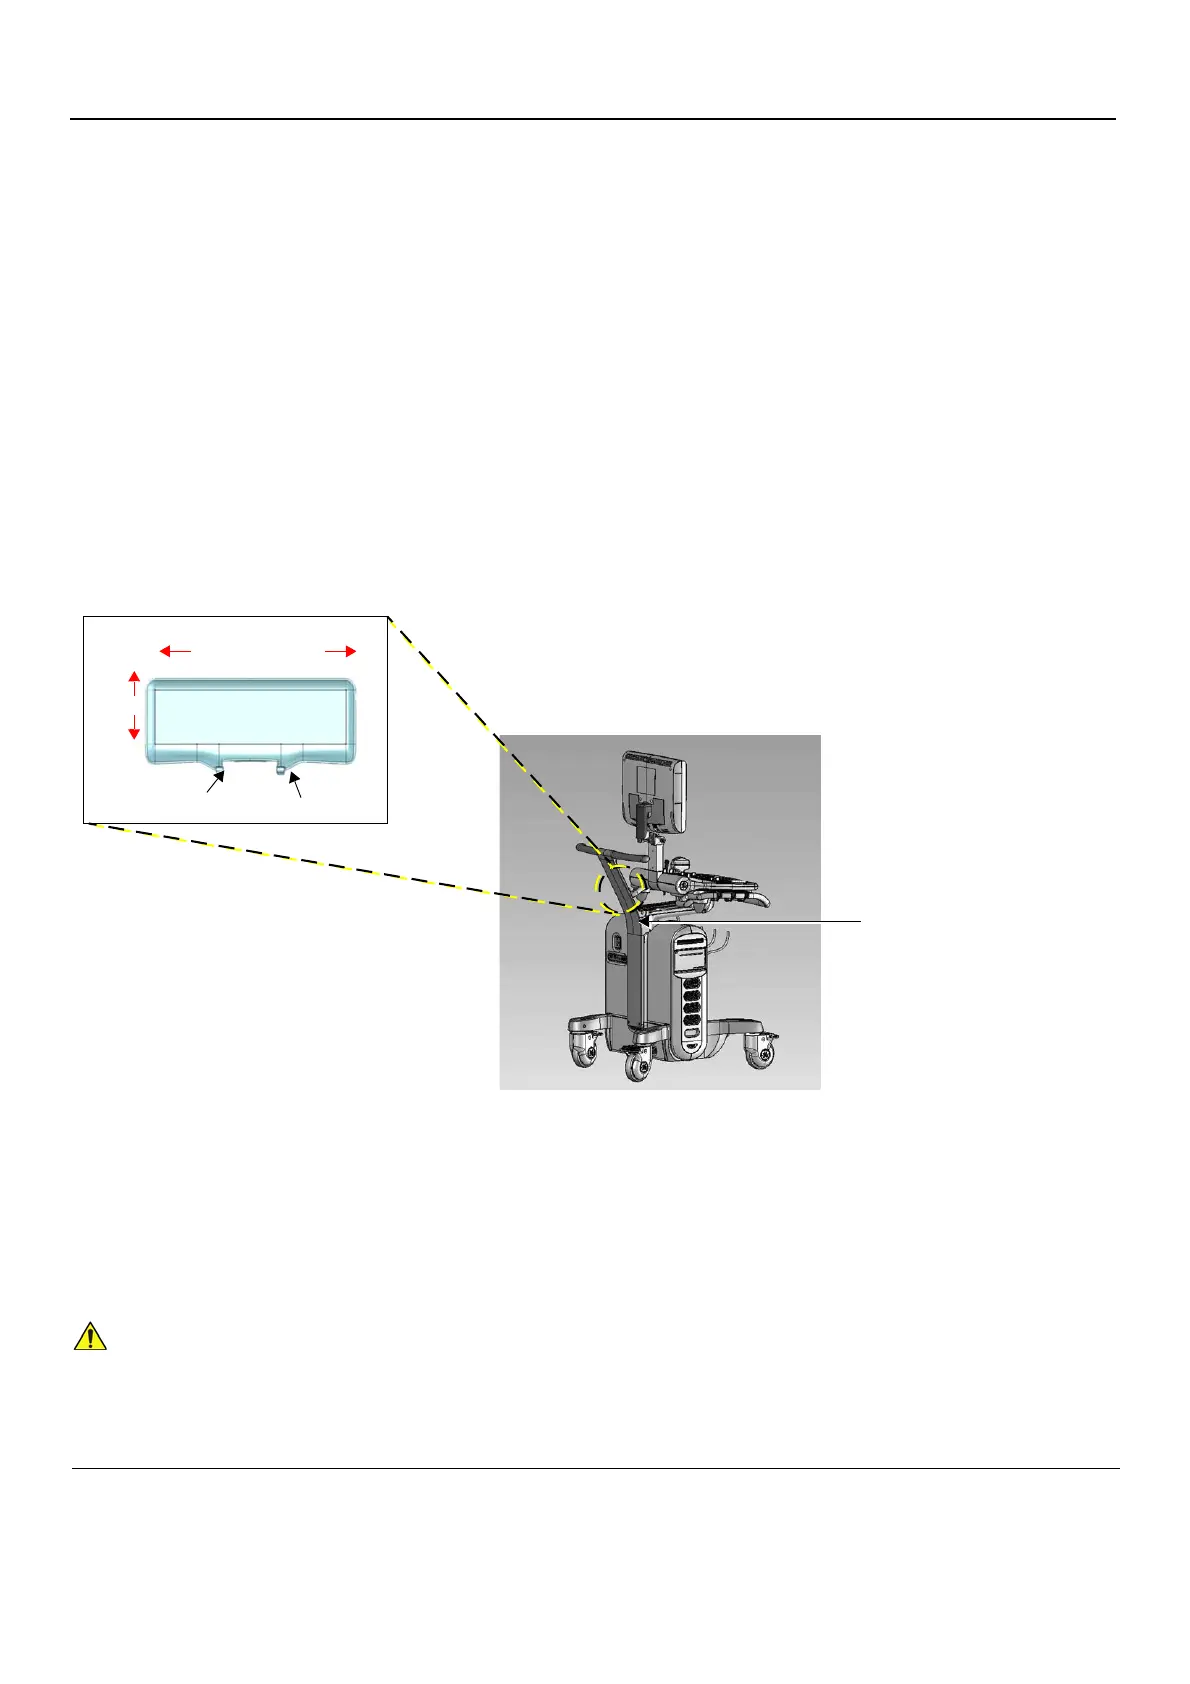
Figure 8-23 Position of Tray Securing Clips
The Tray has a maximum carrying capacity of up to 1 Kg (2.2 lbs).
DO NOT EXCEED THIS LIMIT!
Main Support Column
Securing Clips
360 mm (14.2 in)
102 mm
(4 in)
 Loading...


