GE
P
ART NUMBER FN091065, REVISION 2 VS5 N AND VS6 N SERVICE MANUAL
Chapter 8 - Replacement Procedures 8-179
PRELIMINARY
8-6-15-4 AC Distribution Box (Type B) Installation Procedure
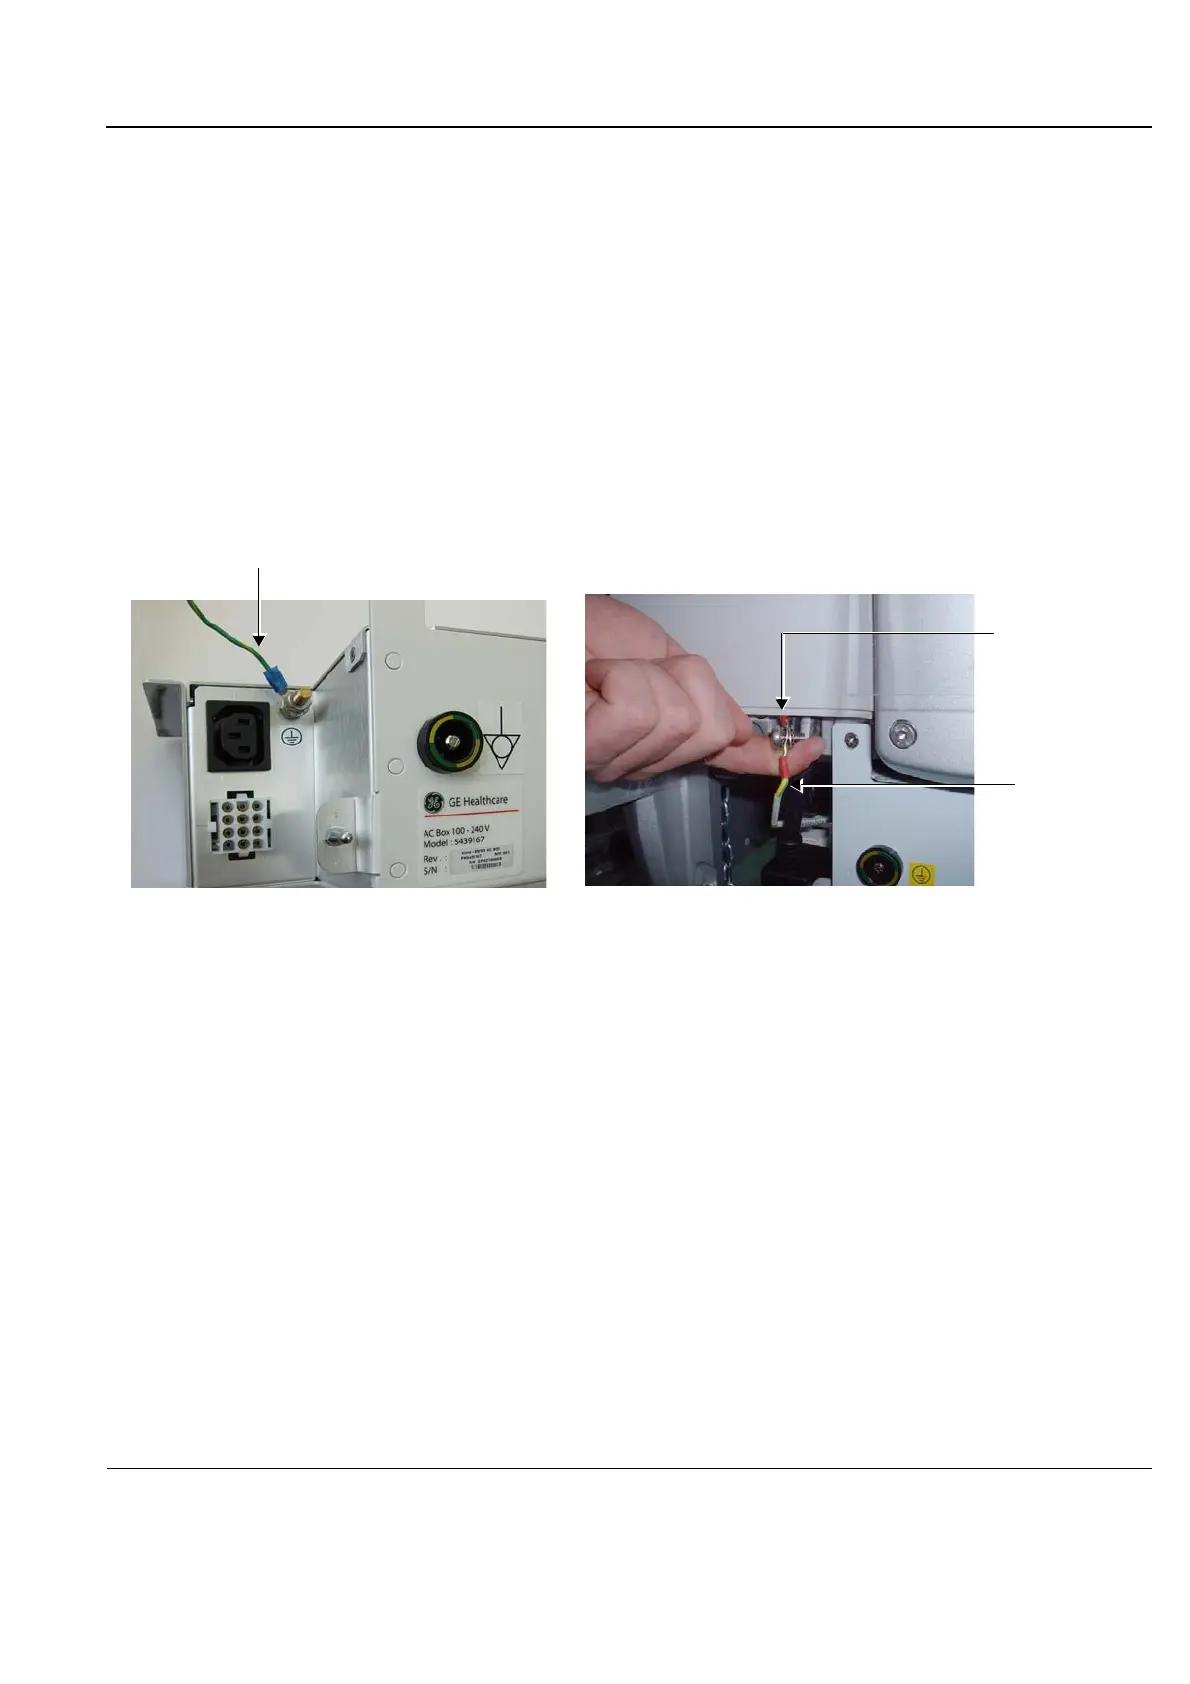
1.) Fasten the ground lead (previously disconnected from the AC Distribution Box that has been
removed) to the new AC Distribution Box - as illustrated (on left) in Figure 8-225.
2.) Place the AC Distribution Box in position at the rear of the system chassis by sliding it onto the
support rails and pushing it in all the way to the end.
3.) Return the two supporting screws (previously removed) to their positions and fasten them securely
(shown in Figure 8-223).
4.) Reconnect the power cables (printer power cable and internal system power cable).
Refer to Figure 8-223.
5.) Reconnect the two ground leads - as illustrated (on right) in Figure 8-225. Refer to note below:
Note: When reconnecting the ground leads, there are two spring washers that should be installed in
the order shown in Figure 8-225. In addition, place the ground lead connector with the flat
surface facing towards the system to prevent damage to the cable holder and the cable.
6.) Return the bottom rear cover to the system chassis, as described in “Bottom Rear Cover Installation
Procedure” on page 8-23.
7.) Turn ON power to the system.
8.) Proceed to perform the following functionality tests:
- “Grounding Continuity” on page 10-23
- “Chassis Current Leakage Test” on page 10-24
- “Calibration” on page 7-12
- “Full System Test” on page 7-11
Figure 8-225 Ground Leads Showing Spring Washers and Cable Holder
Ground Lead
Ground Lead
Ground Lead Fastened to New AC Distribution Box

 Loading...