Working with controlled APs
Configuring APs
6-28
Deleting an AP
Note When the AP authentication feature is disabled, a deleted AP may automatically rediscover
the controller if the AP is left connected to the network. Therefore, before deleting,
disconnect the AP unless you want it to rediscover the controller.
1. To delete an AP, select the AP in the Network tree, and then in the Configured APs list,
select the AP name in the Link column.
2. On the AP management page, select Delete. The AP is deleted.
Moving an AP to a different group
Note Moving an AP to a different group causes it to be restarted.
Using drag-and-drop
The easiest way to move an AP to a different group is to drag-and-drop it from the old group
to the new group. Both groups must be visible in the Network tree for this to work.
The move to the different group does not actually occur until the AP is synchronized as
described in the next section, Synchronizing APs on page 6-29.
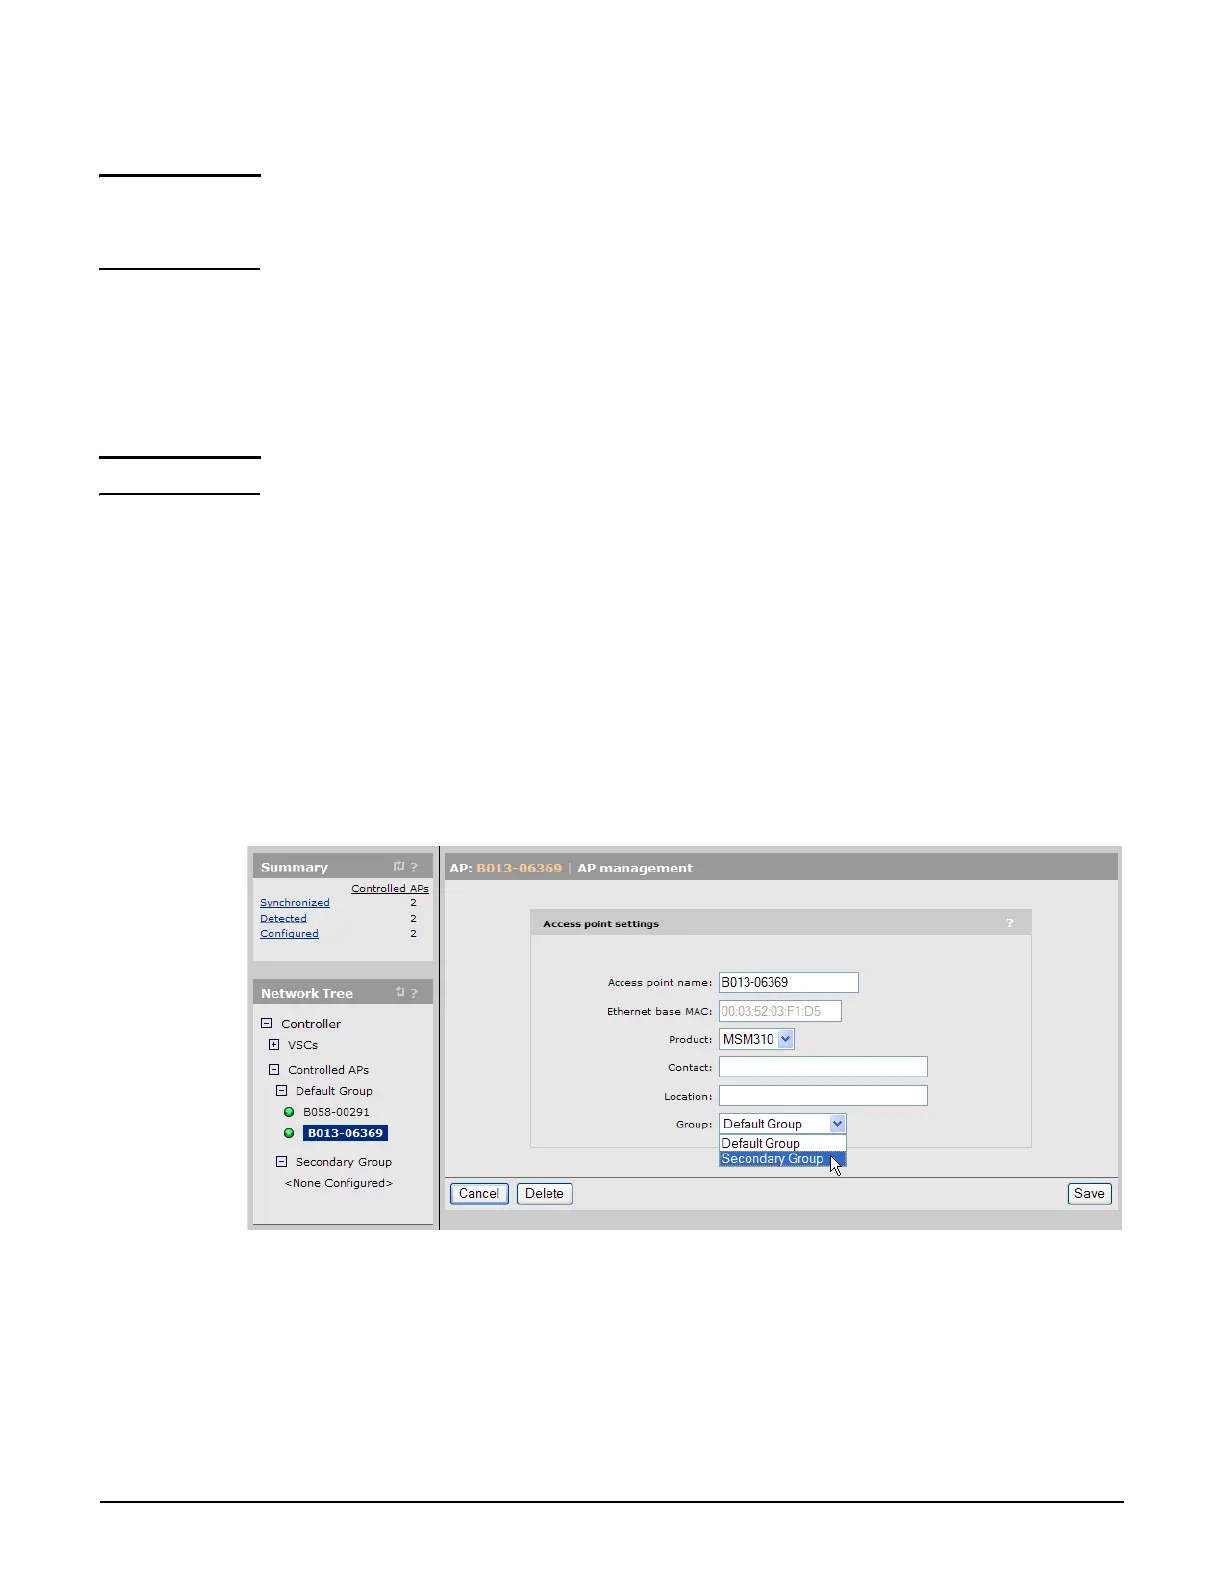
Using menus
1. In the Network tree select the AP and then on the main menu, select Device
Management > AP management.
2. Under Access point settings, select the desired Group and select Save.
This puts the AP into the unsynchronized state (it will be displayed in orange). The move
does not occur until the AP is synchronized as described in the next section.
 Loading...