6
CONVERTER MODE SETTING SCREEN
6-12
4. [Network] Menu (continued)
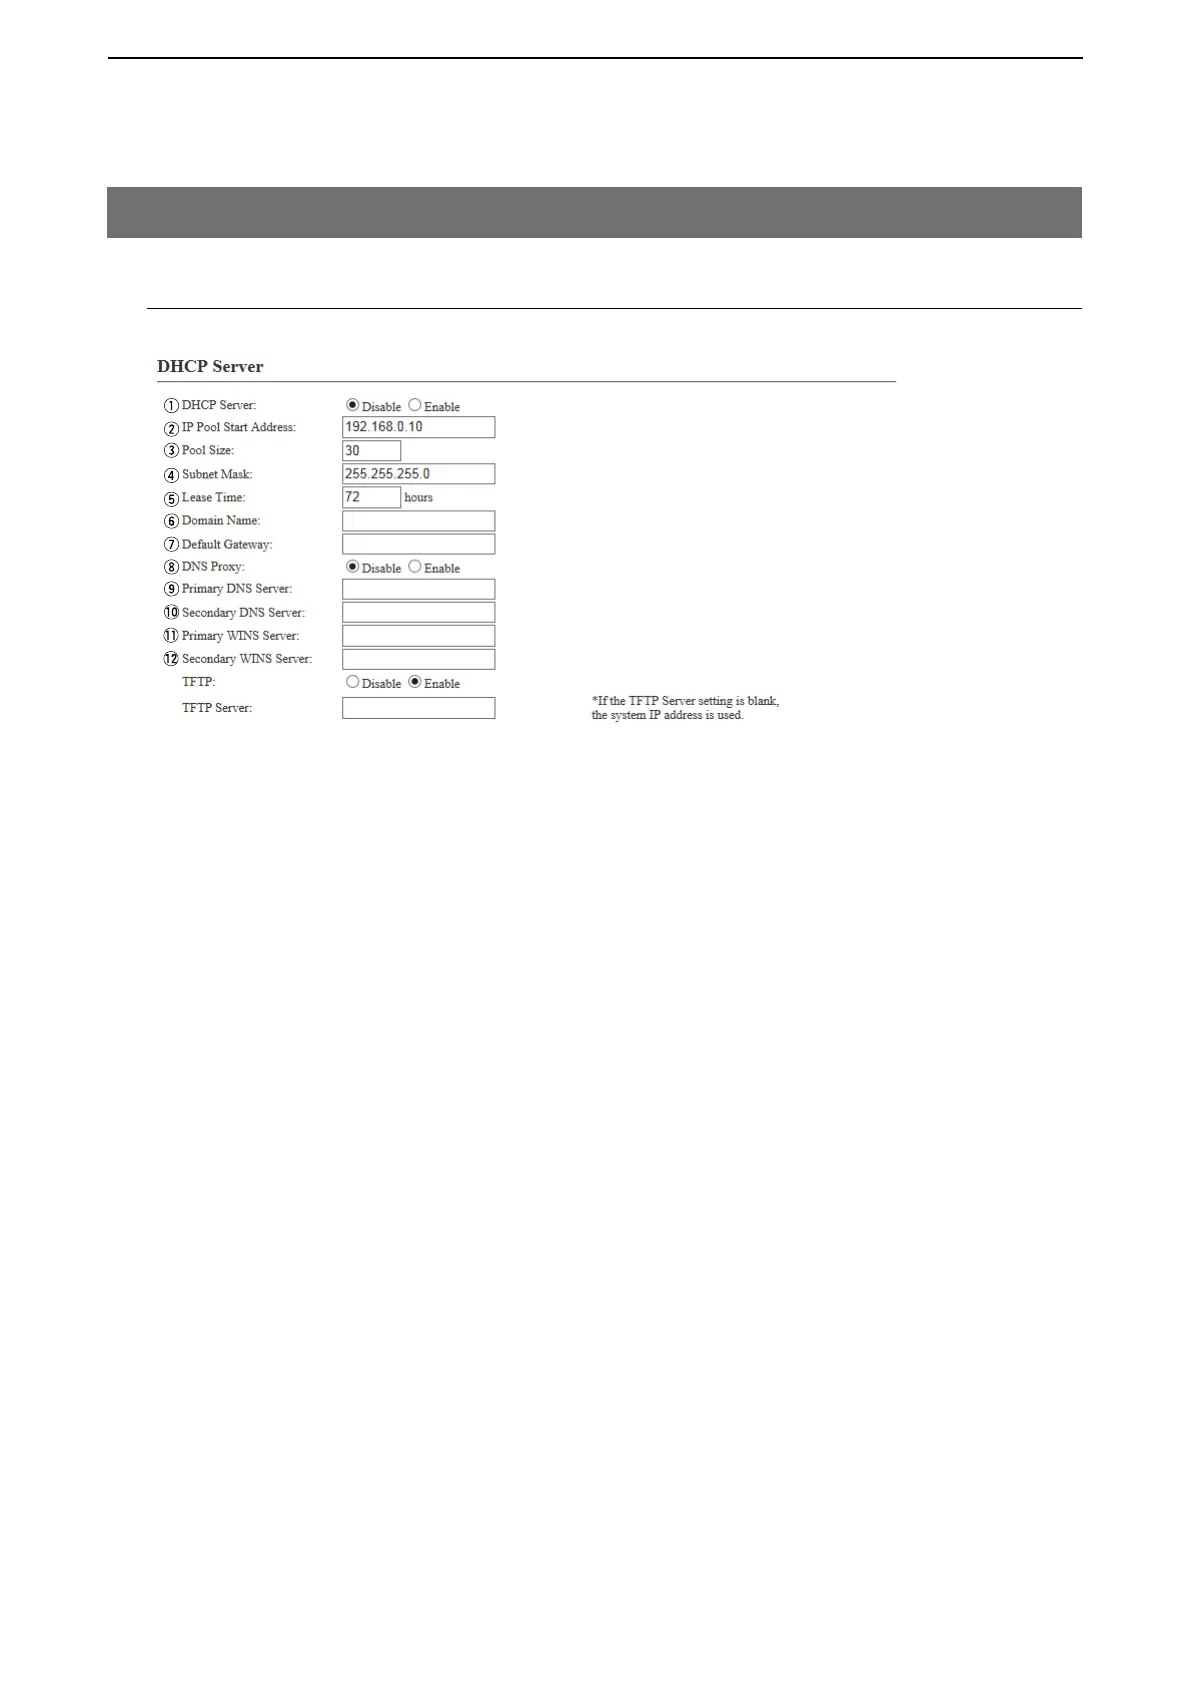
M DHCP Server
Configure the DHCP Server function.
q DHCP Server …………… Select Enable to use the DHCP Server function. (Default: Disable)
w IP Pool Start Address …… Enter the IP pool start address. (Default: 192.168.0.10)
e Pool Size ………………… Enter the size of the IP pool. (Default: 30)
Note: Up to 128 addresses can be automatically assigned by the DHCP serv-
er function. Another 32 addresses can be manually assigned.
r Subnet Mask ……………… Enter the subnet mask for the IP pool start address, which is set in the [IP
Pool Start Address] item (w). (Default: 255.255.255.0)
t Lease Time ……………… Enter the lease time period.
Range: 1 to 9999 (hours) (Default: 72)
y Domain Name …………… Enter a network address domain name of up to 127 characters.
The DHCP server sends the domain to the connected device.
u Default Gateway ………… Enter the IP address of the connecting device, if the network part of the IP
address is different from that of set in [IP Pool Start Address](w).
i DNS Proxy ……………… Select “Enable” for the DNS substitute function. (Default: Enable)
When “Enable” is selected, you don’t need to change the setting even when
the DNS server address has been changed.
When “Disable” is selected, the addresses entered in [Primary DNS Server] and
[Secondary DNS Server] are notified to the DHCP client, as the DNS server address.
o Primary DNS Server …… Enter the DNS server’s primary address.
!0 Secondary DNS Server … Enter the DNS server’s secondary address.
[Network]–[DHCP Server]
!3
!4
*
*
*Appears only when “Disable” is selected in [DNS Proxy].