1
BEFORE USING THE VE-PG3
1-5
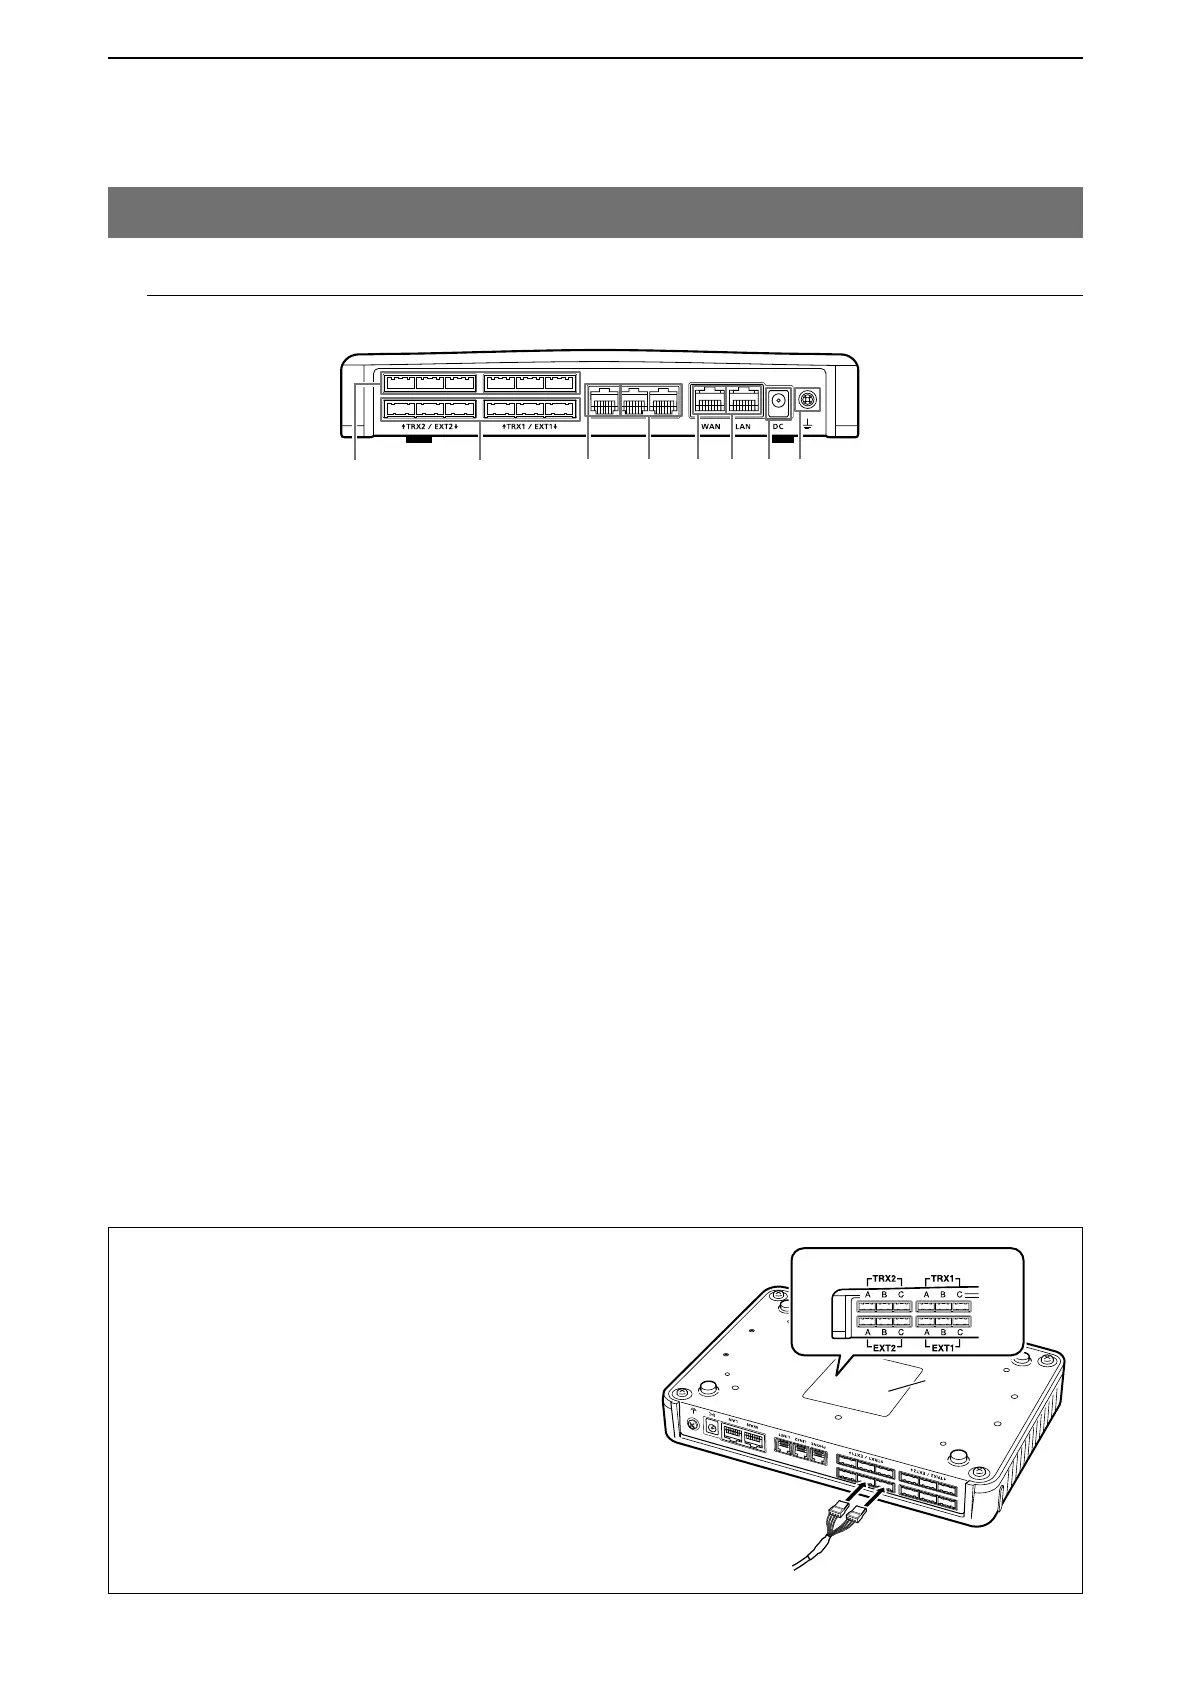
Panel description (continued)
M Rear panel
wqtyer ui
PHONE LINE2LINE1
q [TRX](1/2) port …………… Connect the transceiver through the optional cable.
w [EXT](1/2) port …………… Connect the external equipment through the optional cable.
e [PHONE] port …………… Connect a telephone.
r [LINE](1/2) ports ………… Connect to the PSTN.
t [WAN] port ………………… Connect the network terminal device.
• The router function is disabled as the default setting.
Configure the network setting (DHCP Client/Static IP/PPPoE) according to
your network service provider.
y [LAN] port ………………… Connect the network device such as a HUB.
u DC jack …………………… Connect the supplied AC adaptor.
i Ground terminal ………… Connect the ground wire.
ABOUT THE OPTIONAL CONNECTION CABLE
Before connecting cables, see the cable's manual and the
sticker on the bottom of the VE-PG3 for port information.
• Verify that both the VE-PG3 and connected devices are
turned OFF when connecting or disconnecting the cable.
• Hold the connector body when connecting or disconnecting
them.
• When other cables are connected, you can use needle-nose
pliers to carefully insert or remove connectors.
• Never bend or pinch the cable.
• Never place a heavy object on the cable.
• Never touch the cable with wet hands.
• Always connect the cable correctly. An incorrect connection
could damage the VE-PG3 and/or the transceiver.
VE-PG3 (bottom view)
Connection cable (optional)
Port information on the sticker
Sticker
A
B