DMTA-10045-01EN, Rev. E, August 2016
Applications
135
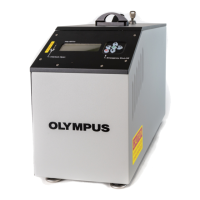
Figure 6‑18 The Skin To Core Disbonds (Tapered) application
To calibrate the signals
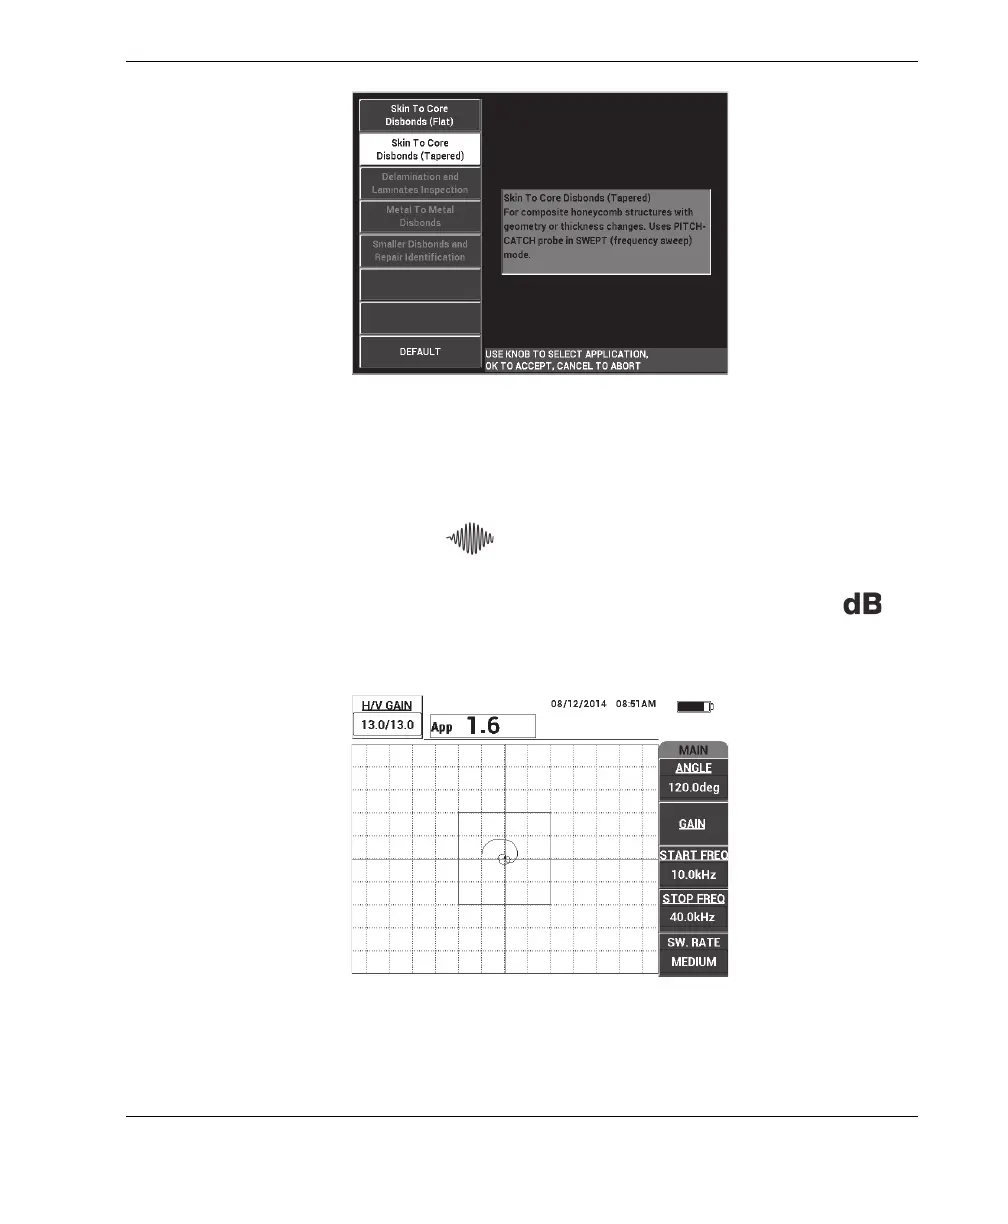
1. Press the MAIN menu key ( ) once, and then use the knob to set the START
FREQ (C key) to 10 kHz and the STOP FREQ (D key) to 40 kHz.
2. Place the probe tips on a good part of the standard, press the GAIN key ( )
and then use the knob to adjust the gain until the swept figure is contained
between two divisions inside the alarm box (see Figure 6-19 on page 135).
Figure 6‑19 The swept figure between two divisions