DMTA-10045-01EN, Rev. E, August 2016
Chapter 5
70
At this point, if the PowerLink function has been enabled, the settings will be loaded
into the BondMaster 600. If the Powerlink function has been disabled, this screen will
be bypassed. In either case, the BondMaster 600 will next proceed to the main
inspection screen.
If you turn on the BondMaster 600 with a connected PowerLink probe, press the
A key to use the PowerLink feature, or press to proceed without using the
PowerLink feature.
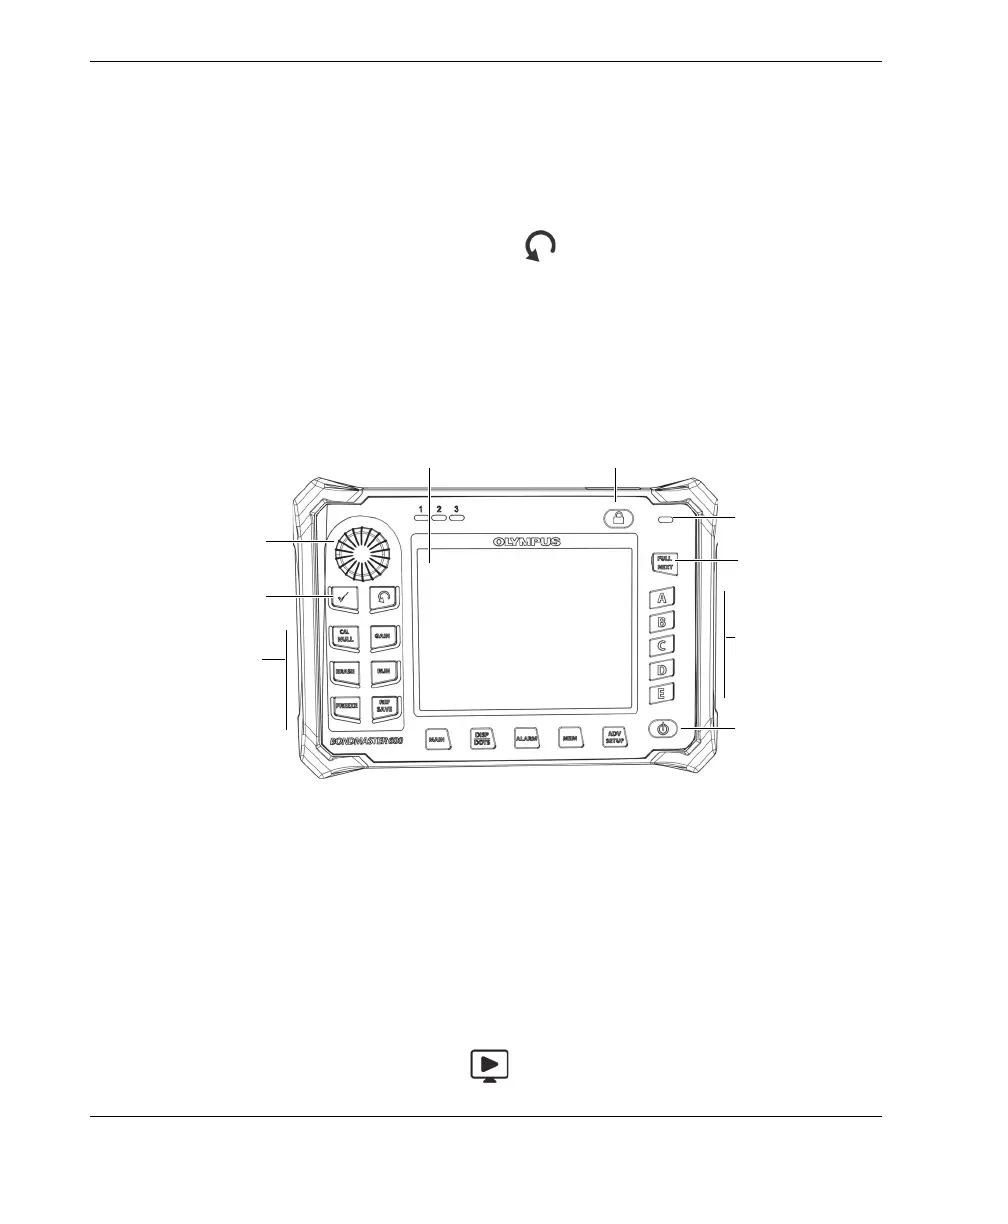
5.2 BondMaster 600 Controls
The BondMaster 600 controls are displayed in Figure 5-2 on page 70.
Figure 5‑2 The BondMaster 600 controls
5.2.1 Display
The BondMaster 600 is configured with a color liquid crystal display (LCD) and offers
640 × 480 resolution (full VGA). The LCD display, also referred to as a screen, shows
the probe signal, menus, status bar, messages, and full screen text when required.
Several display modes are available. The display mode, also referred to as RUN, can
be changed using the RUN menu key ( ).
Direct function
keys
Function keys
Charger/adaptor
indicator
Power button
Display (screen)
Knob
Menu keys
Lock button
FULL/NEXT key
Enter and Return
keys