DMTA-10045-01EN, Rev. E, August 2016
Applications
169
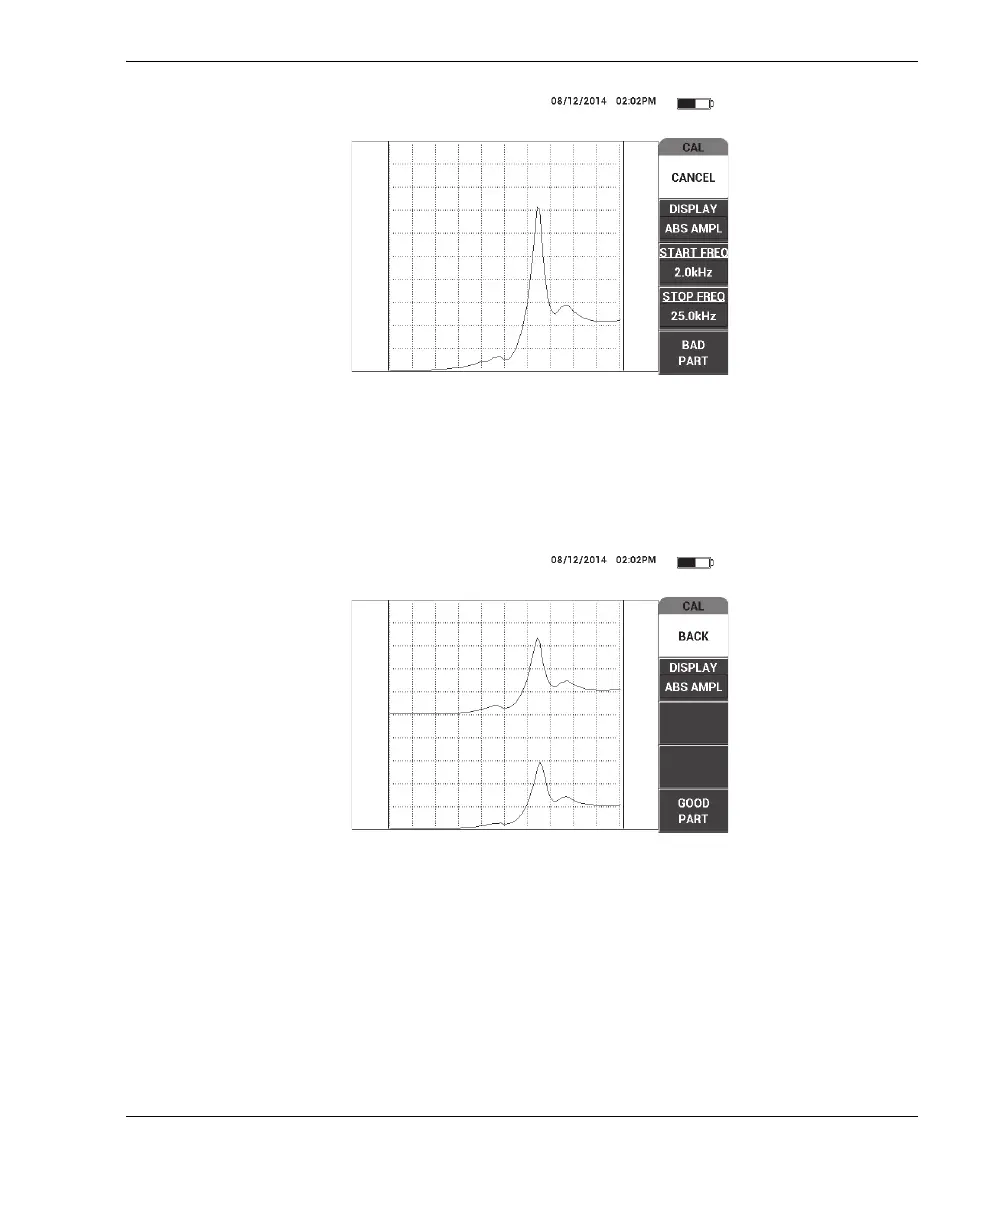
Figure 6‑63 The signal for the smaller defect
5. Hold the probe over a defect-free section, and then press GOOD PART (E key)
[see Figure 6-64 on page 169].
Figure 6‑64 The signal for the defect‑free zone
6. If necessary, select the best operating frequency for your needs by adjusting the
FREQ (D key) using the knob (see Figure 6-65 on page 170).
In many situations, the BondMaster 600 automatically picks the best operating
frequency. However, for some more complex or noisier applications, it is
recommended to manually select the frequency.