237
Adjusting knitting machine 4
Advanced adjustments
Intarsia yarn carrier - check the pressure plates *
4.2.23 Intarsia yarn carrier - check the pressure plates *
Turning over or replacing the small pressure plates (intarsia yarn carrier typ e 1)
Turning over or replacing the
small pressure plates
(intarsia yarn carrier type 1)
1. Dismantle yarn carrier.
Dismantling of small pressure plate
Dismantling of small pressure plate
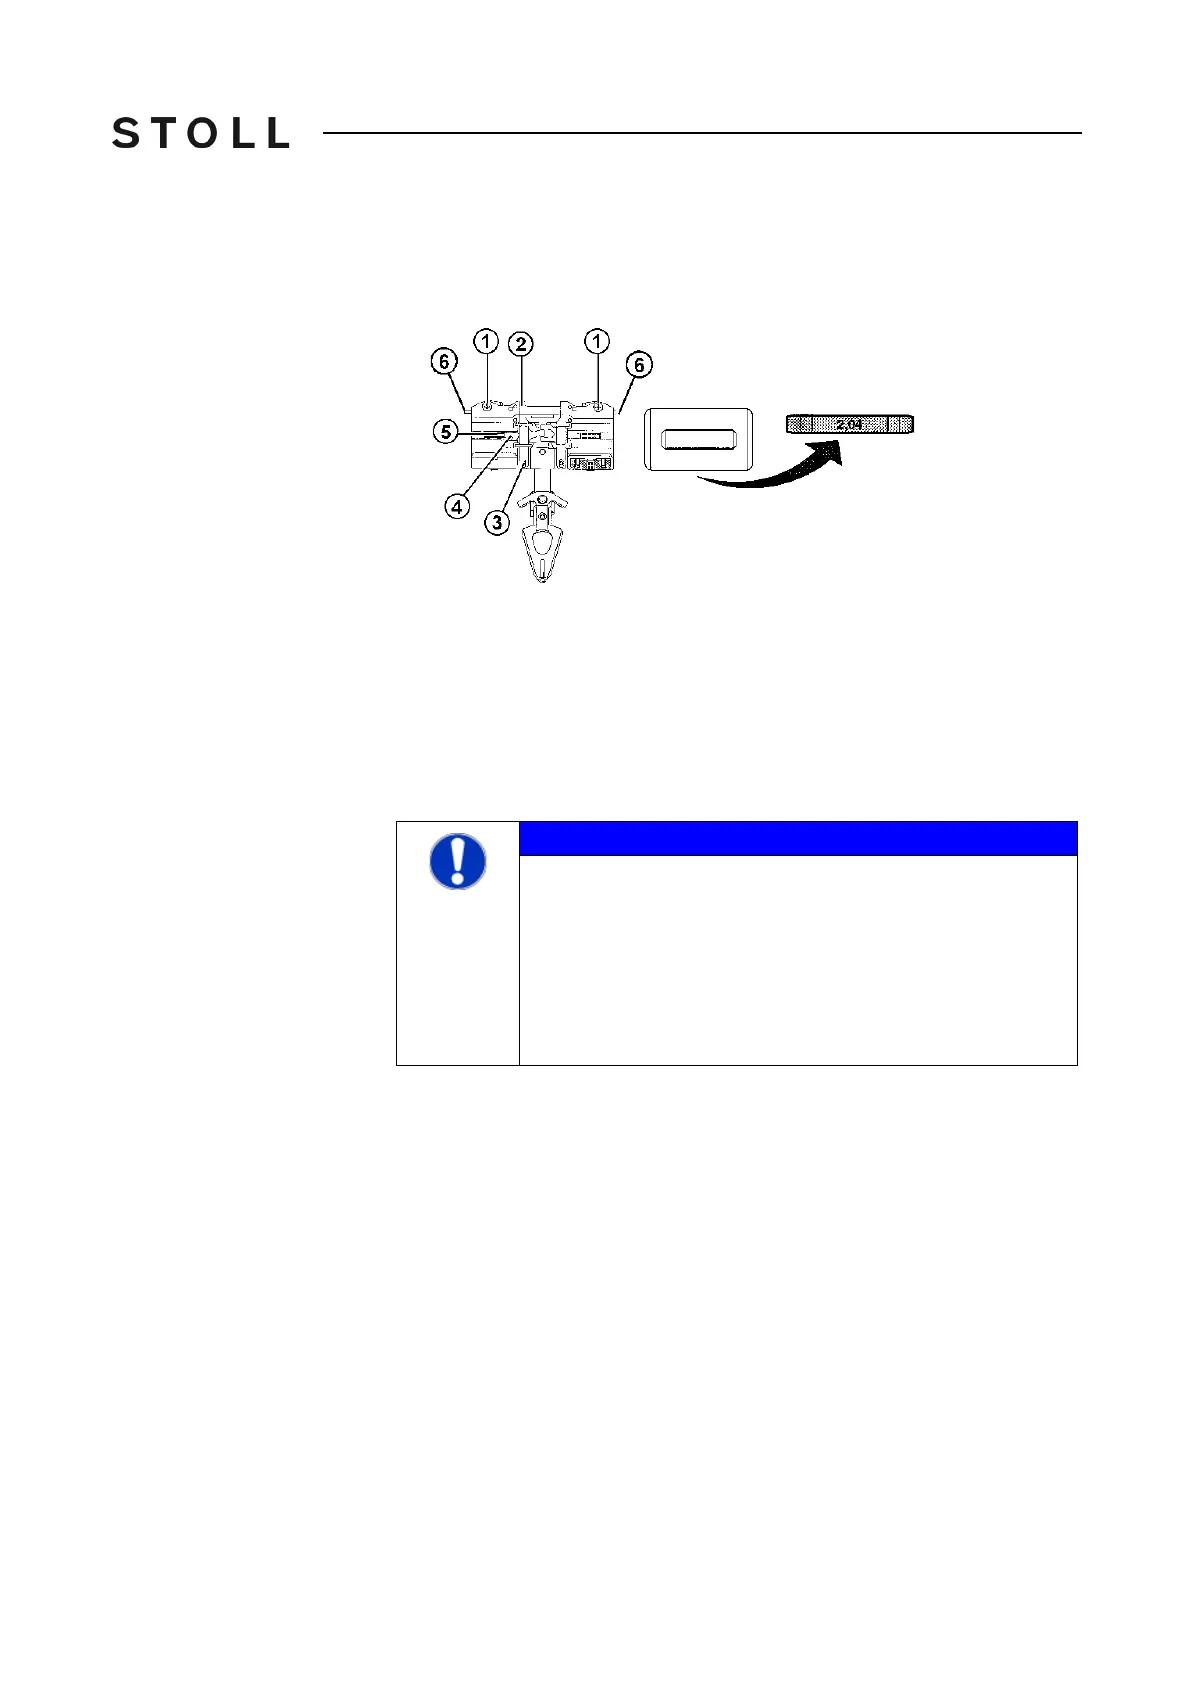
2. Loosen but do not remove the screws (1).
3. Lift the clamping lever (2)out of the locating screw (3) and remove
it. When
doing this, make sure that the spring pin (5) remains in the housing (4).
4. Check whether the thickness designation 2.04 or
2.06 is visible on the
built-in pressure plate.
5. Remove the pressure plate from the clamping lever.
6. If the marking 2.04 or 2.06 was visible o
n the built-
in pressure plate, turn
over the pressure plate and reinsert it.
- or -
➜ If the marking 2.04 or 2.06 was not visible on th
e built-in pressure plate,
insert a new pressure plate of the same thickness with the marking facing
upward.
7. Press the spring pin (5) into the spring part (4) and insert th
e clamping
le
ver (2).
8. Tighten the screws (1).
9. Make sure that the lifter (6) moves smoothly.
Further information:
Replacing yarn carrier [426]
Symbols in this document [16]
NOTICE
Complicated adjustment work is required when replacing the
pressure plates!
If the various thicknesses and positions of the pressure plates
are inte
rchanged, complicated adjustment work is required to
set the stopping point of the yarn carrier correctly.
➜ Do not inter
change the var
ious thicknesses and positions
of the pressure plates!