X35 Console General Operations
8.3
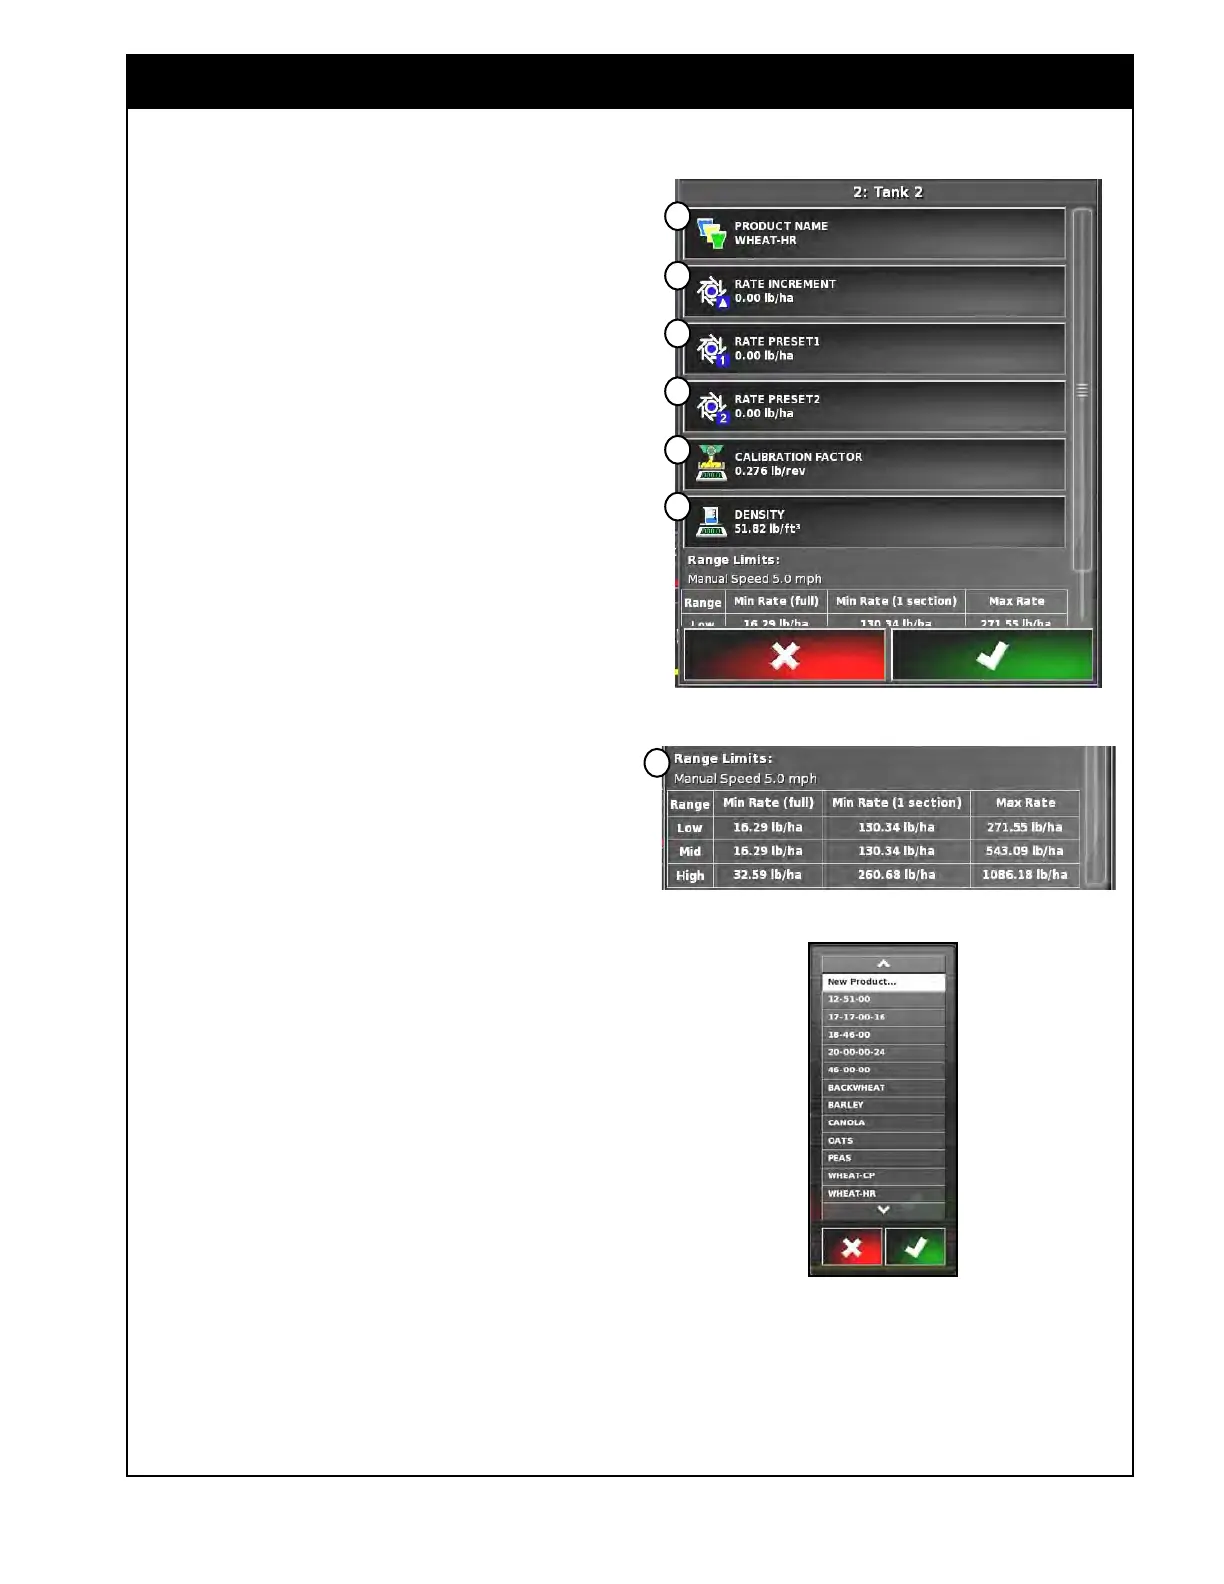
Figure 8.3 - Product Panel
b. To assign a product for the tank s
elect the
Product Name button (Item B,
Figure 8.3)
to
open product scroll list.
i. Select the desired product, if it is
not on the list select "new", refer to
Figure 8.4.
ii.
Selecting "new" will open up the
New Product Set Up wizard, refer
to Section 7 - Product Setup for
complete instructions.
c. Once a product is selected, the Rate
Increment, Rate Preset 1 and 2 buttons
(Items C, D & E, Figure 8.3) will display
values (if they were entered previously for
that product) or for a new product it will
show 0.
i.
Rate Increment
(Items C, Figure
8.3)
is used during seeding to adjust
application rate by increments.
ii. Rate Preset 1 & 2
(Items D & E,
Figure 8.3)
are used to instantly
adjust application rate to preset value.
iii.
Enter new values or adjust existing.
iv. When entering the rate preset 1, you
will be asked whether you want to
set the Requested Rate to this preset
v. Select "yes" to set the requested rate
to rate preset 1, or "no" to enter
the requested rate later using the
requested application rate window
either on the Tank Panel in the
Seeder Controller expanded mode or
Tank Tab in the Seeder Controller
mini-view window (refer to Section
2.6.3
- Tank Tab/Panel Explained).
d. The calibration factor (Item F Figure 8.3)
will
display: factory value or last saved
calibration factor for that product.
i. Selecting the Calibration Factor
button will open Calibration Method
window for the selected tank.
ii. Either enter calibration factor
manually, or perform a calibration for
the single selected tank
Figure 8.4 - Product Selection List
b
c
d
e
f
g
Use the scroll bar to see full Range Limits table:
h
iii. Run tank optimizer wizard or
perform area test.
e. If desired, adjust density (Item G, Figure
8.3).