X35 Console General Operations
8.7
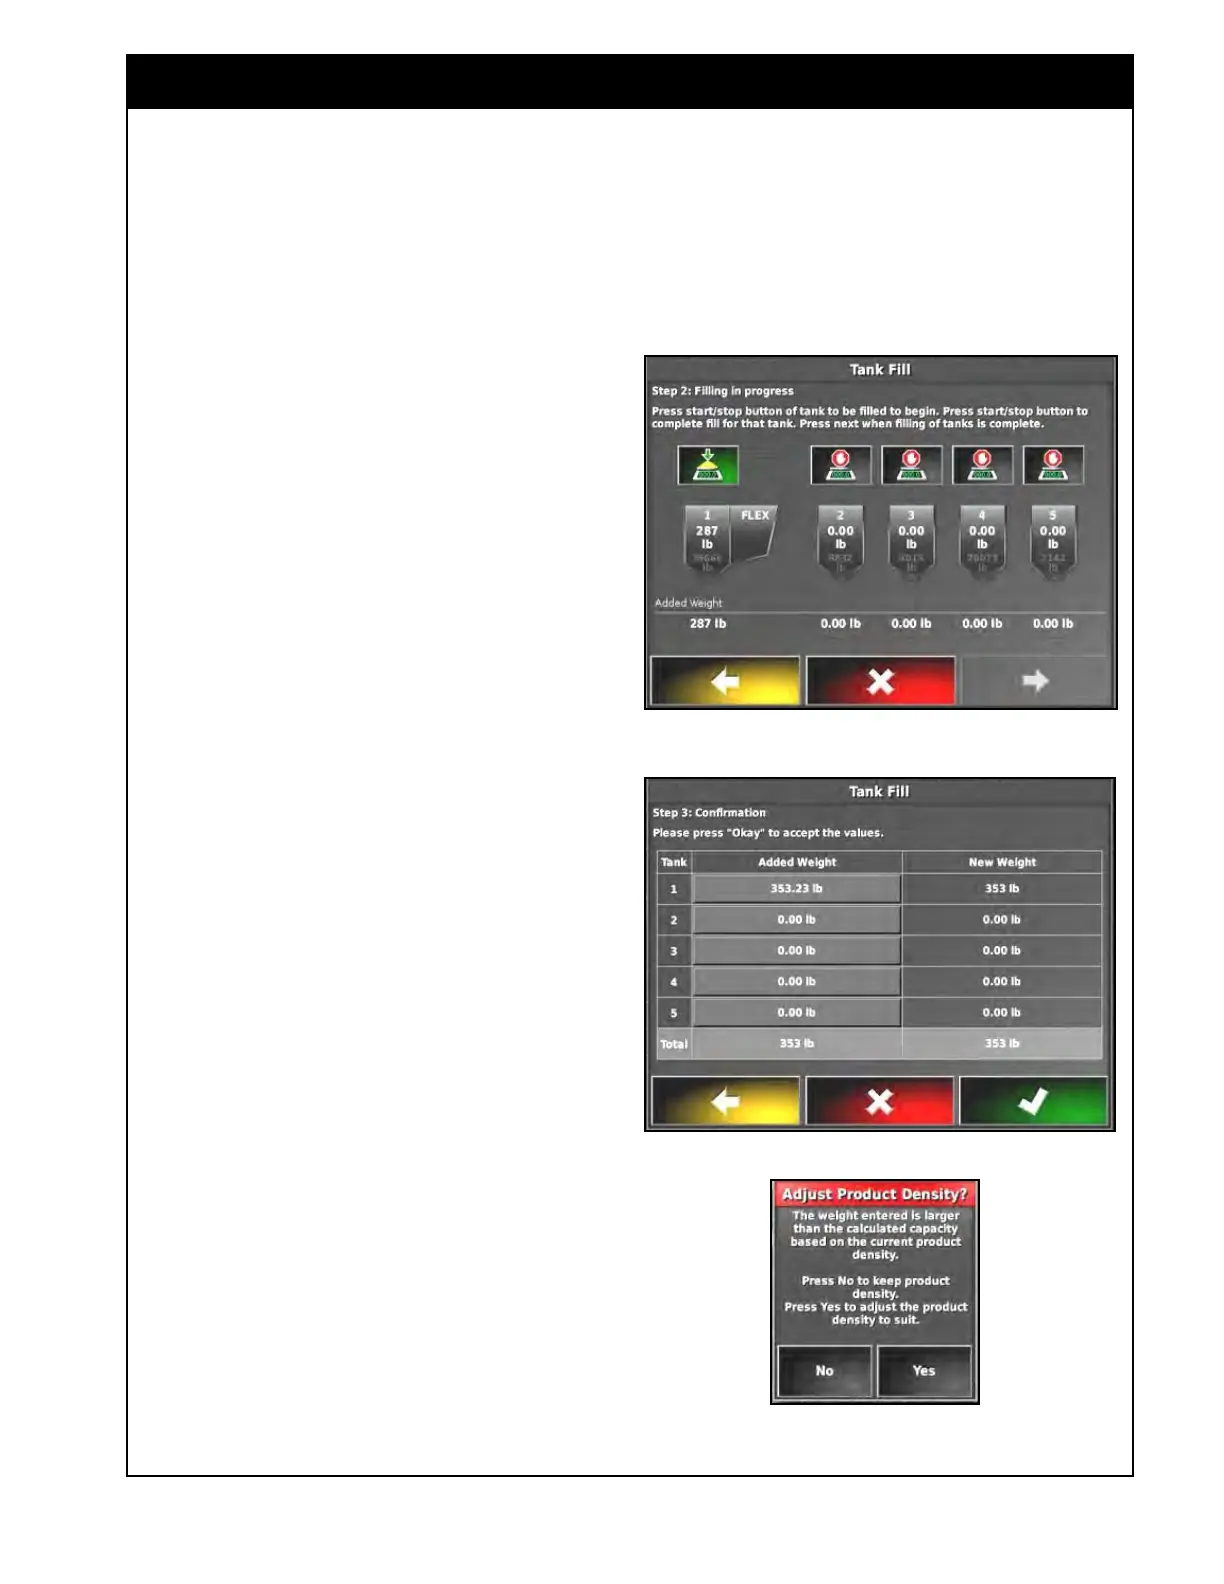
vi. The tank grouping image (shown in
Figure 8.9) will show the current
volume
in each tank along with the
theoretical capacity of each tank.
vii. The added weight for each tank
will be shown at the bottom of the
window.
viii. Select the next button to go to the
next step.
c. Step 3 - Confirmation, refer to Figure
8.10:
i. The Added Weight can be manually
entered
if adjustment is needed for
any of the tanks.
ii. The New Weight column will show
the total weight that each tank will
be changed to.
iii. Select the OK button to complete the
Tank Fill wizard and the weights will
be added to each tank.
iv. Select the cancel button if you want
to leave the wizard without adding
the weights.
6. Adjust
Product Density
If the total weight you are trying to change any
of the tanks to exceeds the theoretical maximum
weight capacity, you will get a prompt to Adjust
Product Density. Refer to Figure 8.11.
a. Select Yes if you want to adjust the density
of
the product to increase the maximum
weight capacity of the tank.
b. Select No if you don’t want to change the
product density.
Important
The auger should be positioned on the ground
while tanks are activated in the Tank Fill wizard so
the weight of it doesn’t affect the volume added to
the tanks.
Figure 8.9 - Tank Grouping Image
Figure 8.10 - Step 3: Confirmation
Figure 8.11 - Adjust Product Density Screen