Maintenance
5552−4/A1
RT-flex50-D
Wärtsilä Switzerland Ltd
3/ 3
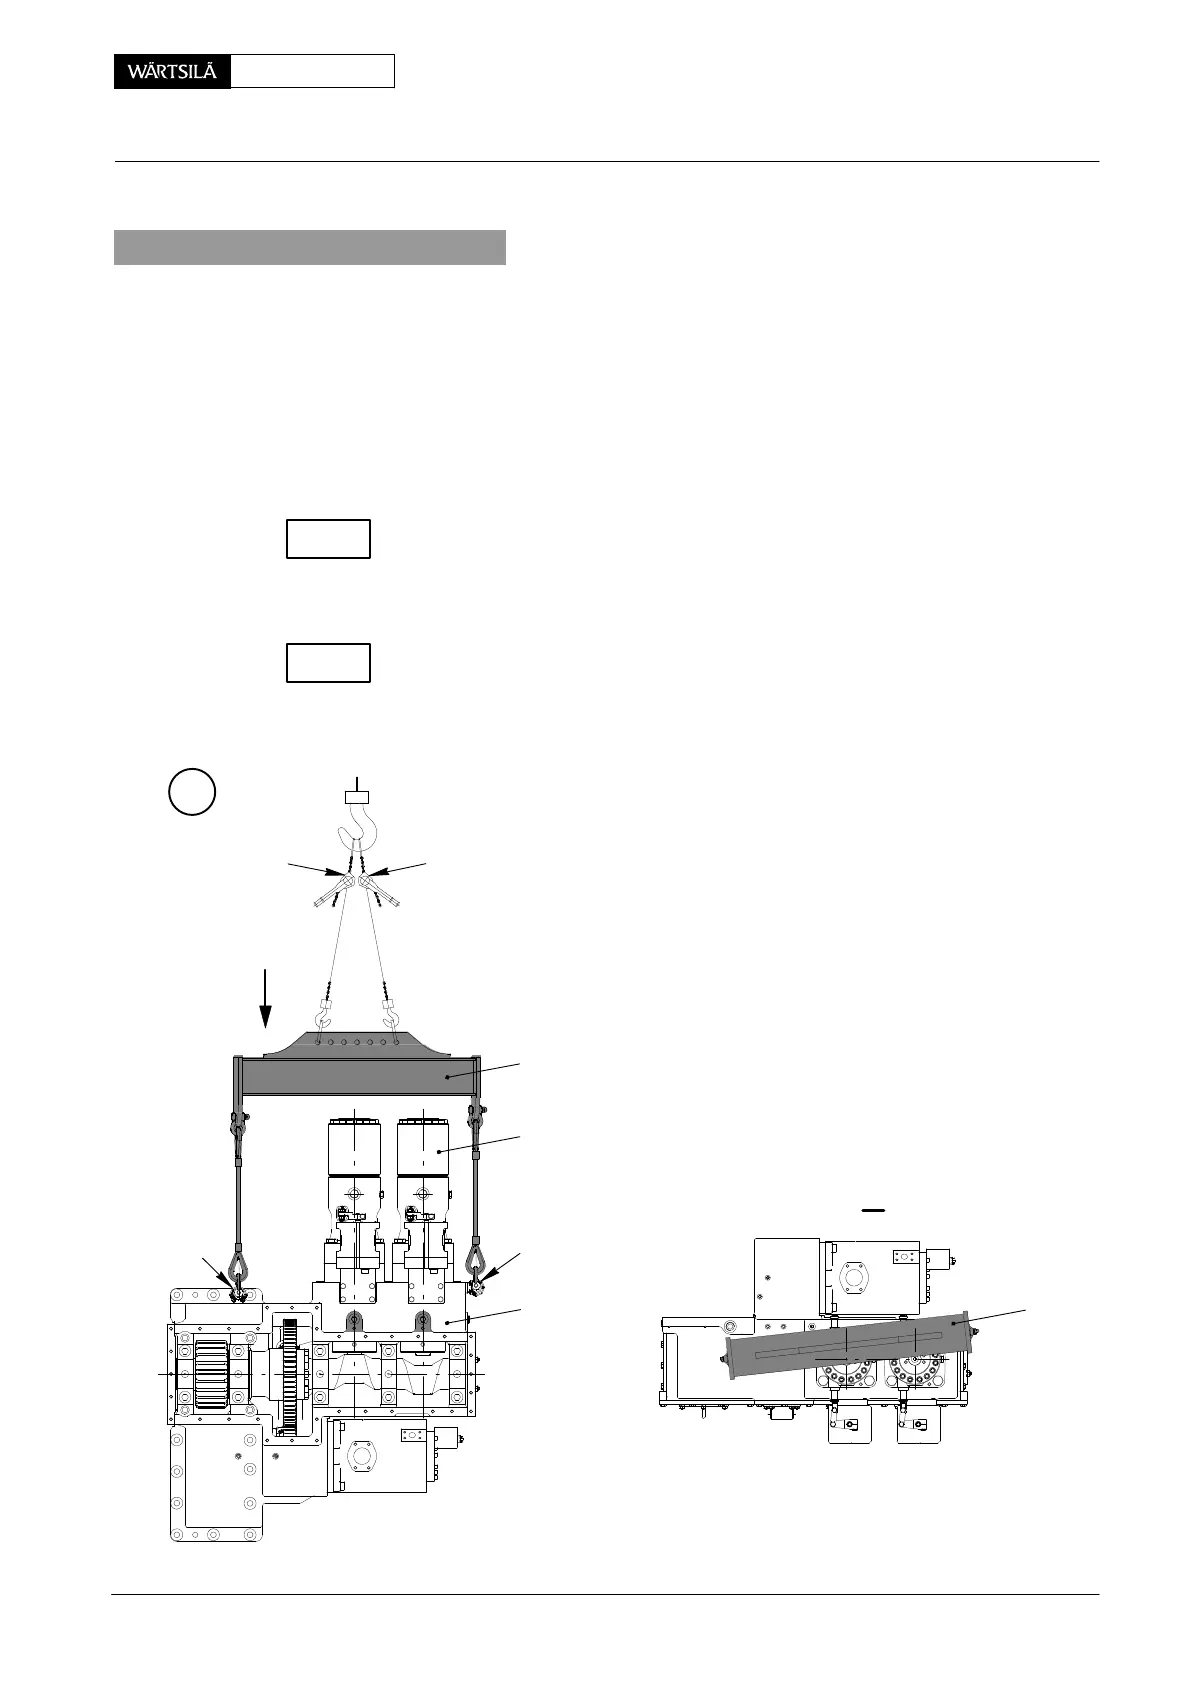
2. Fitting
⇒ Connect supply unit 1 with the engine cran as described for the removal.
⇒ Apply a non-hardening sealing compound to the cleaned sealing surfaces of
housing 9.
⇒ Move supply unit 1 carefully to the housing (Fig. ’A’).
⇒ Fit screws 5, 6, 7 and cap screws 8 (Fig. ’B’), paying attention that the supply
unit rests on the housing, however can still be freely moved.
⇒ Insert dowel pins 4 (Fig. ’C’) and tighten screws 5, 6, 7.
Check and compare the backlash with 0330−1 ’Driving wheels for Supply Unit’.
⇒ Remove all tools.
⇒ Install all pipings.
Start lubricating oil pump and check oil flow to the bearings and spray nozzles 10
(Fig. ’C’).
⇒ Apply a non-hardening sealing compound to the cleaned sealing surfaces of
cover 3 and then fit the latter.
013.043/05
I
RC
2
1
RC
D
I
94557
94557
HZ
HZ
emoval and Fitting of Supply Unit
2010
CHECK
CHECK