ChamSys Ltd www.chamsys.co.uk
MagicQ User Manual 103 Version 1.4.9.0
11.5 Plan View
Plan View enables 2D plans of the stage rig constructed and viewed. It also enables grids of LED or
dimmers to be created for use with the in-built pixel mapping (Bitmap FX) engine. Press the VIEW
PLAN soft button.
11.5.1 Creating rig plans
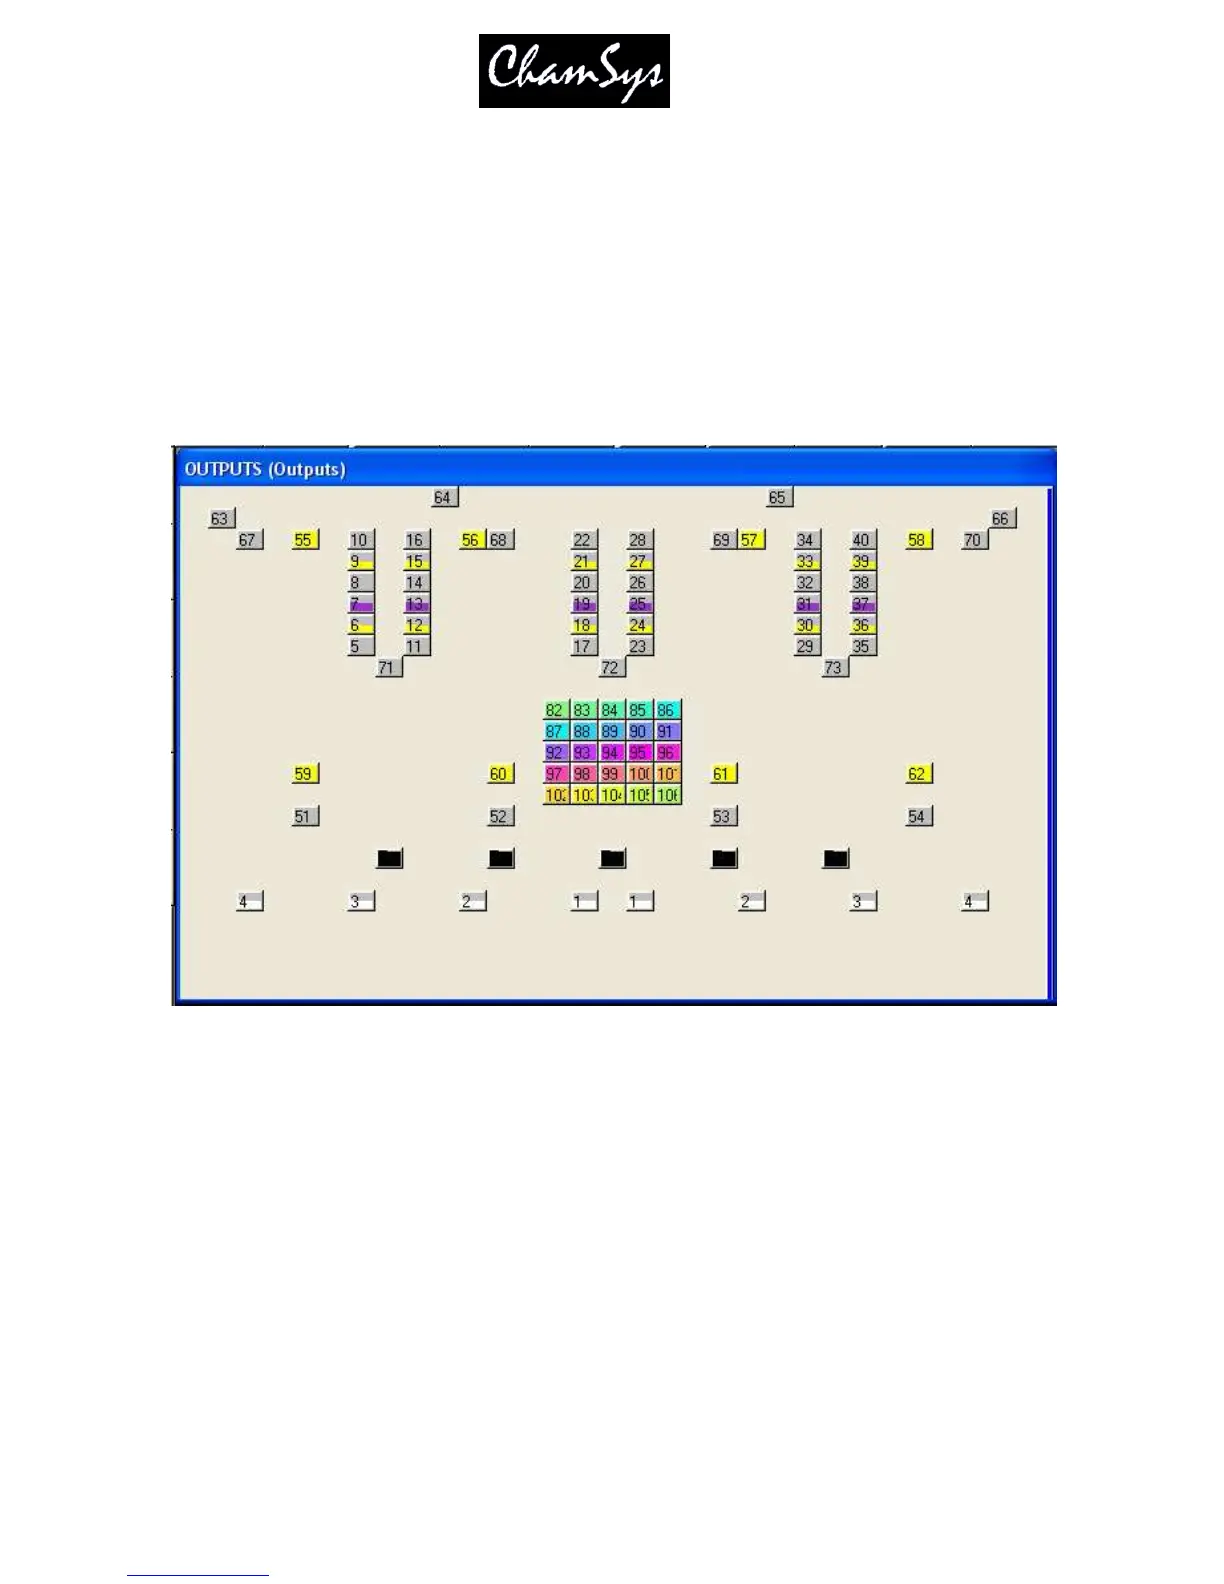
It is possible to create a rig plan in the Outputs window, so that you can easily identify the levels and
colours of your moving lights based on their position in the lighting rig. The model of the rig in MagicQ
consists of a grid - each cell can be assigned to a particular head number. Grids can also be used to
monitor LED arrays and other colour blocks.
In the Outputs Window, select View Plan and View Hd Nos. Press Grid Size and enter a matrix size for
your lighting rig – e.g. 30/20 gives a 30 by 20 grid.
A grid is now displayed. In each of the boxes enter the head number of the head that you wish to be
represented in this box. You can use SHIFT and the cursor keys to set a sequence of head numbers.
Alternatively, you can use the INSERT HEADS button to insert all patched heads into the matrix. The
heads are placed in order of head number. In order to make use of this feature all heads should have
unique numbers.
Note that it is not necessary to have a head number assigned to every cell in the grid – cells can be blank.
This enables the lights to be positioned in the grid in a corresponding way to how the heads are positioned
on the rig.
To remove a head number from a cell, press REMOVE and select the cell. Move and Copy can also be
used to quickly move or copy one or more cells.