ChamSys Ltd www.chamsys.co.uk
MagicQ User Manual 162 Version 1.4.9.0
Hold ALL and press Prev Head Selects previous group
Hold POS, COL, or BEAM and press Next
Head
Selects next range for last encoder changed
Hold POS, COL or BEAM and press Prev
Head
Selects previous range for last encoder changed
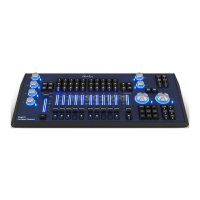
To connect a Mini, PC or Maxi Wing to a console simply enable the MagicQ Wings and Interfaces option.
19.4.2 Connecting Playback Wings and Extra Wings
To configure Playback Wings and Extra Wings open the Setup Window and choose View System, View Wings
view.
In the Type field, choose "Playback / Extra Wing". When the console has detected the Playback wing it will
show as "Fitted" in the status field. If you wish to connect more than one Playback or Extra Wing then enable
the required number of Wings.
Make sure you enable enough the same number of wings as you connect to MagicQ. Connecting more Wings
to MagicQ than you enable will cause unpredictable results.
19.4.3 Connecting an Execute Wing
The MagicQ Execute Wing is fully supported in software version v1.3.8.1. The Execute Wing has 48
playbacks arranged as 12 fader playbacks and 36 button only playbacks. The Execute Wing can be
configured simply to control Playbacks, or it can be set in a mode whereby the 36 button only playbacks
become a 72 button matrix for use selecting heads, palettes, groups, media and execute buttons.
To configure the MagicQ Execute Wing it must be set up as two consecutive wings in the Setup, View
System, View Wings. The first wing must be configured as “Execute” and the second wing as “Execute
Top”. This corresponds to the 48 playbacks whereas with standard Playback Wings there are only 24
playbacks.
The Execute Wing has a mode button called MENU. When this is pressed and held then the 2
nd
row of
buttons becomes a mode selection page. The mode button affects the top 3 rows of playbacks – it does not
affect the bottom row of 12 playbacks – they are always configured as normal Playbacks.
The mode options are:
Playbacks 3 rows of 12 playbacks each with separate GO/BACK (default)
Exec Access to the Execute Window, enabling complete user configuration of the buttons. Use
PG UP and PG DN to select the Exec Page.
Heads Selecting heads. Use PG UP / PG DN to scroll pages of heads.
Palet The buttons are automatically split into 24 Groups, 16 position palettes, 16 colour palettes
and 16 beam palettes.
Media Access to the Media Window. Shows media page options, servers, layers and images as
in the Media Window. Use the 2
nd
down PG UP/PG DN buttons to change the Media
Bank. Use the 3
rd
down PG UP/PG DN buttons to change the Media Image.
Cues Testing of Cues. Use PG UP / PG DN to scroll pages of cues.