ChamSys Ltd www.chamsys.co.uk
MagicQ User Manual 214 Version 1.4.9.0
To make the most of your LED fixture you can create a grid containing the LED fixtures and then each
fixture becomes a “pixel” in the grid. The MagicQ Pixel Mapping Engine can then be used to play back
movies, bitmaps and text on the grid.
After patching your LED fixtures you should set up the head numbers for each fixture in the Patch
Window. By default MagicQ numbers heads in the order they are patched starting at 0. Simply edit the
head number field in the Patch Window to change the head numbers. Use SHIFT and the cursors keys to
set multiple head numbers.
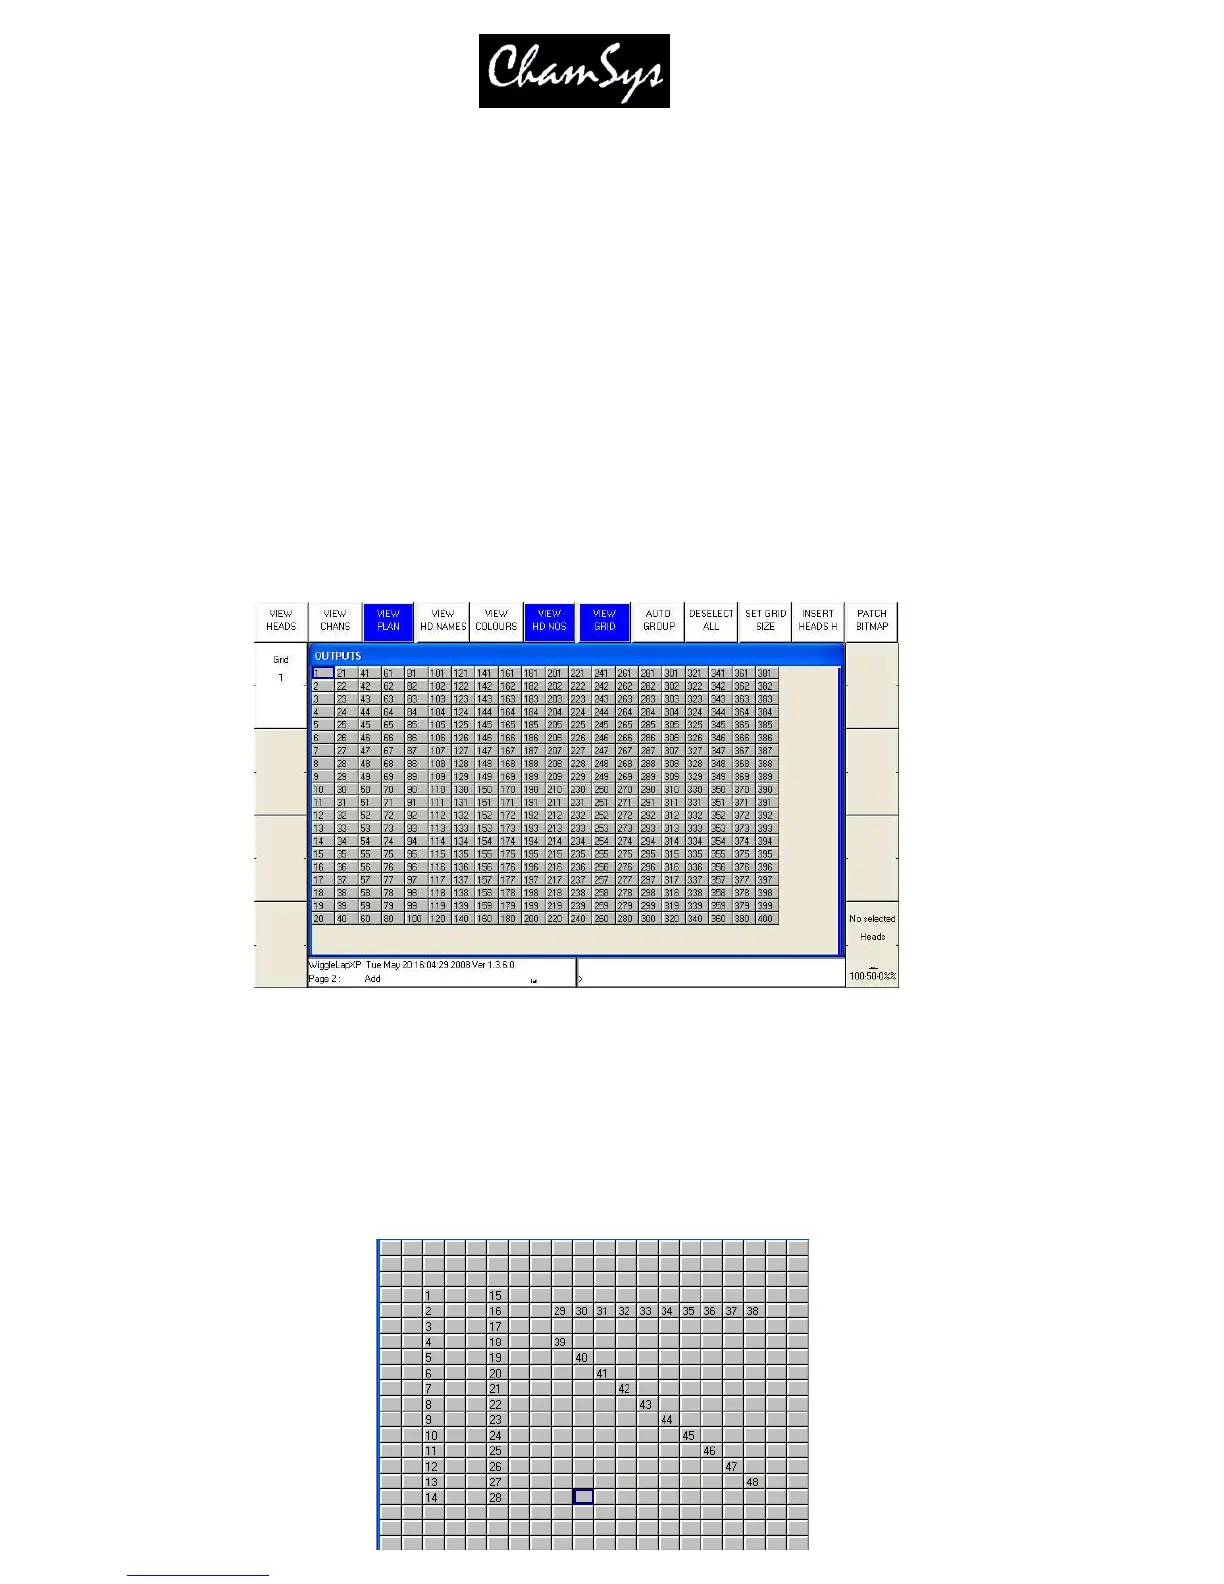
In the example above, we patched a 20 by 20 matrix of RGB pixels (total 400 pixels) on Universes 4.5 and
6.
Then in the Outputs Window, Plan View create a grid. First set up the grid size, by pressing the GRID
SIZE soft button. Enter the horizontal size followed by the vertical size – e.g. 20/20.
In the Plan View there are three different views, Head Names, Colours and Head Numbers. Press Head
Numbers and View Grid to see the grid. Then you can enter the head numbers in the grid according to the
layout of the LED fixtures within the matrix / stage. Use SHIFT and the cursor keys to set multiple head
numbers in one go.
To insert all the patched heads into the grid in horizontal rows use the INSERT HEADS H soft button.
Press SHIFT and INSERT HEADS V to insert in vertical rows
Note that it is not necessary to allocate a head number to every position in the grid – so if your LED
fixtures are placed at weird angles you can make a grid with the LED placed as you would see it. Multiple
grids can contain the same head numbers – so it is possible to have one grid with the LED tightly packed
and anther representing how they are really spaced out.
 Loading...