5
BRIDGE MODE SETTING SCREEN
5-66
8. [Port Settings] Menu (continued)
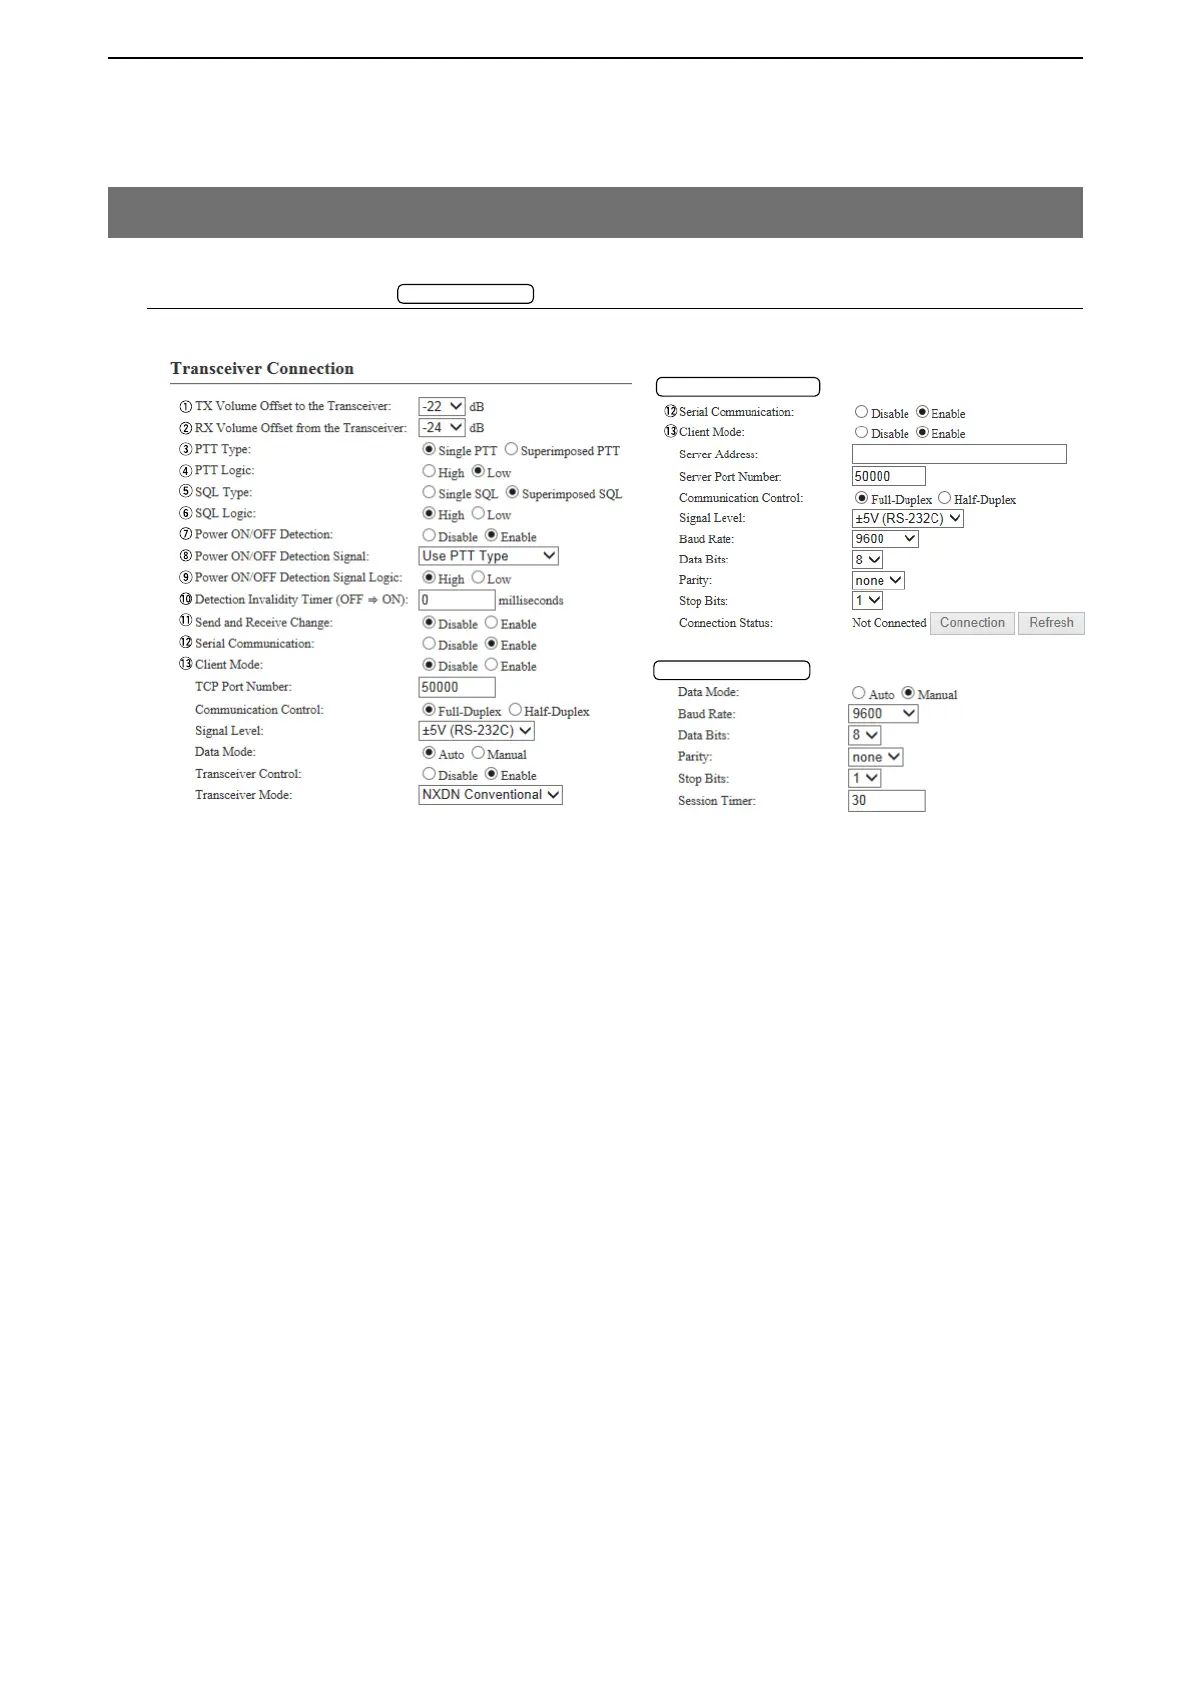
M Transceiver Connection
"General Setting"
The setting screen when "General Setting" is selected in [Transceiver Model].
[Port Settings]–[Transceiver 1 (TRX1)/[Transceiver 2 (TRX2)]
q TX Volume Offset to the Transceiver
…………………………… Adjust the VE-PG3’s transmitting audio level that is sent to the connected
transceiver between “–30” and “+15” (dB). (Default: –22)
w RX Volume Offset from the Transceiver
…………………………… Adjust the VE-PG3’s audio level from the transceiver between “+26” to “–26”
(dB). (Default: –24)
e PTT Type ………………… Select the PTT circuit type. (Default: Single PTT)
• Single PTT: The microphone line and PTT input line are separated.
• Superimposed PTT: The PTT input line is superimposed on the MIC input
(A1 terminal).
r PTT Logic ………………… Select the PTT logic. (Default: Low)
• High: PTT line becomes “High” when [PTT] is pushed. (Active High)
• Low: PTT line becomes “Low” when [PTT] is pushed. (Active Low)
*
1
Appears only when “Enable” is selected in [Power Detection].
*
2
Appears only when “Enable” is selected in [Serial Communication].
*
3
Appears only when “Enable” is selected in [Transceiver Control].
*
1
*
1
*
2
*
2
*
3
*
2
*
2
*
2
*
2
*
2
!4
!9
@0
@1
@4
@4
@5
@5
@6
@7
@3
@3
@2
@2
Client Mode = "Enable"
Data Mode = "Manual"
!5
!5
!6
!6
!7
!7
!8