13B-15
DIESEL INJECTION
Flow actuator: Removal - Refitting
K9K
13B
a Disconnect:
-the injector rail pressure sensor,
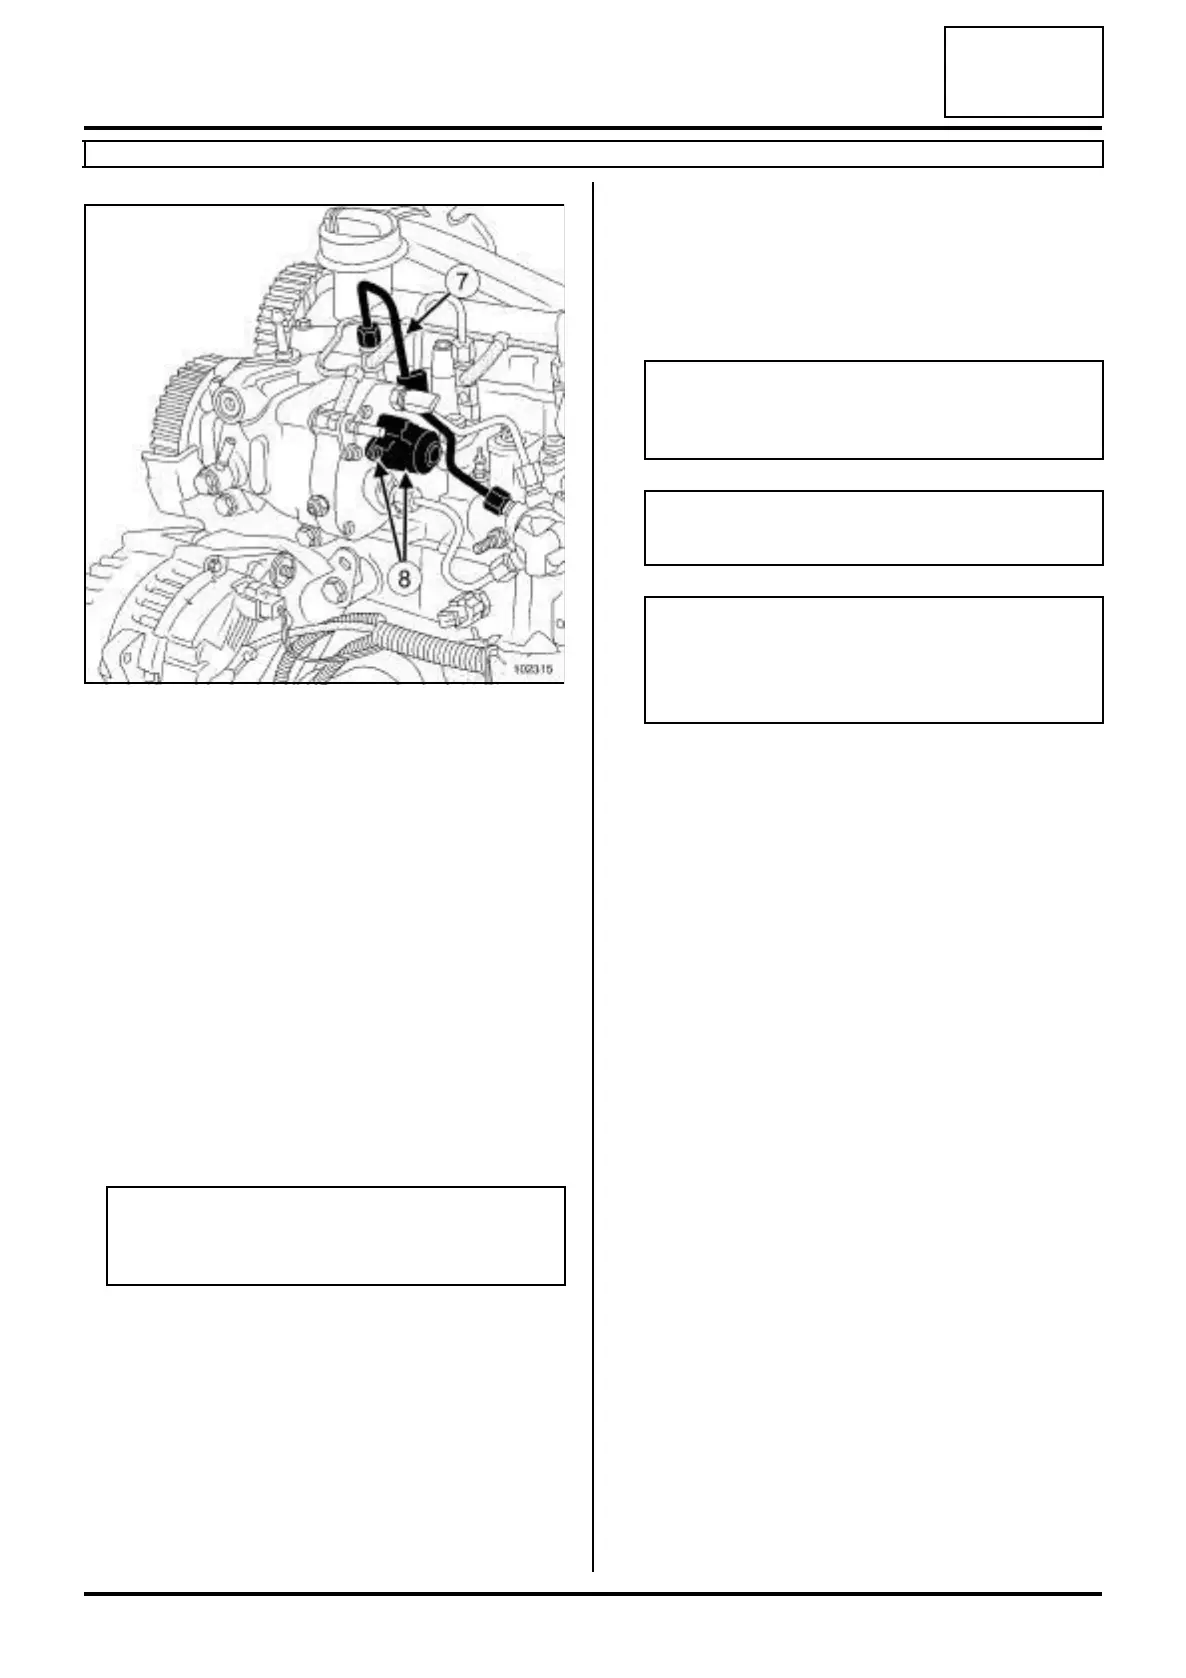
-the accelerometer .
a Unclamp the engine wiring and put it to one side.
a Remove:
-the neck located on the injector rail,
-the high pressure pipe (7) between the injector rail
and injector no. 4 (see 13B, Diesel injection, High
pressure pipe between rail and injector: Re-
moval - Refitting, page 13B-22) .
a Plug the openings.
II - REMOVAL OPERATION
a Loosen the fuel flow actuator bolts (8) .
a Withdraw the fuel flow actuator (by hand using small
successive turns).
REFITTING
I - REFITTING PREPARATION OPERATION
a Only unpack the new component when you are
ready to fit it.
II - REFITTING OPERATION
a Position the flow actuator.
a Finger tighten the flow actuator bolts.
a Torque tighten the flow actuator bolts (6 N.m).
III - FINAL OPERATION
a Refit the new high pressure pipe between the injec-
tor rail and injector no. 4 (see 13B, Diesel injection,
High pressure pipe between rail and injector: Re-
moval - Refitting, page 13B-22) .
a Connect:
- the diesel supply and return pipes on the high pres-
sure pump,
- the electrical connectors on the high-pressure
pump,
- the injectors,
- the heater plugs.
a Refit the dipstick guide.
a Torque tighten the dipstick guide and filler neck
nuts on the high pressure rail (21 N.m).
a Connect the battery (see Battery: Removal - Refit-
ting) (80A, Battery).
a Start the engine.
a Check that there are no fuel leaks.
a Refit the engine cover.
102315
WARNING
Do not use the electrical connector as a lever
arm.
WARNING
Do not remove the blanking plugs from each
component until the last moment.
WARNING
Do not damage the seal when refitting.
Note:
Do not lubricate the seals with grease or old die-
sel fuel. Use the applicator provided in the kit for
the new part.