36B-6
POWER ASSISTED STEERING
Power-assisted steering pump: Removal - Refitting
K9K, and STANDARD HEATING RECIRCULATION
36B
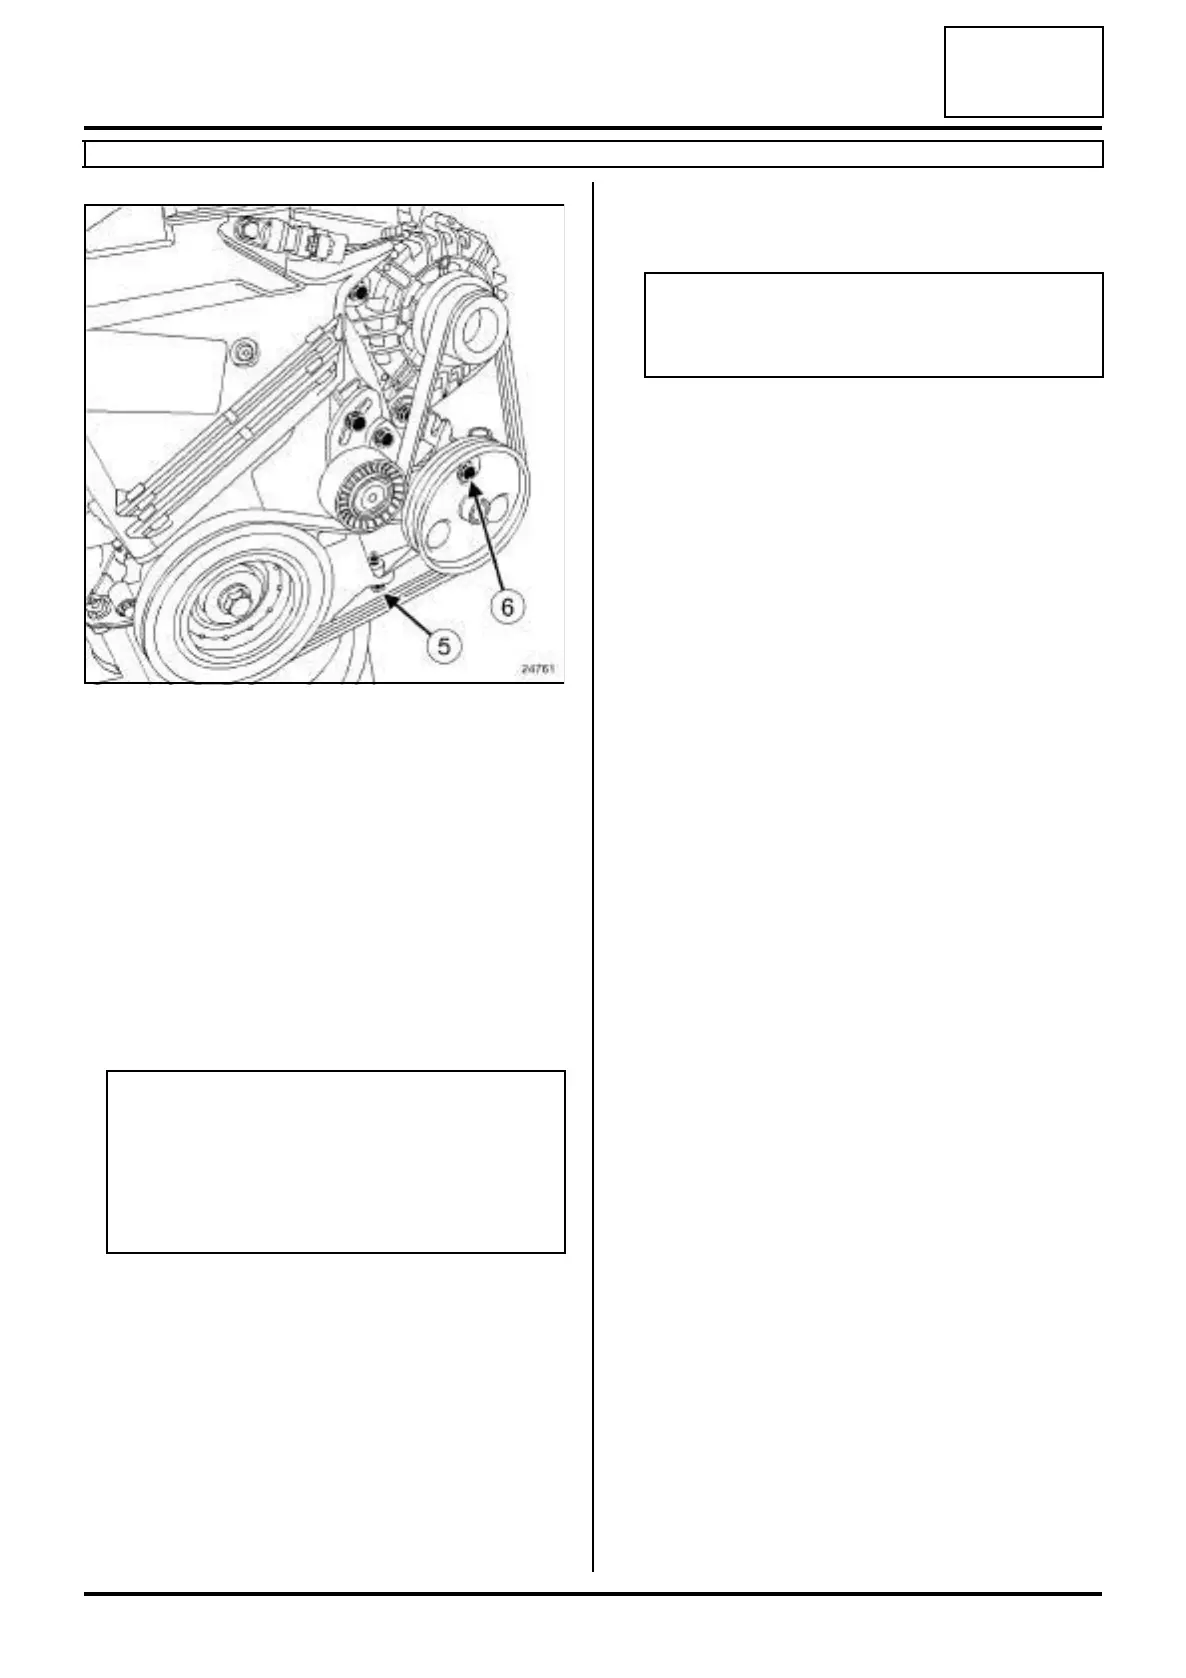
a Remove:
-the bolt (5) of the power-assisted steering pump
support on the sump,
-the power-assisted steering pump bolt (6) on the
multifunction support,
-the power-assisted steering pump.
REFITTING
I - REFITTING PREPARATION OPERATION
a
II - REFITTING OPERATION FOR PART
CONCERNED
a Refit:
-the power-assisted steering pump,
-the power-assisted steering pump support mount-
ing bolt on the sump.
a Remove the plugs from the pipe openings.
a Screw the high pressure pipe union on the power-
assisted steering pump.
a Refit the high pressure pipe support bolt on the pow-
er-assisted steering pump.
a Torque tighten:
- the power-assisted steering pump bolts (21
N.m),
- the power-assisted steering pump high pres-
sure union (21 N.m),
- the power assisted steering pump support bolt
on the sump (21 N.m),
- the power-assisted steering pump high pres-
sure pipe support mounting bolt (21 N.m).
a Connect the inlet hose on the power-assisted steer-
ing pump.
a Refit the hydraulic inlet hose clip on the power-as-
sisted steering pump using the.
a Remove the hose clamps (Ms. 583) on the hydraulic
inlet and outlet pipes of the power assisted steering
pump.
III - FINAL OPERATION
a Refit the accessories belt (11A, Top and front of en-
gine) (see Accessories belt: Removal - Refitting) .
a Fill the power-assisted steering circuit with ELF
RENAULT MATIC D2 oil (see Vehicle: Parts and
consumables for the repair) (see 04B, Consum-
ables - Products).
a Bleed the circuit by turning the steering wheel from
lock to lock with the engine switched off in the first in-
stance.
a Bleed the circuit by turning the steering wheel from
lock to lock with the engine running.
a Top up the fluid in the reservoir.
a Check that there are no leaks.
a Refit the engine undertray.
24761
WARNING
Do not remove the blanking plugs from each
component until the last moment.
Also, do not remove the components from their
packaging until they are to be fitted to the vehi-
cle.
Note:
Tighten to torque first the two bolts on the acces-
sories belt side, then the bolts on the other side.