3.58
SEL-400 Series Relays Instruction Manual Date Code 20171006
Basic Relay Operations
Reading Oscillograms, Event Reports, and SER
Step 4. Enter SER settings.
a. For this example, open the entry form by clicking the button
beside the SITM1 SER Points and Aliases, Point 1 entry field.
We will change this SER point to report the operation of the Tar-
get Reset pushbutton.
b. Click the button beside the Relay Word Bit entry field.
c. Select Target Logic Bits, and then double-click on TRGTR to
copy the TRGTR name into the Relay Word Bit field. This also
copies TRGTR to the Reporting Name (or alias) field.
d. Type Target Reset PB in the Alias Name field.
e. Type TEST in the Set Alias field.
f. Type OFF in the Clear Alias field.
g. Click OK.
Step 5. Click File > Save to save the new settings in QuickSet.
Step 6. Upload the new settings to the relay.
a. Click File > Send.
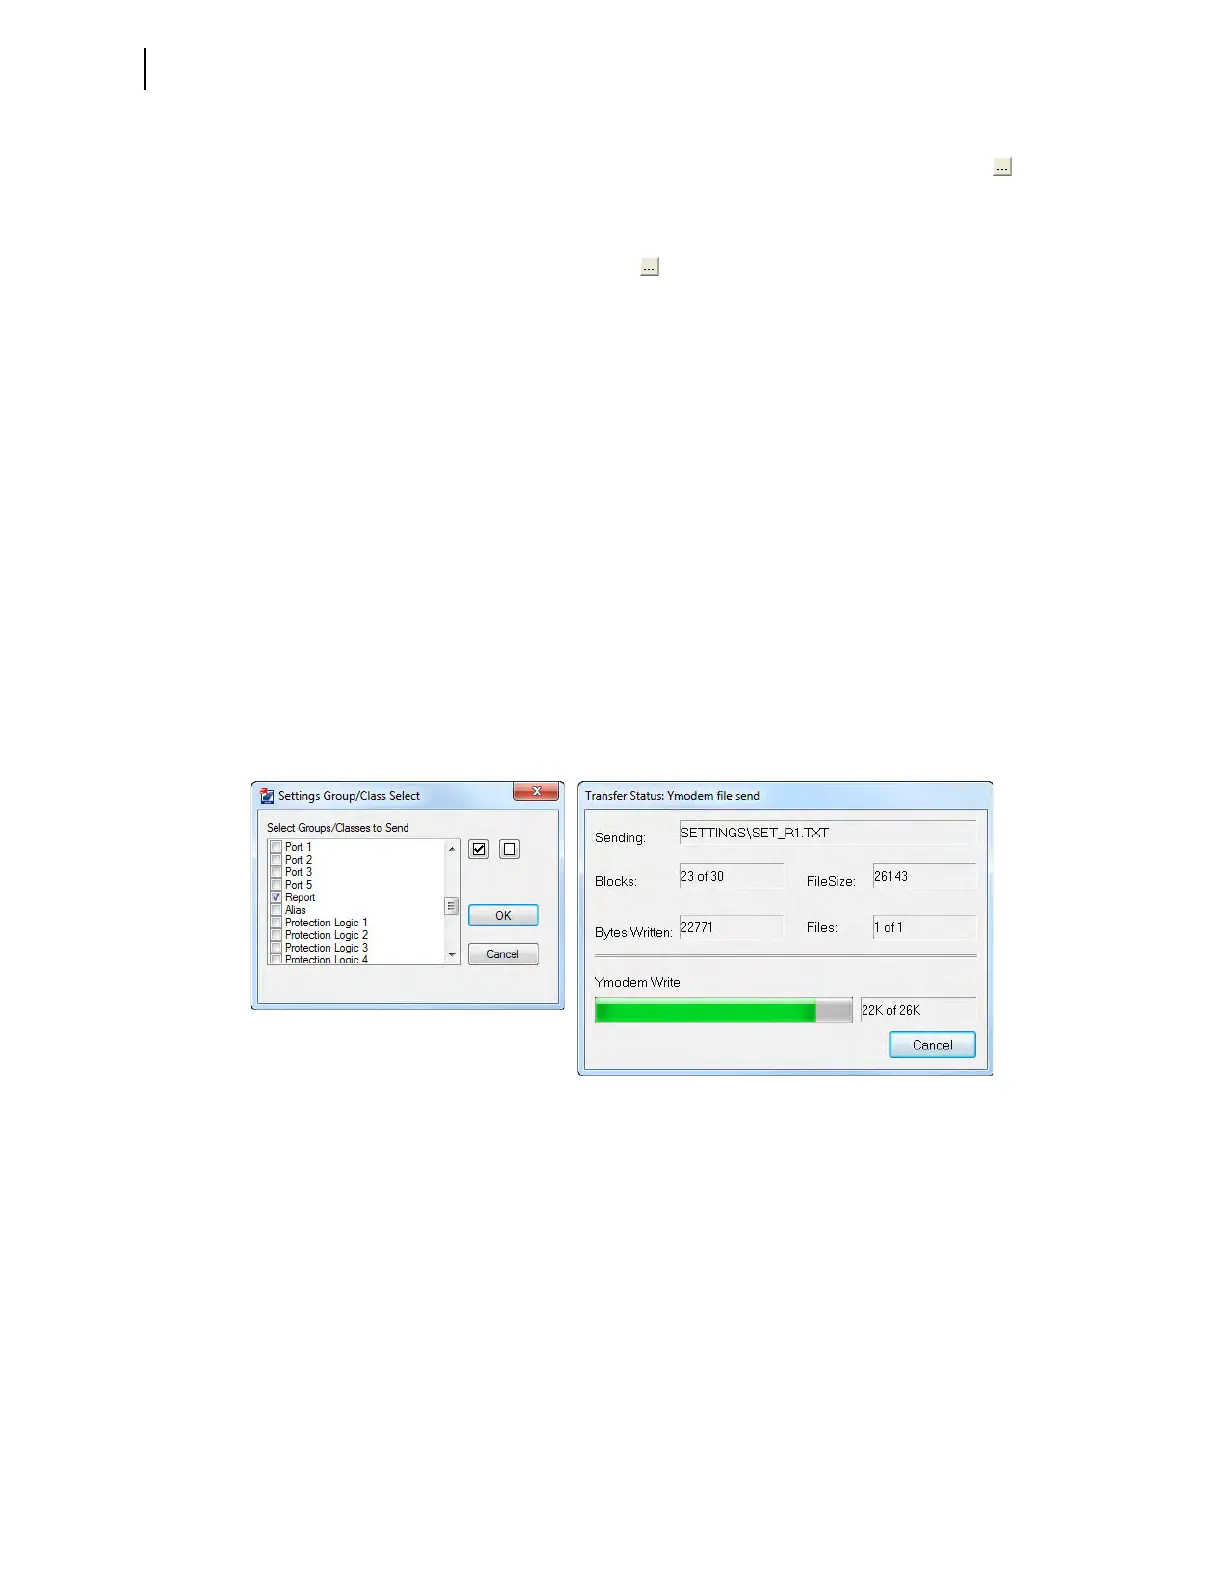
QuickSet prompts you for the settings class you want to send to
the relay, as shown in the first dialog box of Figure 3.50.
b. Click the Report check box.
c. Click OK.
QuickSet responds with the second dialog box of Figure 3.50.
If you see no error message, the new settings are loaded in the relay.
Step 7. Press and release the front-panel TARGET RESET pushbutton to generate
an SER record.
Step 8. View the SER report.
a. Start the QuickSet operator interface.
b. In the top toolbar Tools menu, click HMI > HMI.
c. Click the SER button of the HMI tree view (see Figure 3.51).
QuickSet displays the SER records with a display similar to
Figure 3.52.
Figure 3.50 Uploading Report Settings to the Relay