138
442703/B
Note
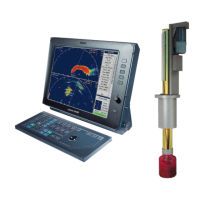
Makesurethatyoukeepthetransducersafe,andthetransducercableand
connectordry.Watchthesecarefullytopreventthesedelicatepartsfrombeing
damaged,stuckorhookedontoprotrudingobjectswhilemanoeuvringthehullunit
intothesonarroom.Donotremovethetransducerprotection(thethickfoam)until
justbeforethehullunitisloweredontotheinstallationtrunk.
2Removetheblindangefromthetopoftheinstallationtrunk.
Ablindangeismountedontheinstallationtrunkforprotectionifthetrunkis
providedwiththeST90delivery.
Storetheblindangeinthesonarroomforpossiblefutureuse.
3Checkthetopoftheinstallationtrunk.
aMakesurethatthesurfaceoftheinstallationtrunkiscleanandfreefromgrit
orotherdamagingparticles.
bMakesurethatthetopoftheinstallationtrunkhasnotbeendamaged,andthat
itissmoothandevenwithoutphysicalscratchesordents.
4O-ring:
aCleantheO-ringgrooveandinspecttheO-ring.
bApplyathinlmofsilicongreaseontheO-ring.
cInstalltheO-ring.
5Removethetransducerprotection.
6LowertheHullUnitcarefullyontotheinstallationtrunk.
Important
Thetransduceriscoveredwithathickredprotectivecoatingmadeofaspecial
plastictype.Theredprotectivecoatingisanvitalpartofthetransducer.Itisvery
importantthatneitherthiscoatingnortheinternalpartsofthetransducerare
damagedduringthehandling,installationorcleaning.
7Alignthemountingholescarefully.
8Mountandtightentherelevantnutsandbolts.
First,tightenallthenutstongertight.Thenworkalternatelyonoppositesidesof
theconstruction.
Usethefollowingnalmaximumtorque:470Nm
Relatedtopics
Installingthehullunit,page124
Hullunitinstallationoverview,page125
SimradST90InstallationManual