21. Performing the setup from WebSetup
Xerox Phaser 790
21–12
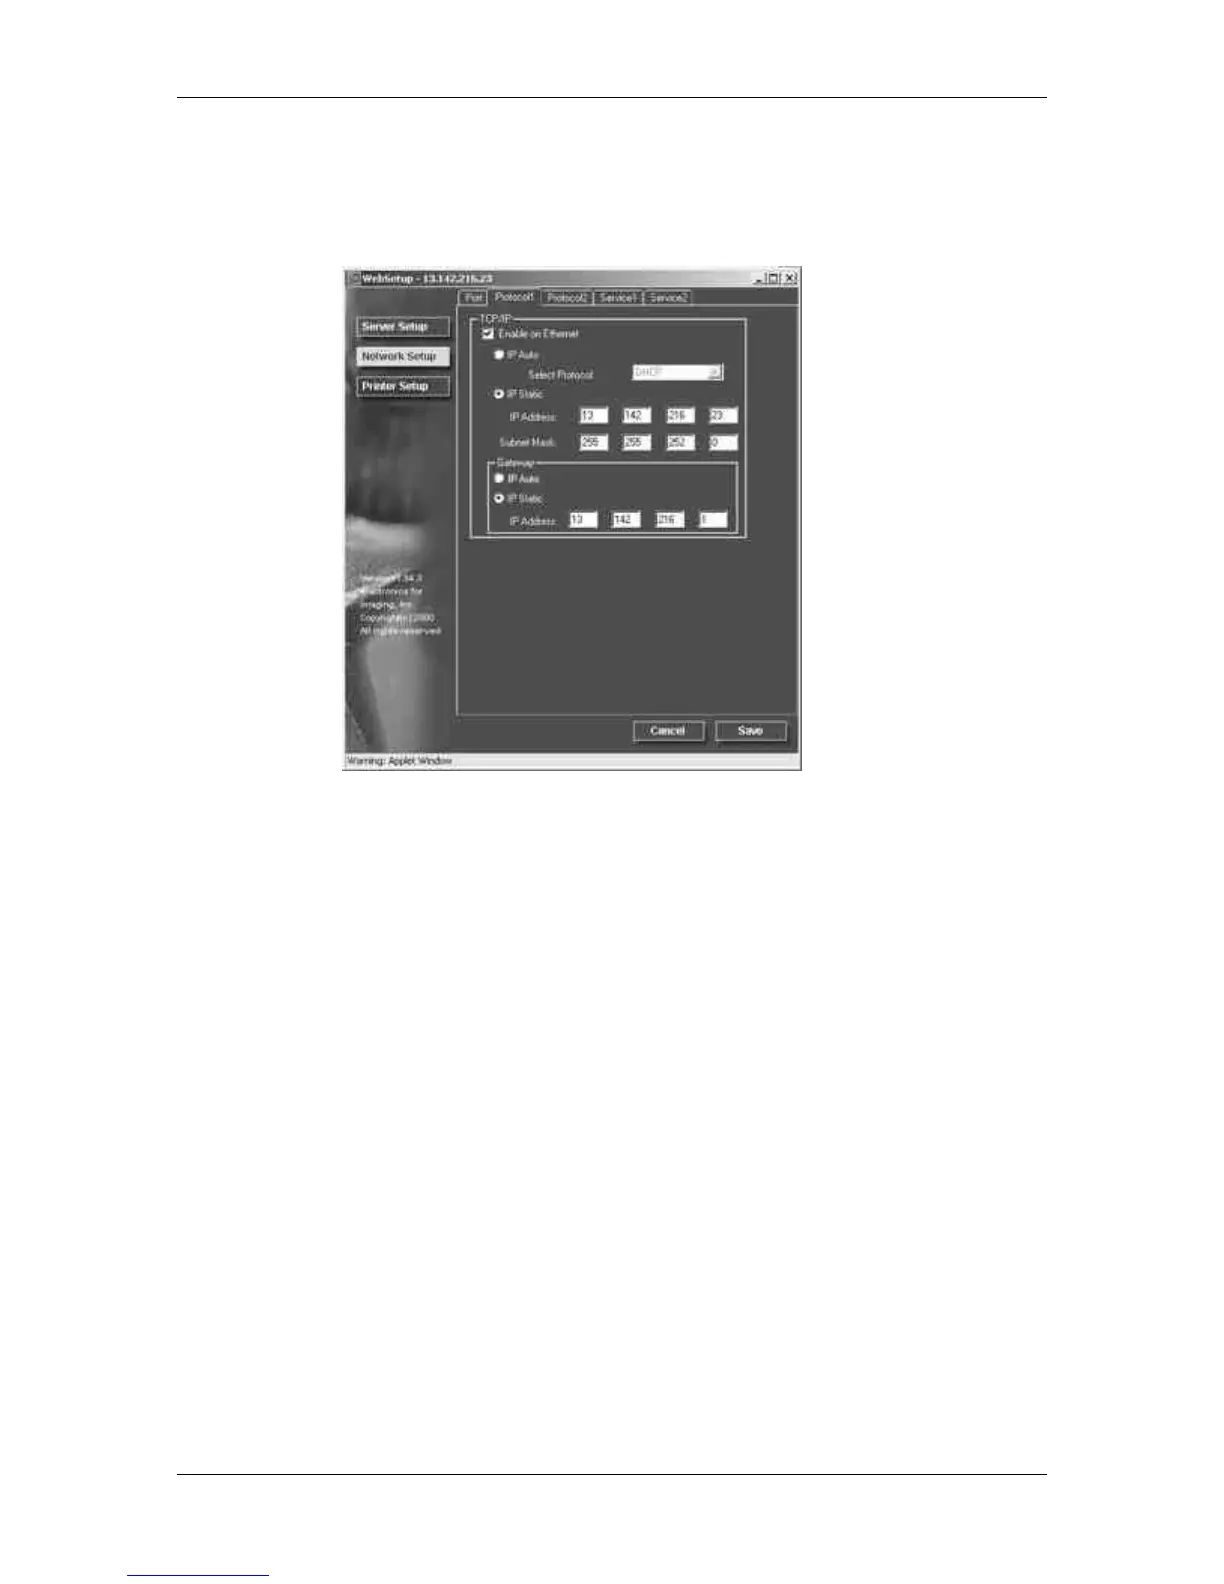
4. Select the Enable on Ethernet check box if you have a TCP/IP
network connected to the printer over Ethernet cabling. If the
check box is selected, the IP Auto and IP Static radio buttons and
the Gateway address fields are enabled.
a. Select the IP Auto radio button to enable the system to find
an IP address. Select the appropriate protocol (DHCP,
BOOTP, RARP) to be used from the enabled Select Protocol
drop down box. The printer reboots when you save your
changes and exit Setup. Allow the printer to complete its
reboot and return to Idle mode before printing a configuration
page or proceeding with any other operation.
b. To set a specific address, select the IP Static radio button to
enable the IP Address and Subnet Mask fields and perform
the following:
Enter the Phaser 790 unique IP address for Ethernet in the
IP Address text boxes (default address used for network
checking is 127.000.000.001). The values in each field are
limited to a range of 0-255.