EasyManuals Logo

Xerox Phaser 790 Documentation

Xerox Phaser 790
542 pages
To Next Page IconTo Next Page
To Previous Page IconTo Previous Page
Page #426 background imageLoading...
Page #426 background image
23. Problem Solving Clearing paper jams
23-2 Xerox Phaser 790
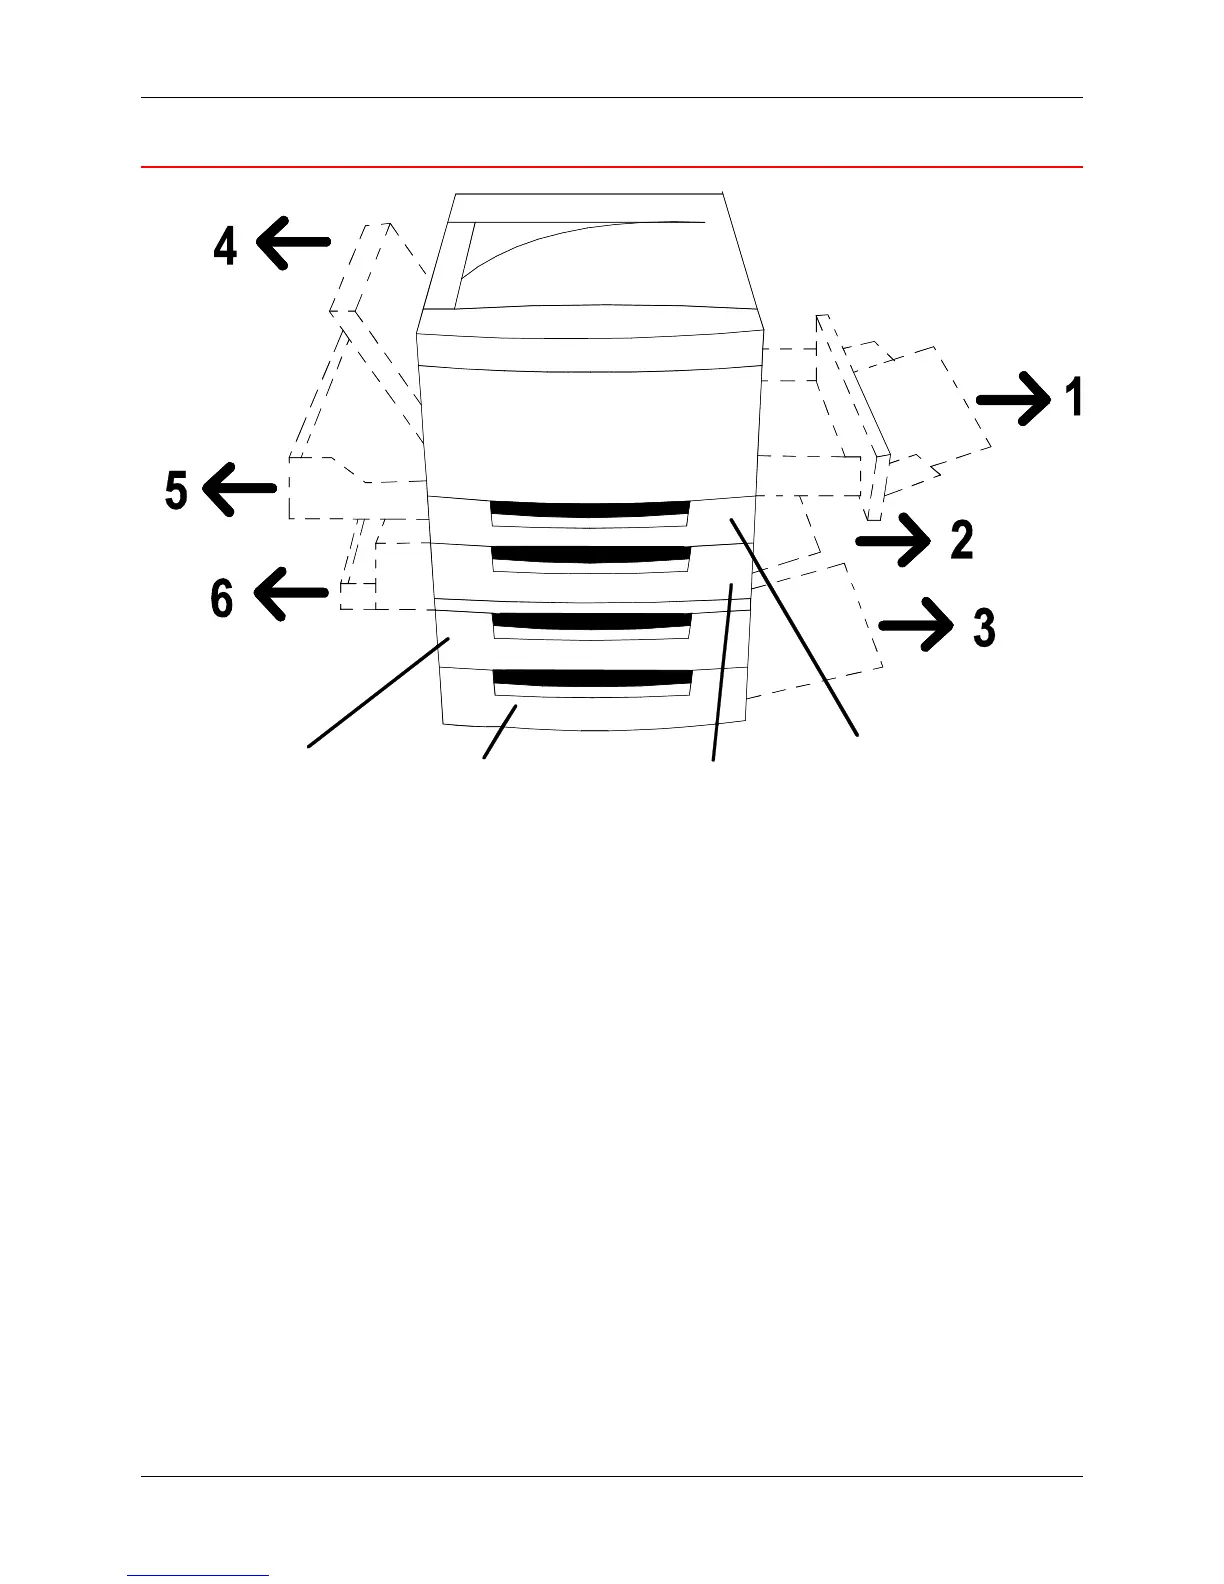
Printer jam clearance areas
D
C
B
A
301069a
Area 1: Bypass Tray and Bypass Transport
Area 2: Paper Feed Area from Paper Tray 1, or the Duplex Tray when
installed.
Area 3: Paper Feed Area from the 2 Tray Module, when installed.
Area 4: Top Left-hand Cover
Area 5: Upper Inverter, if installed. Also provides access to the Fuser area.
Area 6: Lower Inverter, if installed
A: Duplex Tray
B: Paper Tray 1
C: Paper Tray 3, in the 2 Tray Module
D: Paper Tray 2, in the 2 Tray Module

Table of Contents

Other manuals for Xerox Phaser 790

Questions and Answers:

Question and Answer IconNeed help?

Do you have a question about the Xerox Phaser 790 and is the answer not in the manual?

Xerox Phaser 790 Specifications

General IconGeneral
BrandXerox
ModelPhaser 790
CategoryCopier
LanguageEnglish

Related product manuals