Recording Studio
Page 93
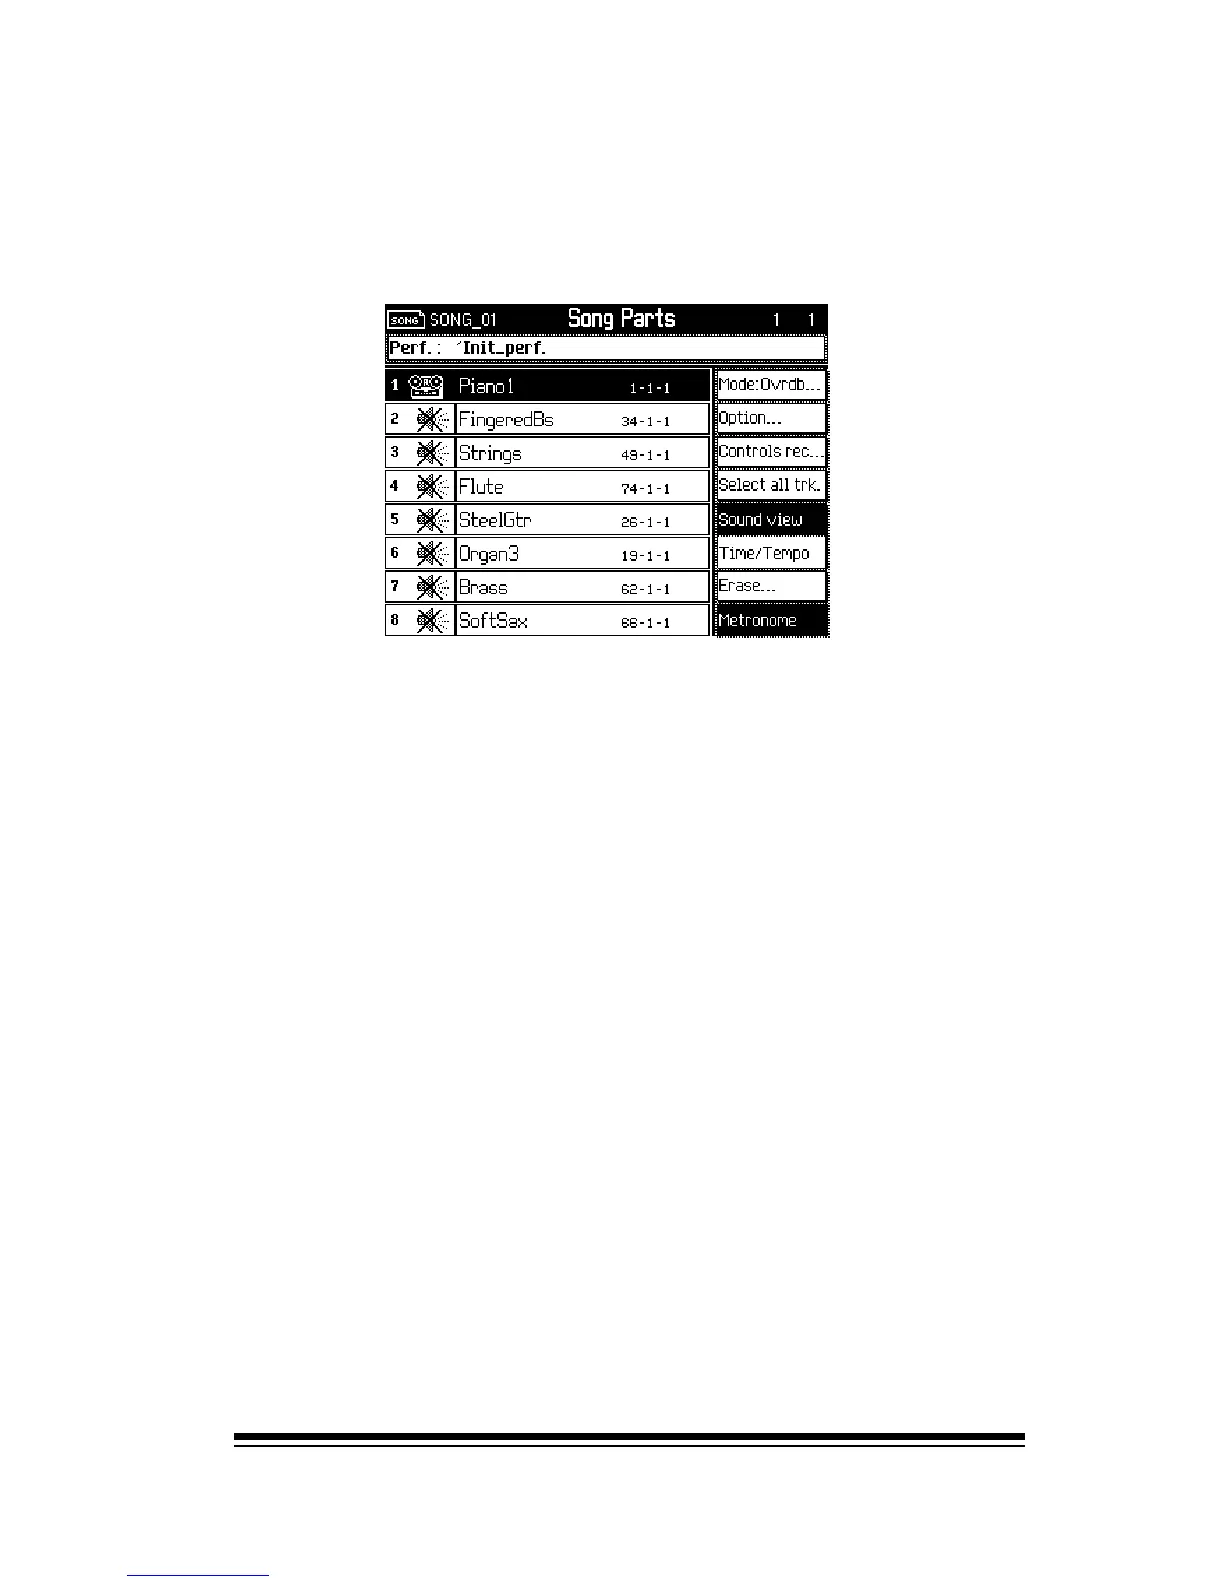
Youll notice that track 1 is already ready for recording, as
indicated by the tape recorder icon. You can change the
sound and volume for this track exactly as before. When
youre ready to start recording, just press PLAY.
When youve finished recording this track press the STOP
button. Now you have three choices. You can record an
overdub onto this track, you can re-record the track or you
can leave it and move on to another track.
To overdub the track, just press PLAY again. You will hear
what you recorded previously while anything else you play
will be recorded in addition. You can keep on overdubbing
the same track in this way as many times as you wish.
This happens because the recording mode, shown at the
top right side of the screen, is set to OVERDUB. If you want
to re-record this track, simply press the MODE button, (F1)
and change the mode to REPLACE, (as we did in the last
example).
If youre satisfied with what youve recorded in this track
and youre ready to move on to the next track, simply press
the button beside the track one more time and it will switch
from recording mode to playback mode. Now youre ready
to select another track for recording.
When youve finished recording, turn off the RECORD but-
ton.
The display you see now should already be familiar to you.
Its just like the display we used when we were adding new
tracks to our EASY SONG. The only difference is that, this
time, the song is completely empty.