2.1 Preparation Flowchart
27
2
Chapter 2 Measurement Preparations
Be sure to read the "Follow these precautions to ensure safe operation and to obtain the full benefits of the various
functions." (p. 4) before installing and connecting this instrument.
Refer to "Appendix 10 Rack Mounting"(p. A14) for rack mounting.
Measurement
Preparations Chapter 2
2.1 Preparation Flowchart
Installing the Instrument (p. 4)
• Using the printer (p. 381)
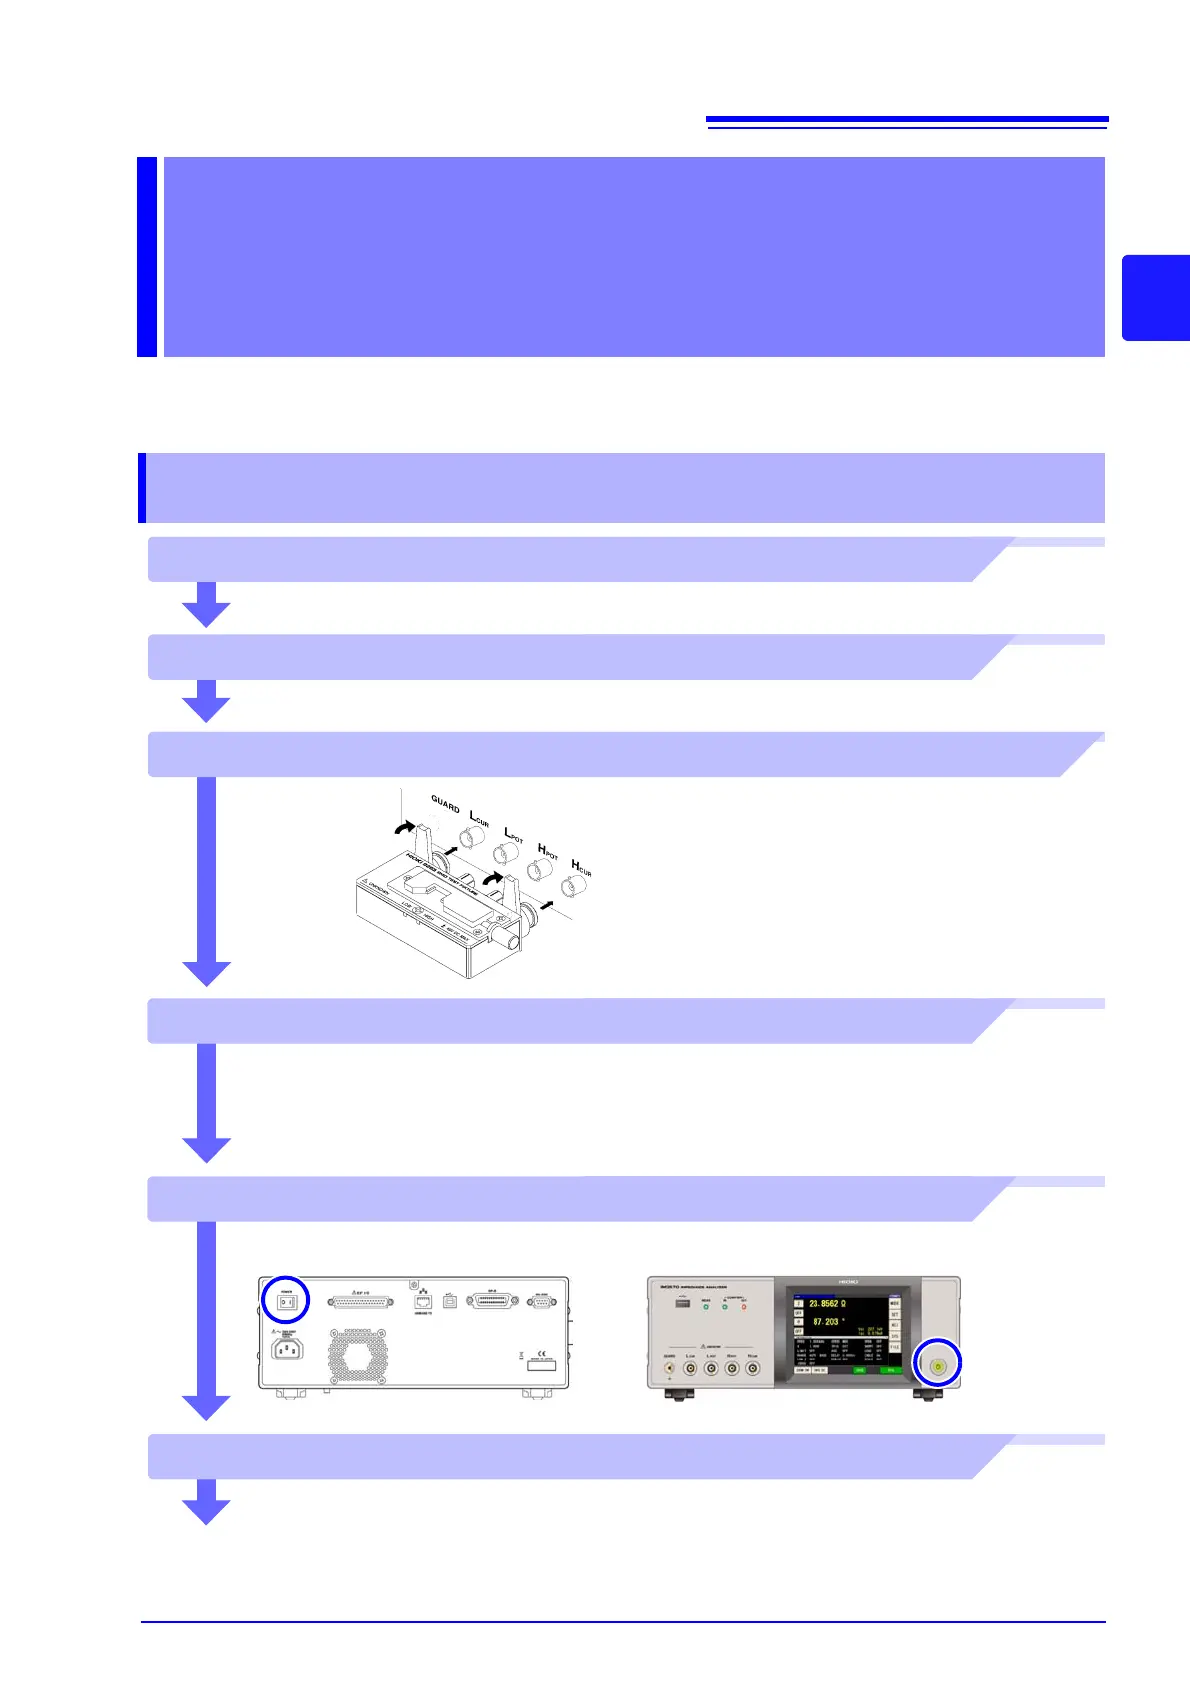
Connect measurement cables, optional Hioki probes or test fixture (p. 30)
Connecting the Power Cord (p. 29)
Turning Power On (p. 31)
Connect the external interface (as needed)
1
3
2
5
4
• RS-232C
•GP-IB
• USB
•LAN
Make instrument settings
6
Connect to the test sample
When finished measuring, turn the power off (p. 31)
FrontRear
See Communication Instruction
Manual “Chapter 2” (CD)