In setting group Action
[Scan template 3: Check print] Define whether a check plot is made for each
scanned file and how the check prints are or-
dered (by set or by page).
NOTE
The [Scan template 3: Check print]
options are available for [Black/
white] scans only.
2. Click “Edit” in the settings group bar or click on the value of a single setting.
3. Click [OK] to confirm your entries or [Cancel] to reject your entries.
Once you have enabled the [File (scan-to-file)] option and set your preferred [Destination], you
can copy with a scan-to-file template. You can now start a scan job from the scanner operator
panel. For more information, see
Introduction to scan-to-file jobs
on page 206.
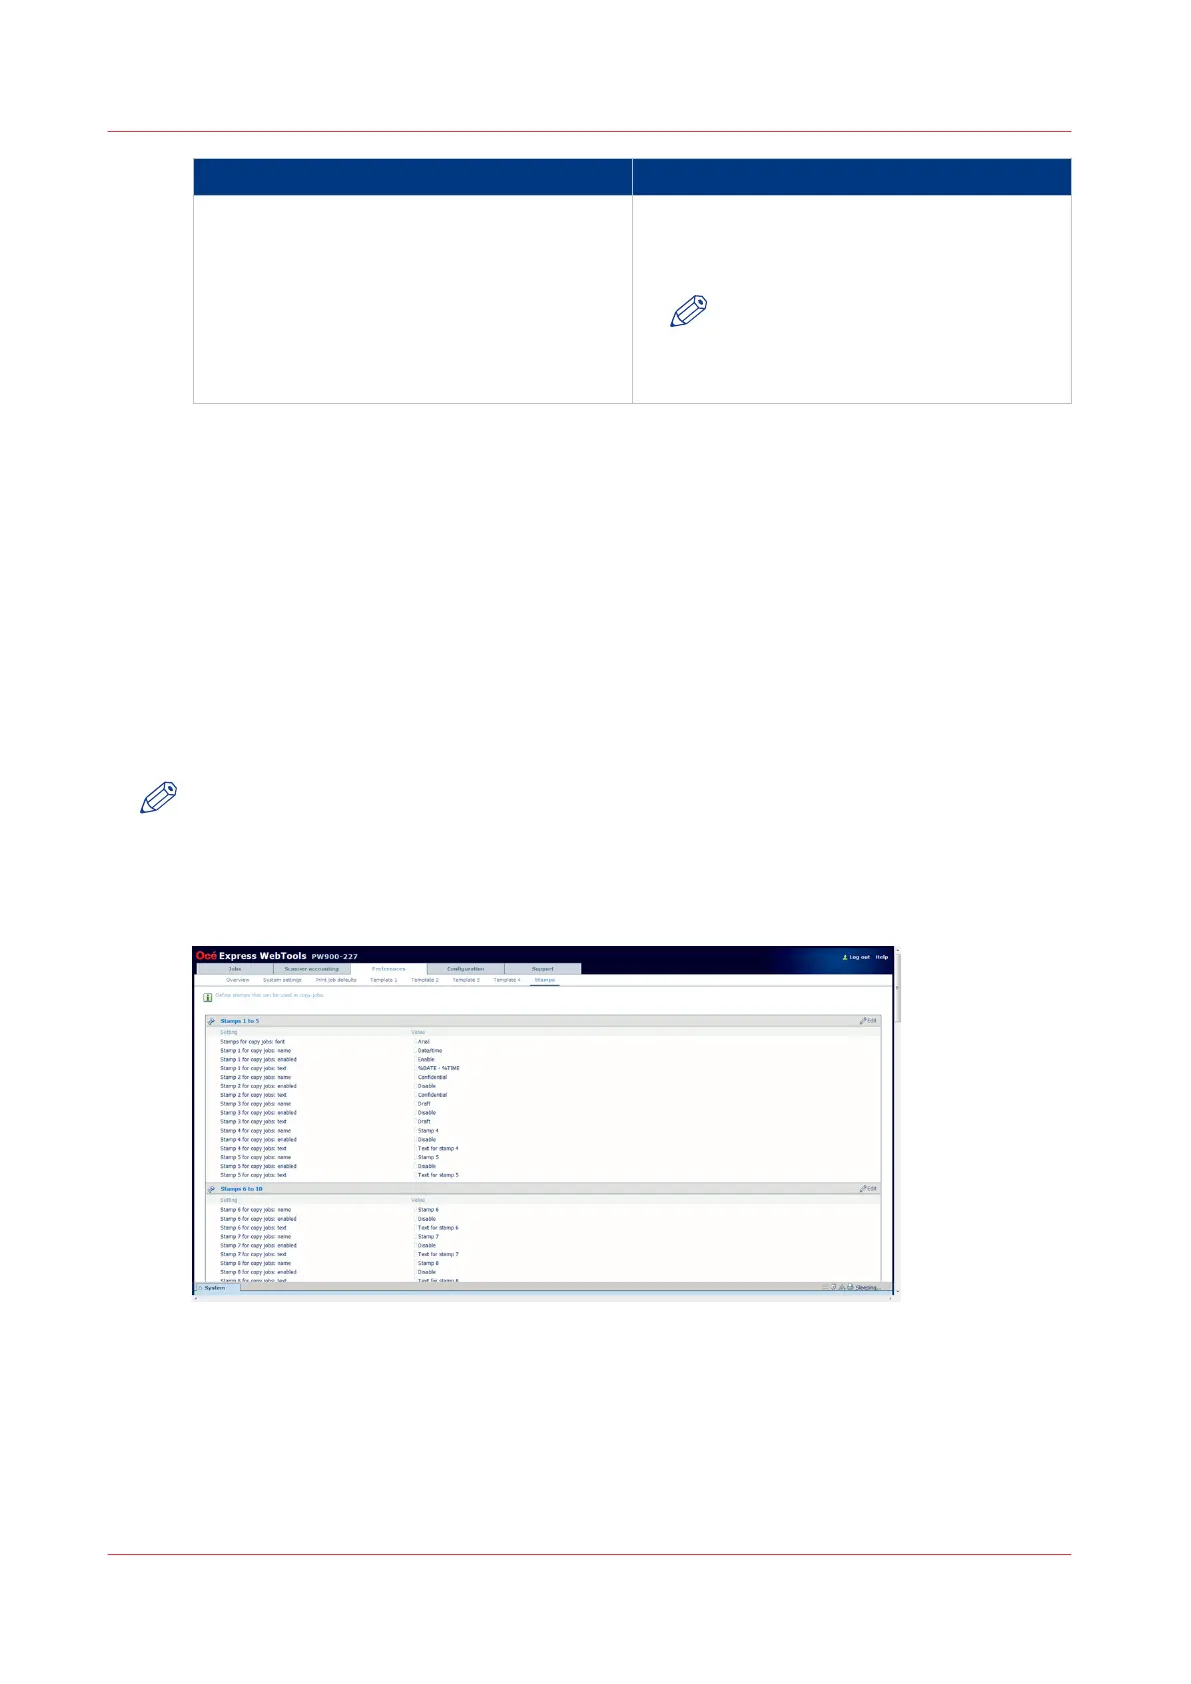
Define the stamps preferences
Introduction
Here you can define the preferred values for the stamps (as visible on the scanner operator
panel).
NOTE
Before you can edit a setting or a settings group, you must log on as a key operator or power
user.
Illustration
[25] Stamps defaults
Procedure
1.
Click [Preferences] - [Stamps] .
The stamps settings are grouped in settings for 10 stamps. You can find detailed information
about the settings in the tooltip.
Define the stamps preferences
128
Chapter 3 - Define your workflow with Océ Express WebTools