11A-55
TOP AND FRONT OF ENGINE
Camshaft: Removal - Refitting
K9K
11A
a Apply four beads (6) of RESIN ADHESIVE (see Ve-
hicle: Parts and consumables for the repair)
(04B, Consumables - Products) 7 mm in diameter
on the cylinder head.
II - REFITTING OPERATION FOR PART
CONCERNED
a Fit the camshaft in place by placing the camshaft
groove on the timing end vertically and facing up-
wards.
a Refit the camshaft bearings, observing their original
positions (bearing No. 1 at the flywheel end).
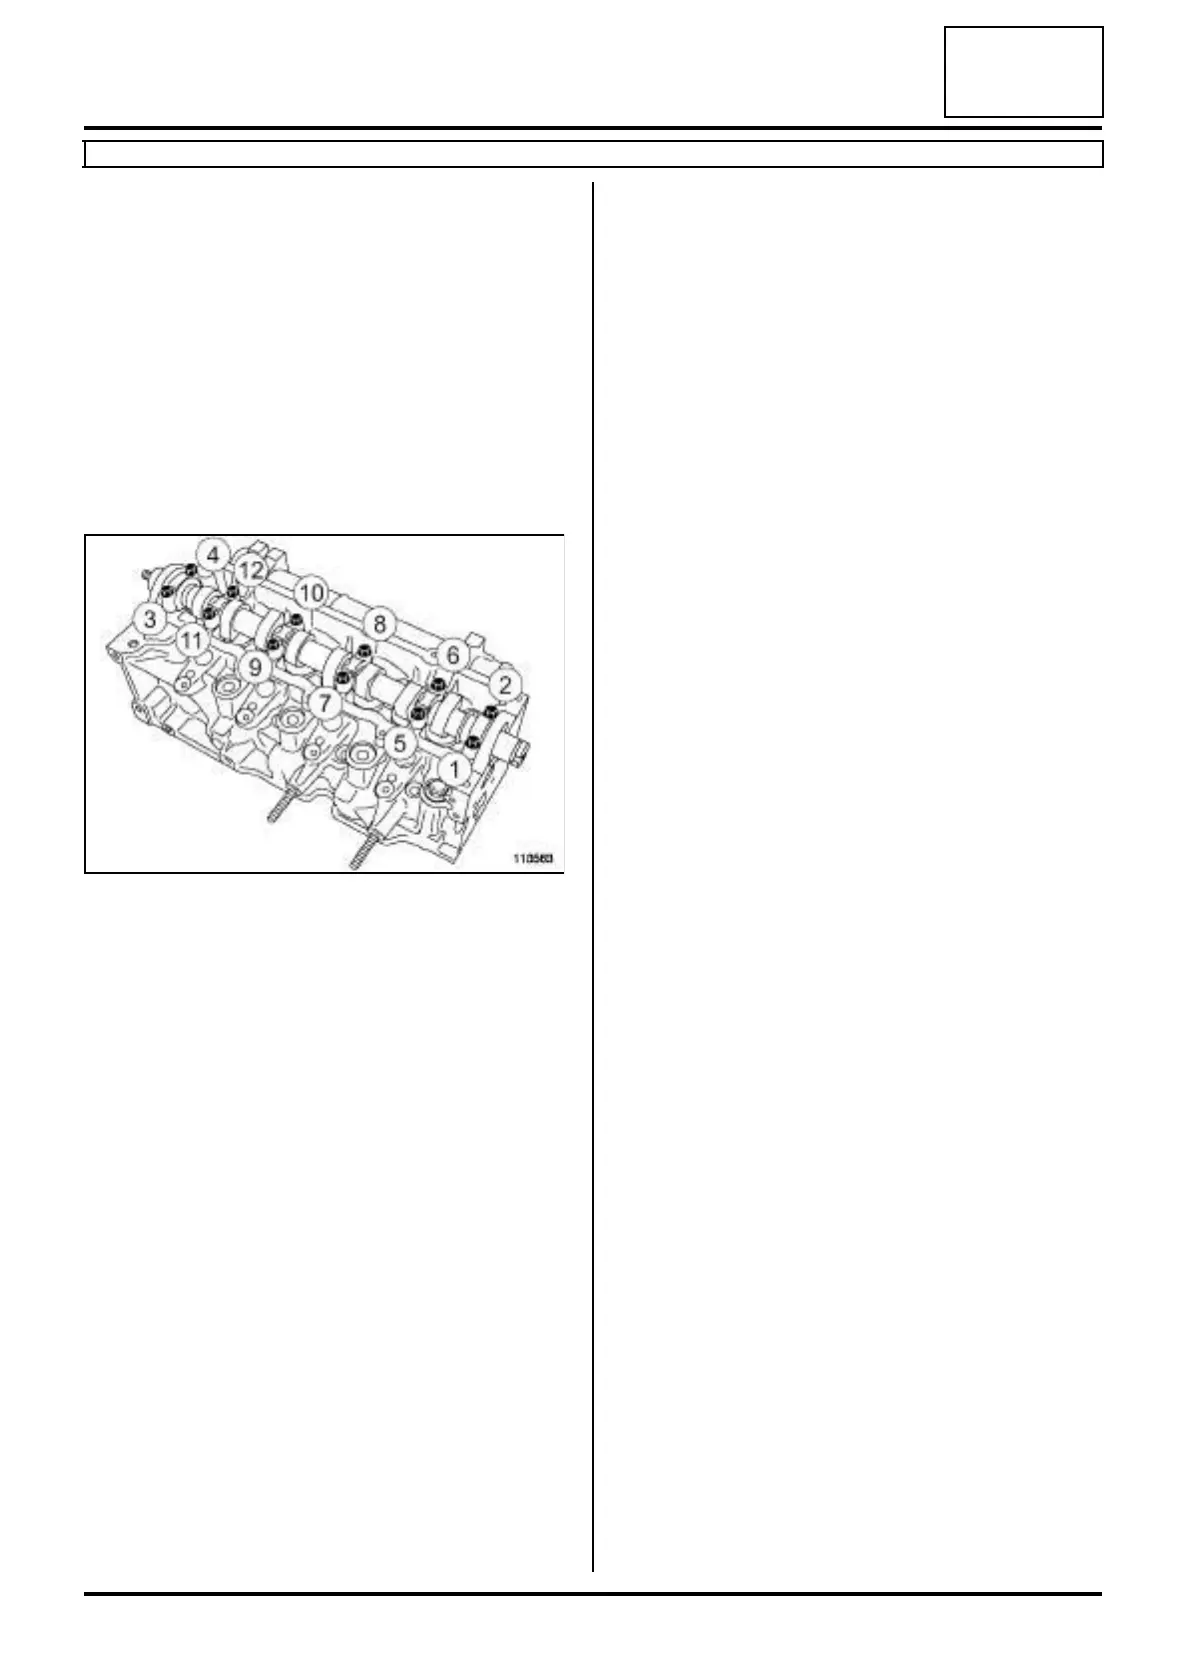
a Refit the camshaft bearing bolts (1) , (3) , (4) and (2)
in order.
a Tighten the camshaft bearing bolts (1) , (3) , (4) and
(2) in order.
a Refit the camshaft bearing bolts in order.
a Tighten to torque and in order the bolts of the cam-
shaft bearings (10 N.m).
a Check and adjust (if necessary) the valve clearance
(see Valves: Adjustment) .
III - FINAL OPERATION
a Refit:
-the camshaft seal (see 11A, Top and front of en-
gine, Camshaft seal, timing end: Removal - Re-
fitting, page 11A-56) ,
-the rocker cover (see 11A, Top and front of en-
gine, Rocker cover: Removal - Refitting, page
11A-42) ,
-the vacuum pump (see Vacuum pump: Removal
- Refitting) (37A, Mechanical component controls),
-the timing belt (see 11A, Top and front of engine,
Timing belt: Removal - Refitting, page 11A-17) ,
- the crankshaft accessories pulley (see 11A, Top
and front of engine, Crankshaft accessories
pulley: Removal - Refitting, page 11A-10) ,
- the camshaft position sensor (see 13B, Diesel in-
jection, Camshaft position sensor: Removal -
Refitting, page 13B-7) ,
- the right-hand suspended engine mounting (see
19D, Engine mounting, Right-hand suspended
engine mounting: Removal - Refitting, page
19D-4) ,
- the accessories belt (see 11A, Top and front of
engine, Accessories belt: Removal - Refitting,
page 11A-2) ,
- the engine undertray,
- the front right-hand wheel arch liner (see Front
wheel arch liner: Removal - Refitting) (55A, Ex-
terior protection),
-the front right-hand wheel (see Wheel: Removal -
Refitting) (35A, Wheels and tyres),
- the air filter box (see 12A, Fuel mixture, Air filter
unit: Removal - Refitting, page 12A-6) .
a Connect the battery (see Battery: Removal - Refit-
ting) (80A, Battery).
113563