3.77
Date Code 20171006 Instruction Manual SEL-400 Series Relays
Basic Relay Operations
Readying the Relay for Field Application
Step 6. Click File > Save to save the new settings in QuickSet.
Step 7. Upload the new settings to the relay.
a. Click File > Send.
QuickSet prompts you for the settings class or instance you want
to send to the relay.
b. Select the Group 1 check box and the Output check box, as
shown in the first dialog box of Figure 3.62.
c. Click OK.
QuickSet responds with a display similar to the second dialog
box shown in Figure 3.62.
If you see no error message, the new settings are loaded in the relay.
To confirm that you have prepared an out-of-synchronization/loss-of-HIRIG
mode alarm, disconnect the IRIG-B input. The relay alarm will activate.
Readying the Relay for Field Application
Before applying the relay in your power system, set the relay for your particular
field application. Be sure to modify the relay factory-default settings for your
power system conditions to enable relay features to help you protect and control
your system.
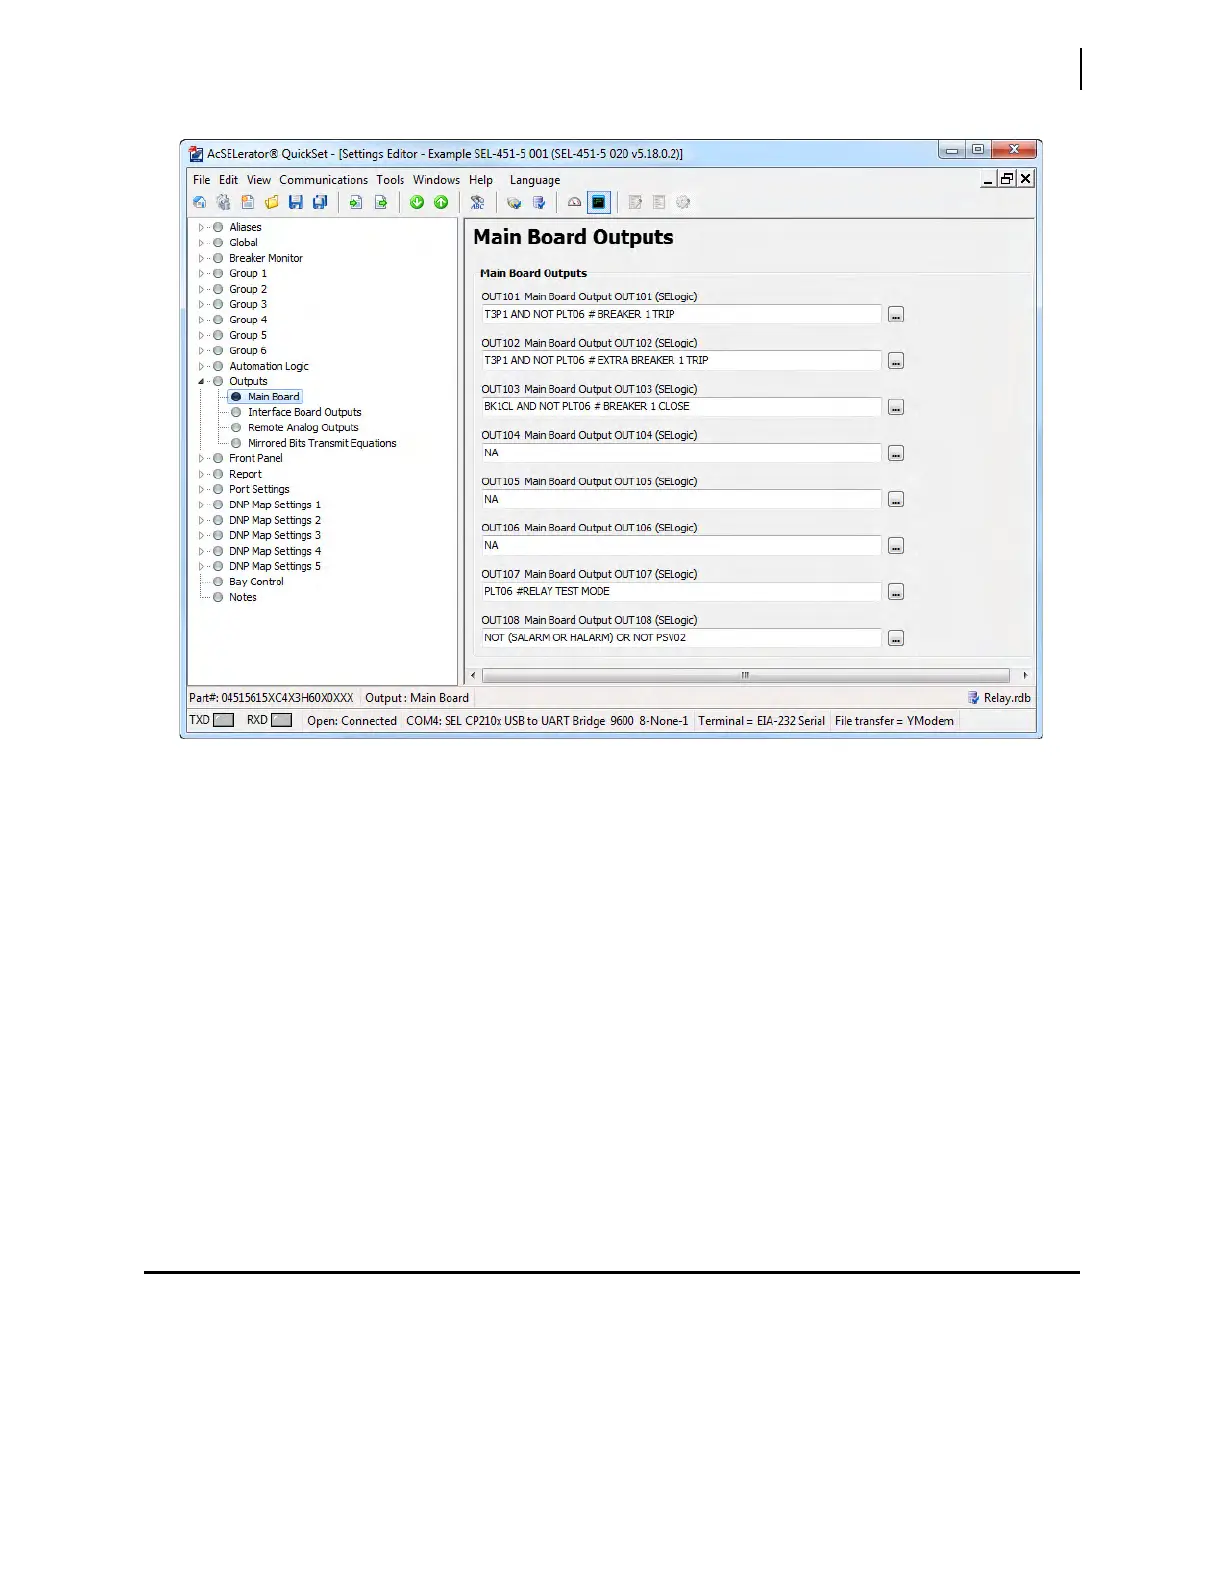
Figure 3.68 Setting OUT108 in QuickSet