Replacing the SH1R Air Filter Pad
l Cooling and Airflow
l Clearance Requirements
l Air Filter Pads
Replacing the SH1R Air Filter Pad
1. Verify that you are properly grounded with an anti-static wrist strap or heel strap
connected to the grounded ESD jack.
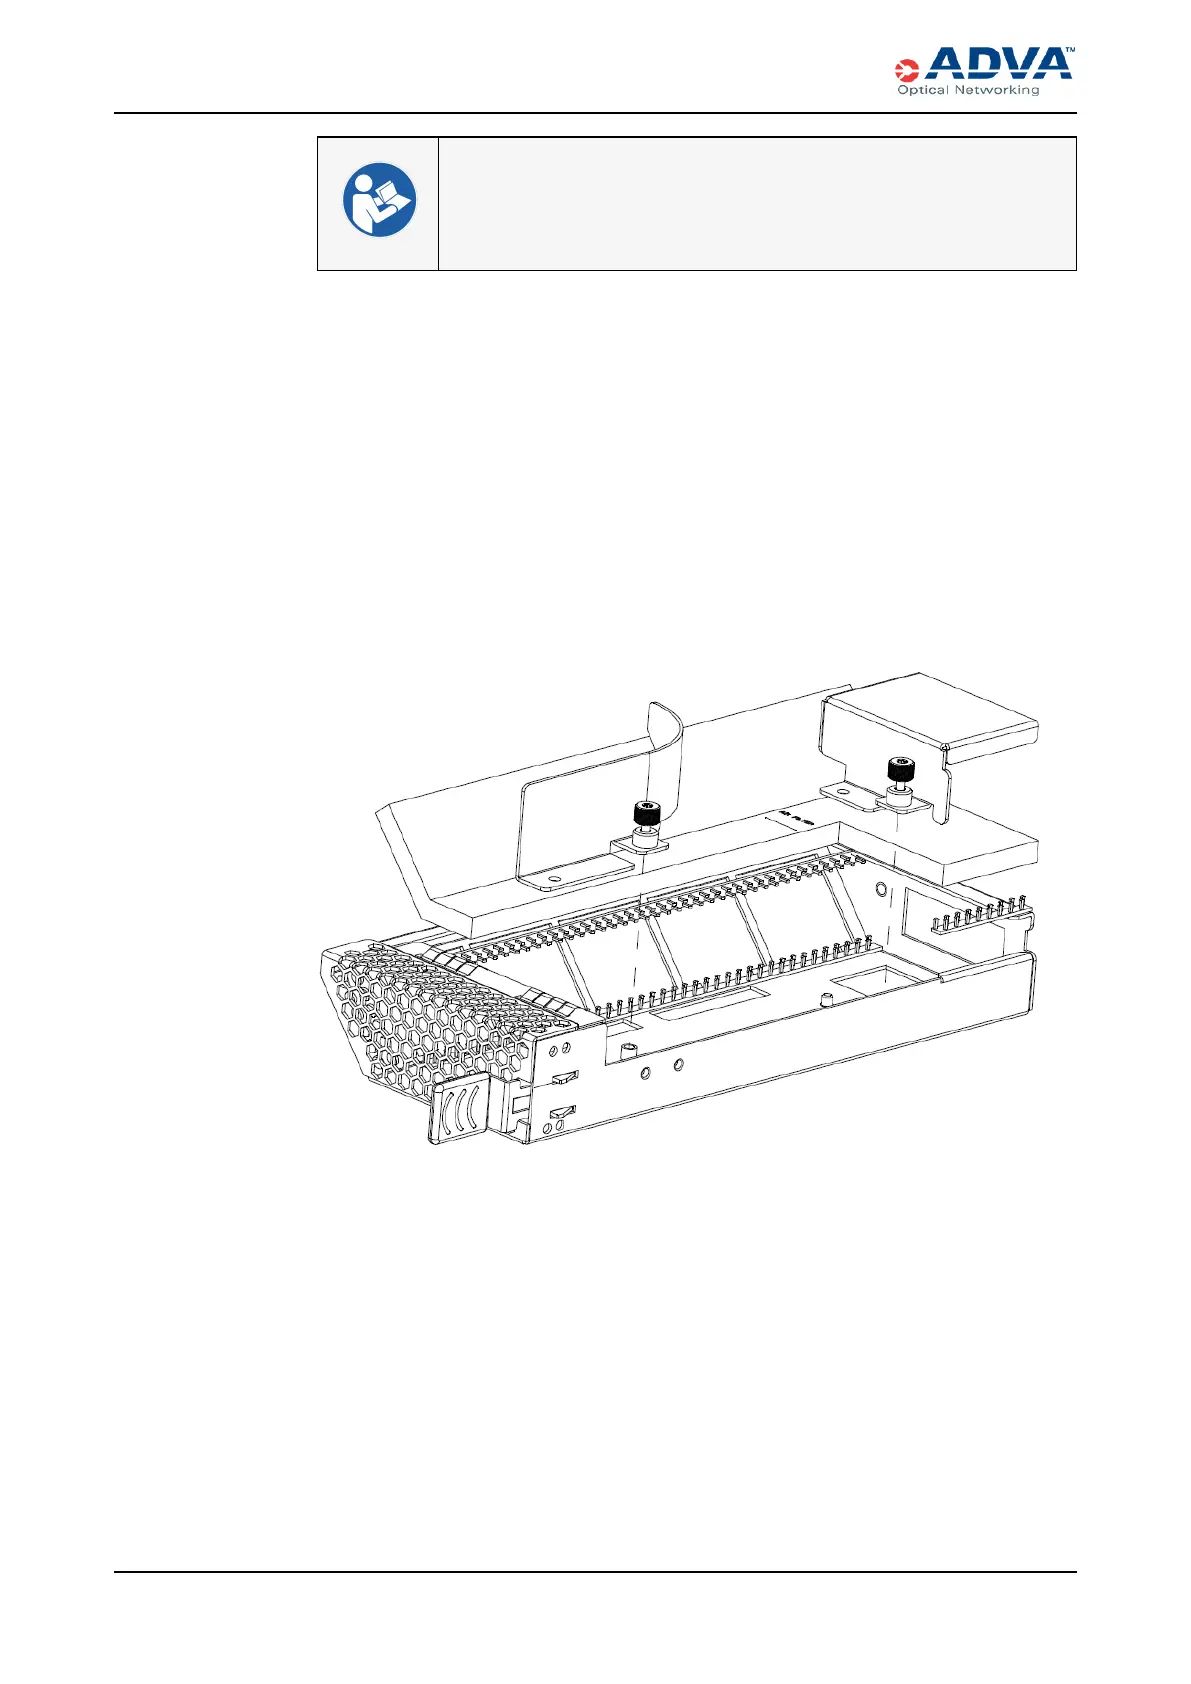
2. Press the tab to the left to unlock the air filter unit located on the right side of the shelf
(see Figure 17 for location).
3. Carefully slide the air filter unit out of the shelf.
4. Place the unit on a static-dissipative mat.
5. Use a Torx T10 screwdriver to unscrew the two thumb screws from the air filter unit.
The air filter resides below the two metal components.
6. Lift the two metal components from the unit.
7. Use your fingers to carefully remove the dirty air filter pad.
8. Insert a new replacement air filter pad.
9. After you have completely inserted the air filter, place the two metal components
back onto the unit.
10. Hand-tighten the thumb screws.
11. Use a Torx T10 screwdriver to gently tighten the thumb screws as needed. Do not
overtighten.
12. Insert the air filter unit back into the shelf.
13. Gently apply pressure to the faceplate while pushing the unit into the slot. >
361 FSP 3000R7 High-Density Subshelf Guide - R17.2 - Issue:B
 Loading...