EPSON EPL-N3000/AcuLaser M4000N Revision C
Troubleshooting Troubleshooting for Individual Units 127
Confidential
3.4.17 Electrical Noise
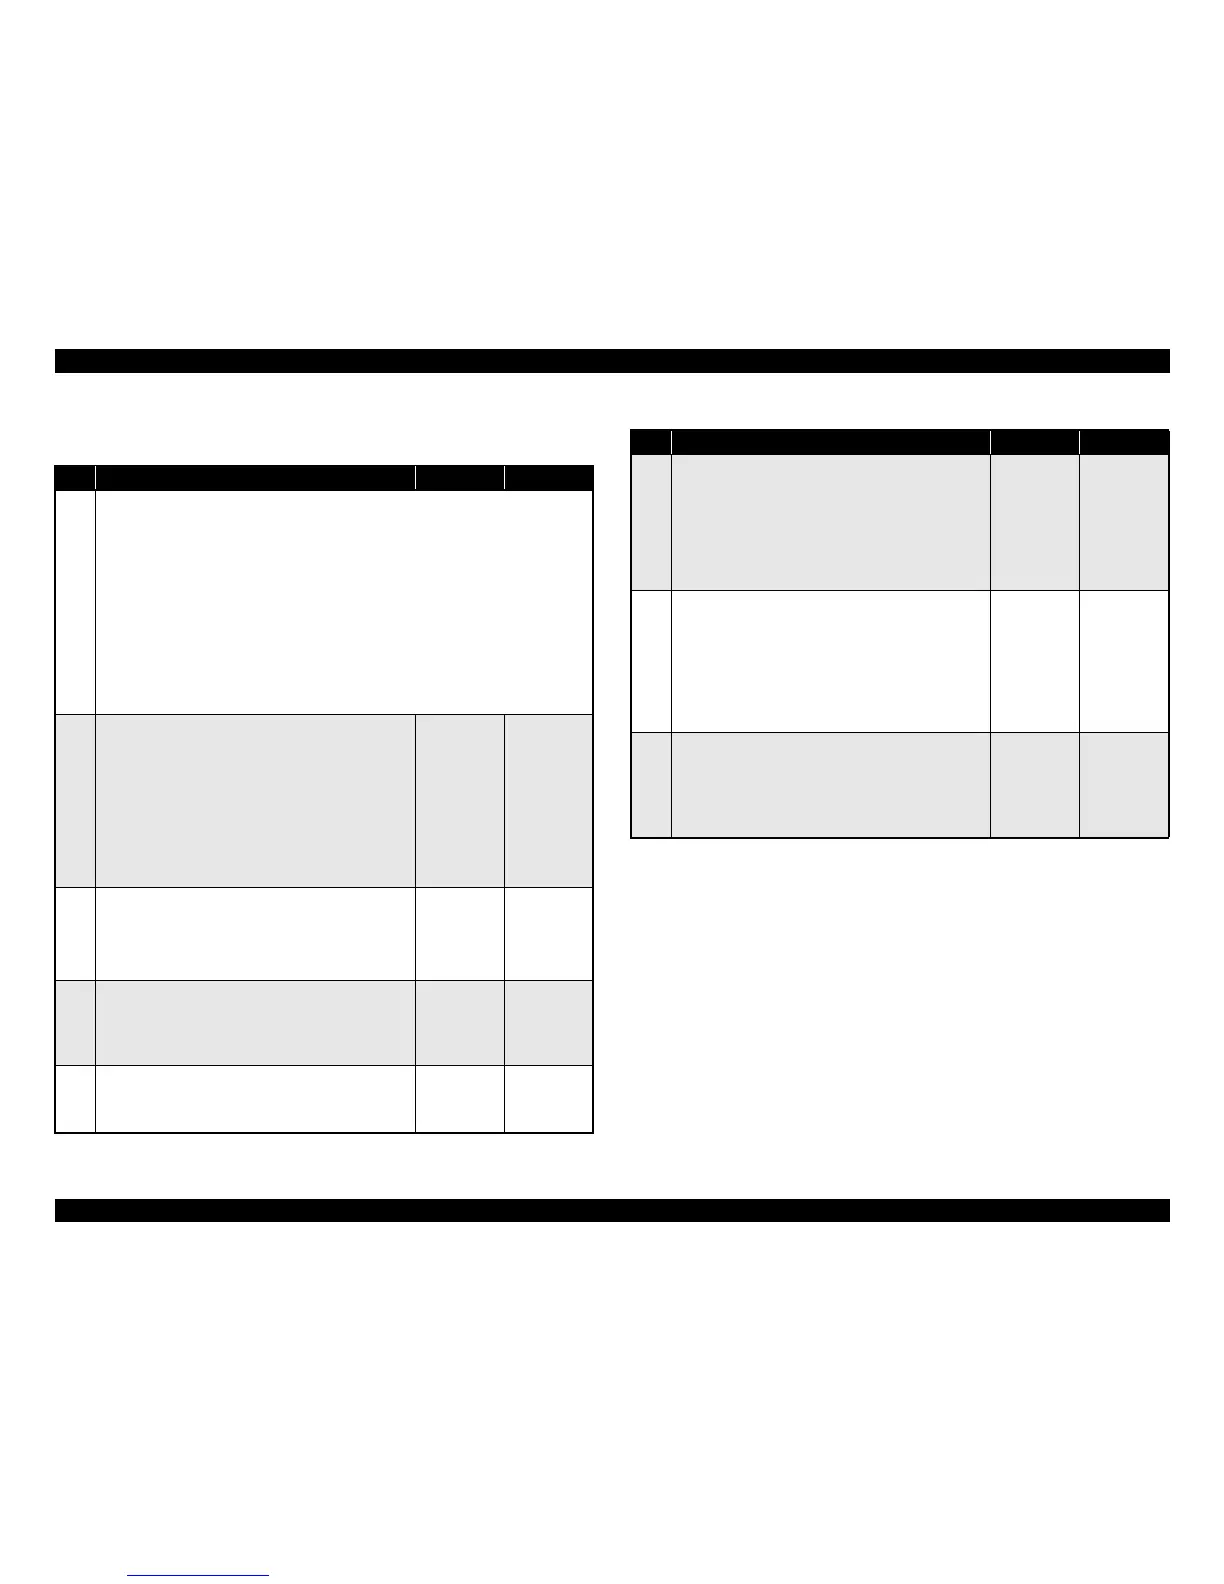
Table 3-76. Troubleshooting for Electrical Noise
Step Action and Question Yes No
Parts below can be the source of this error (Chapter 4 Disassembly and Assembly)
•HVPS/MCU (p.301)
• GUIDE ASSY CRU R (p.257)
• FUSER ASSY (p.253)
• Imaging Cartridge
• HARNESS ASSY ANT
• HARNESS ASSY AC110V (p.289)
• HARNESS ASSY LVPS
• Option 550 Paper Feeder (p.303)
• PWBA FEEDER 550 (p.310)
• PWBA DUPLEX (p.347)
1
External noise
1. Check to see if within 3 m from the printer there is
another electrical apparatus, such as a generator, a
radio transmitter or an apparatus incorporating a
motor.
2. Turn off the power to the electrical apparatus in
question or move the printer to a position at least 6
m distant from the apparatus.
♦Does the problem with electrical noise still occur?
Go to Step 2
Problem
solved
2
AC grounding
1. Check the AC power connection.
♦Is the AC power cable connected and grounded
properly?
Go to Step 3
Ask the
customer for
repair of the
AC power
connection.
3
HARNESS ASSY AC100V
1. Inspect the grounding screw of the cable connected
to the HARNESS ASSY AC100V.
♦Is the cable grounded properly?
Go to Step 4
Install the
grounding
screw
properly.
4
Imaging Cartridge
1. Replace the Imaging Cartridge.
♦Does the problem with electrical noise still occur?
Go to Step 5
Problem
solved
5
GUIDE ASSY CRU R (1)
1. Is there continuity in the harness of the GUIDE
TRAY LEFT between Tray 1 Size Switch
↔ J1821
and between Tray 2 Size Switch ↔ J1821?
♦Are the Plates Earth of the GUIDE ASSY CRU R in
contact with the respective terminals on the HVPS/
MCU properly?
Go to Step 6
Replace the
GUIDE ASSY
CRU R
6
GUIDE ASSY CRU R (2)
1. Remove the Imaging Cartridge.
2. Remove the GUIDE ASSY CRU R. (p.257)
3. Check the Plate Earth of the GUIDE ASSY CRU R.
♦Are the Plate Earth of the GUIDE ASSY CRU R
free from abnormalities, dirt, obstacles or
deformation?
Go to Step 7
Clean the
plates or
replace the
GUIDE ASSY
CRU R
7
HARNESS ASSY ANT
1. Disconnect the connector P/J15 on the HVPS/MCU.
(Refer to “Connectors (p.406)”)
2. Check continuity between J15 ↔ J150.
♦Is there continuity between J15 ↔ J150?
Go to Step 8
Replace the
HARNESS
ASSY ANT
Table 3-76. Troubleshooting for Electrical Noise (continued)
Step Action and Question Yes No