EPSON EPL-N3000/AcuLaser M4000N Revision C
Disassembly and Assembly Option 550 Paper Feeder 318
Confidential
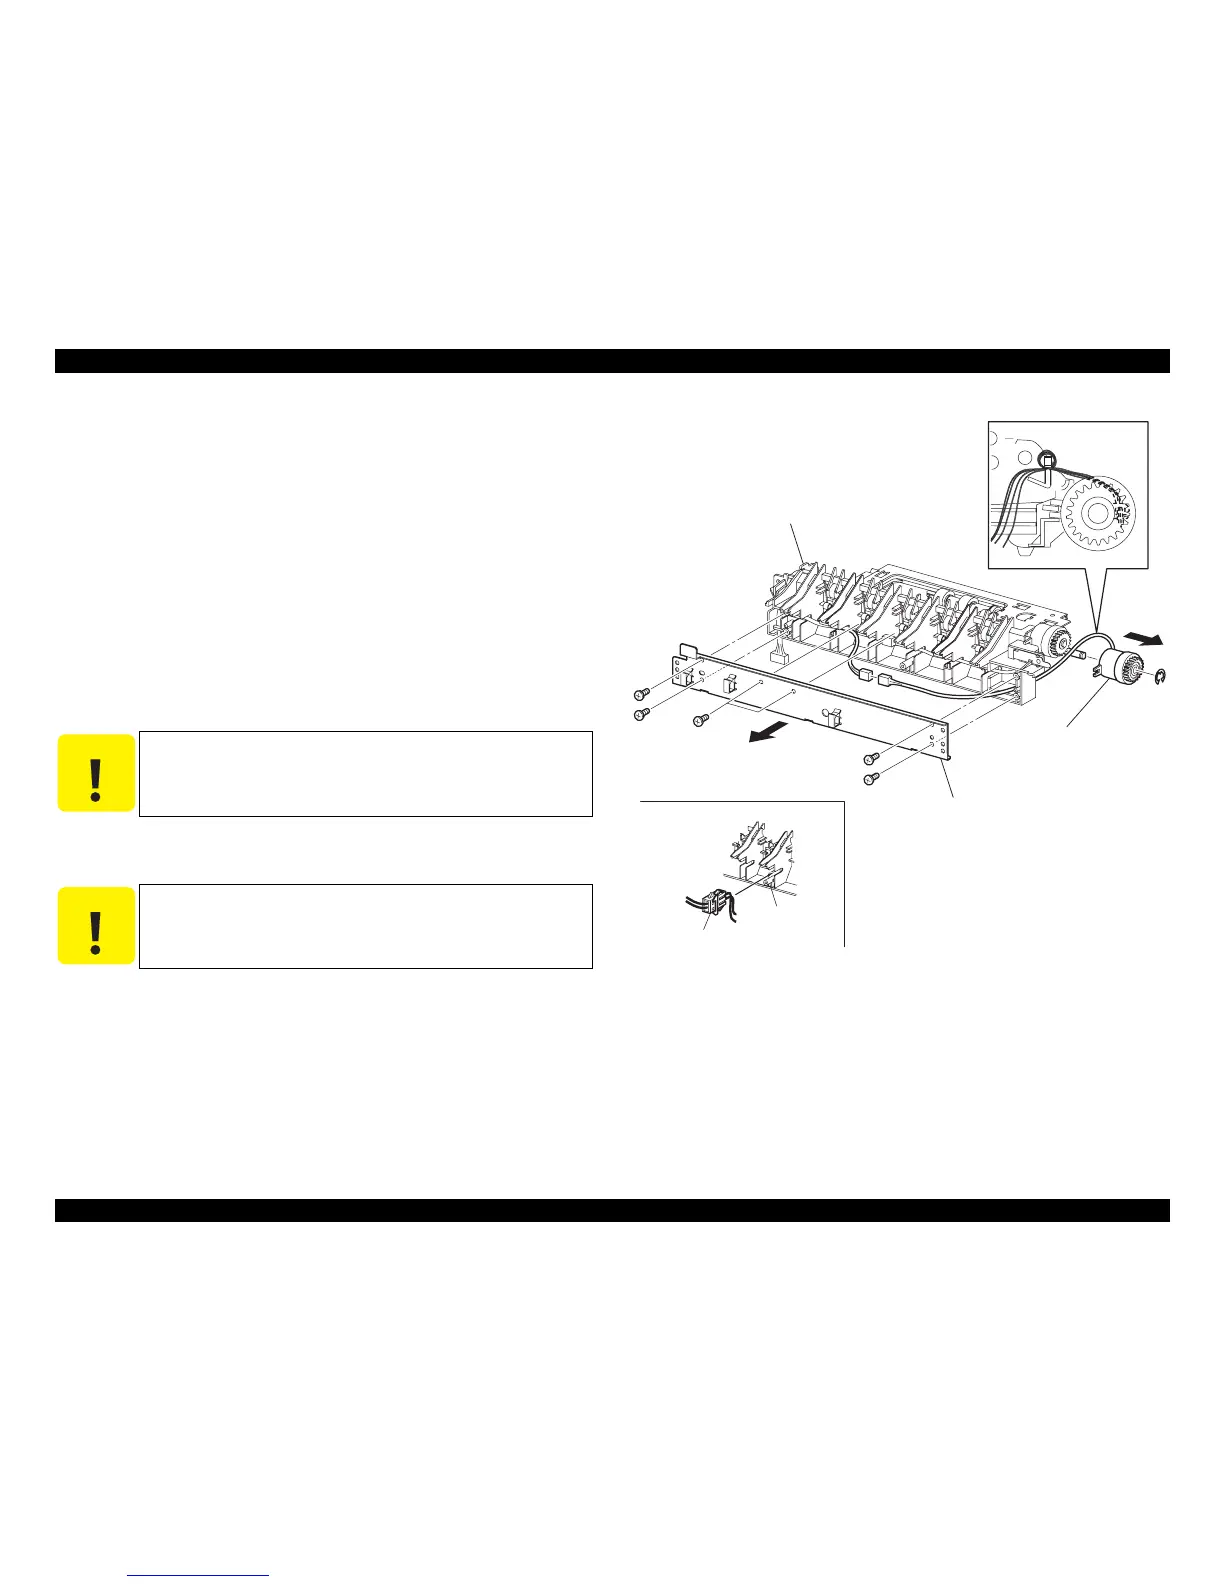
4.11.14 CLUTCH ASSY PH
Removal
1. Remove the 550 FEEDER OPTION. (p.311)
2. Remove the six screws (gold, tapping, 8mm) securing the PLATE TIE.
3. Remove the PLATE TIE from the CHUTE OUT.
4. Disconnect the connector (P/J853) of the CLUTCH ASSY PH from the
HARNESS ASSY CLSNR1.
5. Remove the E-ring retaining the CLUTCH ASSY PH and remove the CLUTCH
ASSY PH from the SHAFT FEED.
Installation
1. Install the CLUTCH ASSY PH to the SHAFT FEED, and secure it with the E ring.
2. Connect the connector (P/J853) of the CLUTCH ASSY PH to the HARNESS
ASSY CLSNR1.
3. Install the PLATE TIE to the CHUTE OUT with the six screws (gold, tapping,
8mm).
4. Install the 550 FEEDER OPTION. (p.311)
Figure 4- 122. CLUTCH ASSY PH Removal
C A U T I O N
When installing it, match the notch of the CLUTCH ASSY PH
to the boss of the CHUTE OUT.
Carefully route the harness of the CLUTCH ASSY PH.
C A U T I O N
Place the connected connector between the ribs of the CHUTE
OUT.
JG3515AA
CHUTE OUT
CLUTCH ASSY PH
PLATE TIE
Note 1)
CONNECTOR
CHUTE OUT
WHEN ASSEMBLING
5)
4)
3)
2)