EPSON EPL-N3000/AcuLaser M4000N Revision C
Disassembly and Assembly Xero 241
Confidential
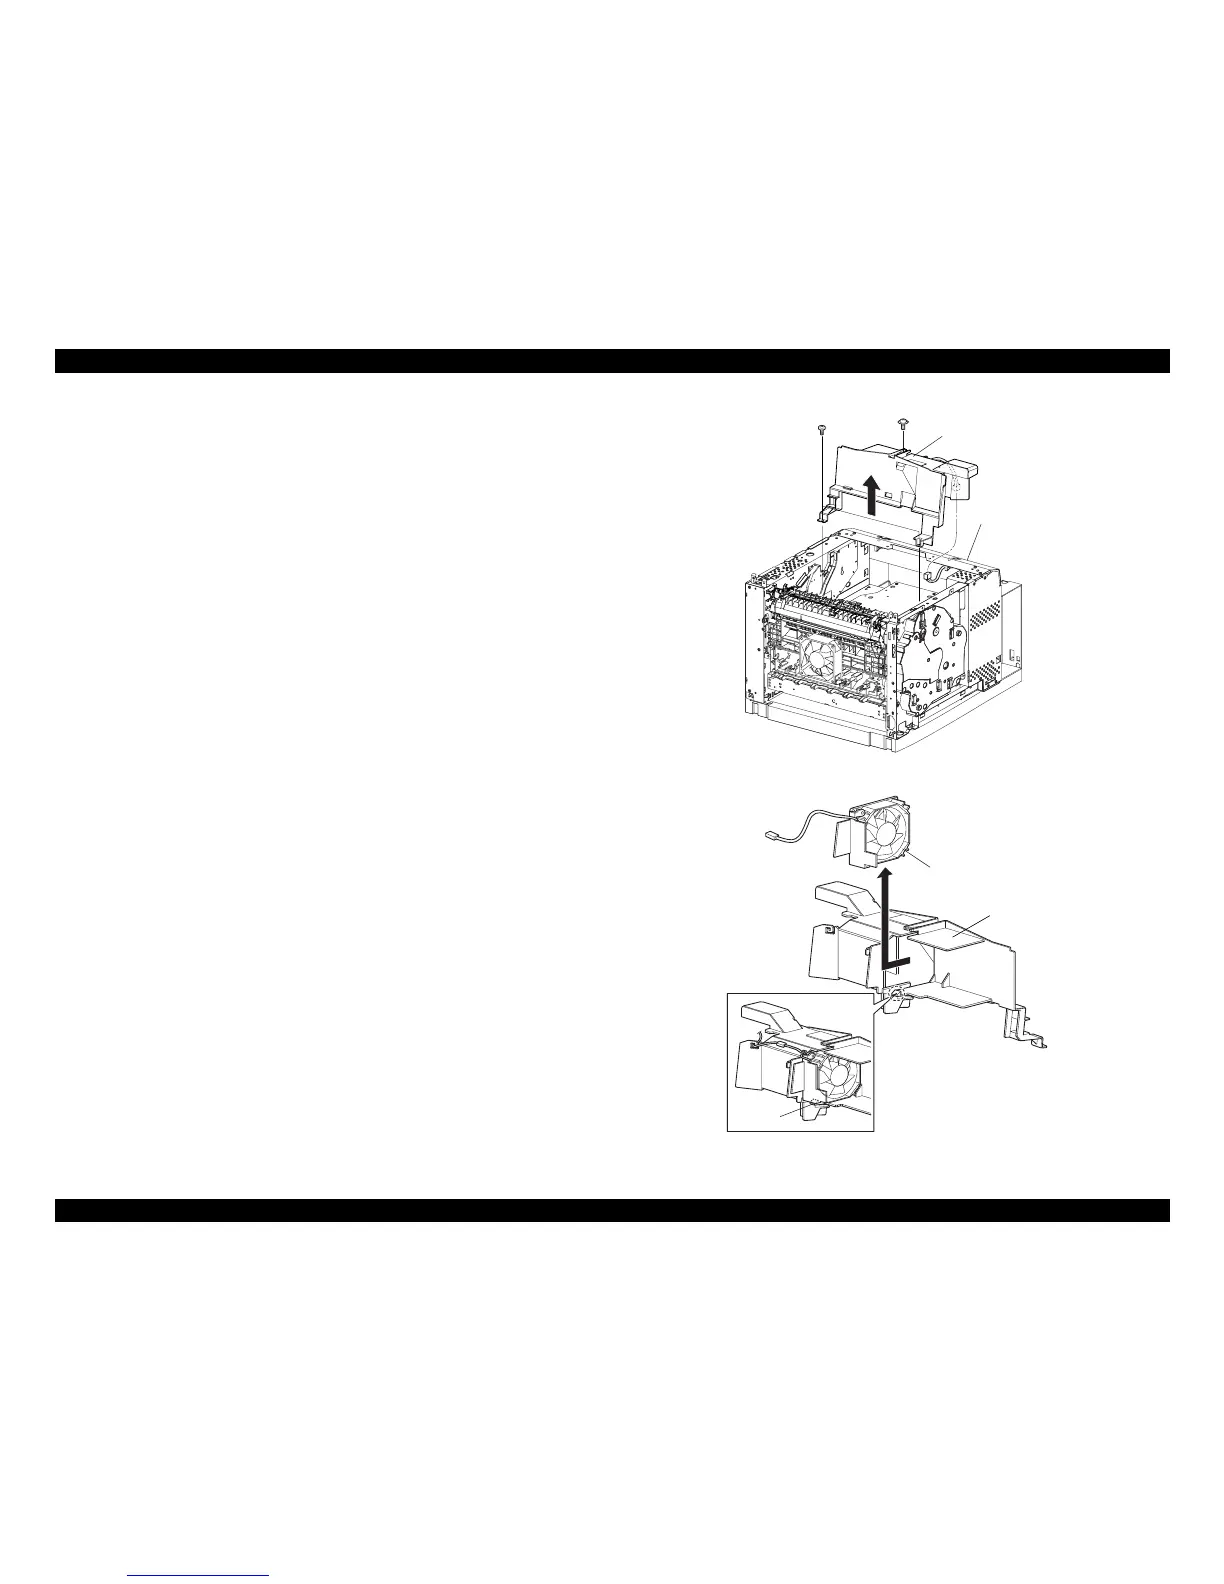
4.7.2 DUCT FRONT, FAN SUB
Removal
1. Remove the COVER REAR 500. (p.270)
2. Remove the COVER REAR. (p.167)
3. Remove the COVER LEFT. (p.169)
4. Remove the COVER RIGHT. (p.168)
5. Remove the COVER EXIT 500. (p.261)
6. Remove the 500 EXIT ASSY. (p.262)
7. Remove the COVER TOP, CONTROL PANEL. (p.170)
8. Remove the COVER FRONT. (p.172)
9. Disconnect the connector (P/J270) of the FAN SUB from the HARNESS ASSY
LVPS.
10. Remove the three screws (silver, tapping with a collar, 8mm x1, gold, tapping,
8mm x2) securing the DUCT FRONT.
11. Move the DUCT FRONT mounted with the FAN SUB in the direction of the
arrow, and remove it from the frame.
12. Release the hook securing the FAN SUB to the DUCT FRONT, and remove the
FAN SUB.
Figure 4- 59. DUCT FRONT, FAN SUB Removal
Figure 4- 60. DUCT FRONT, FAN SUB Removal
JG3192A