EPSON EPL-N3000/AcuLaser M4000N Revision C
Disassembly and Assembly 550 Paper Cassette 191
Confidential
4.4 550 Paper Cassette
4.4.1 ROLL ASSY RETARD
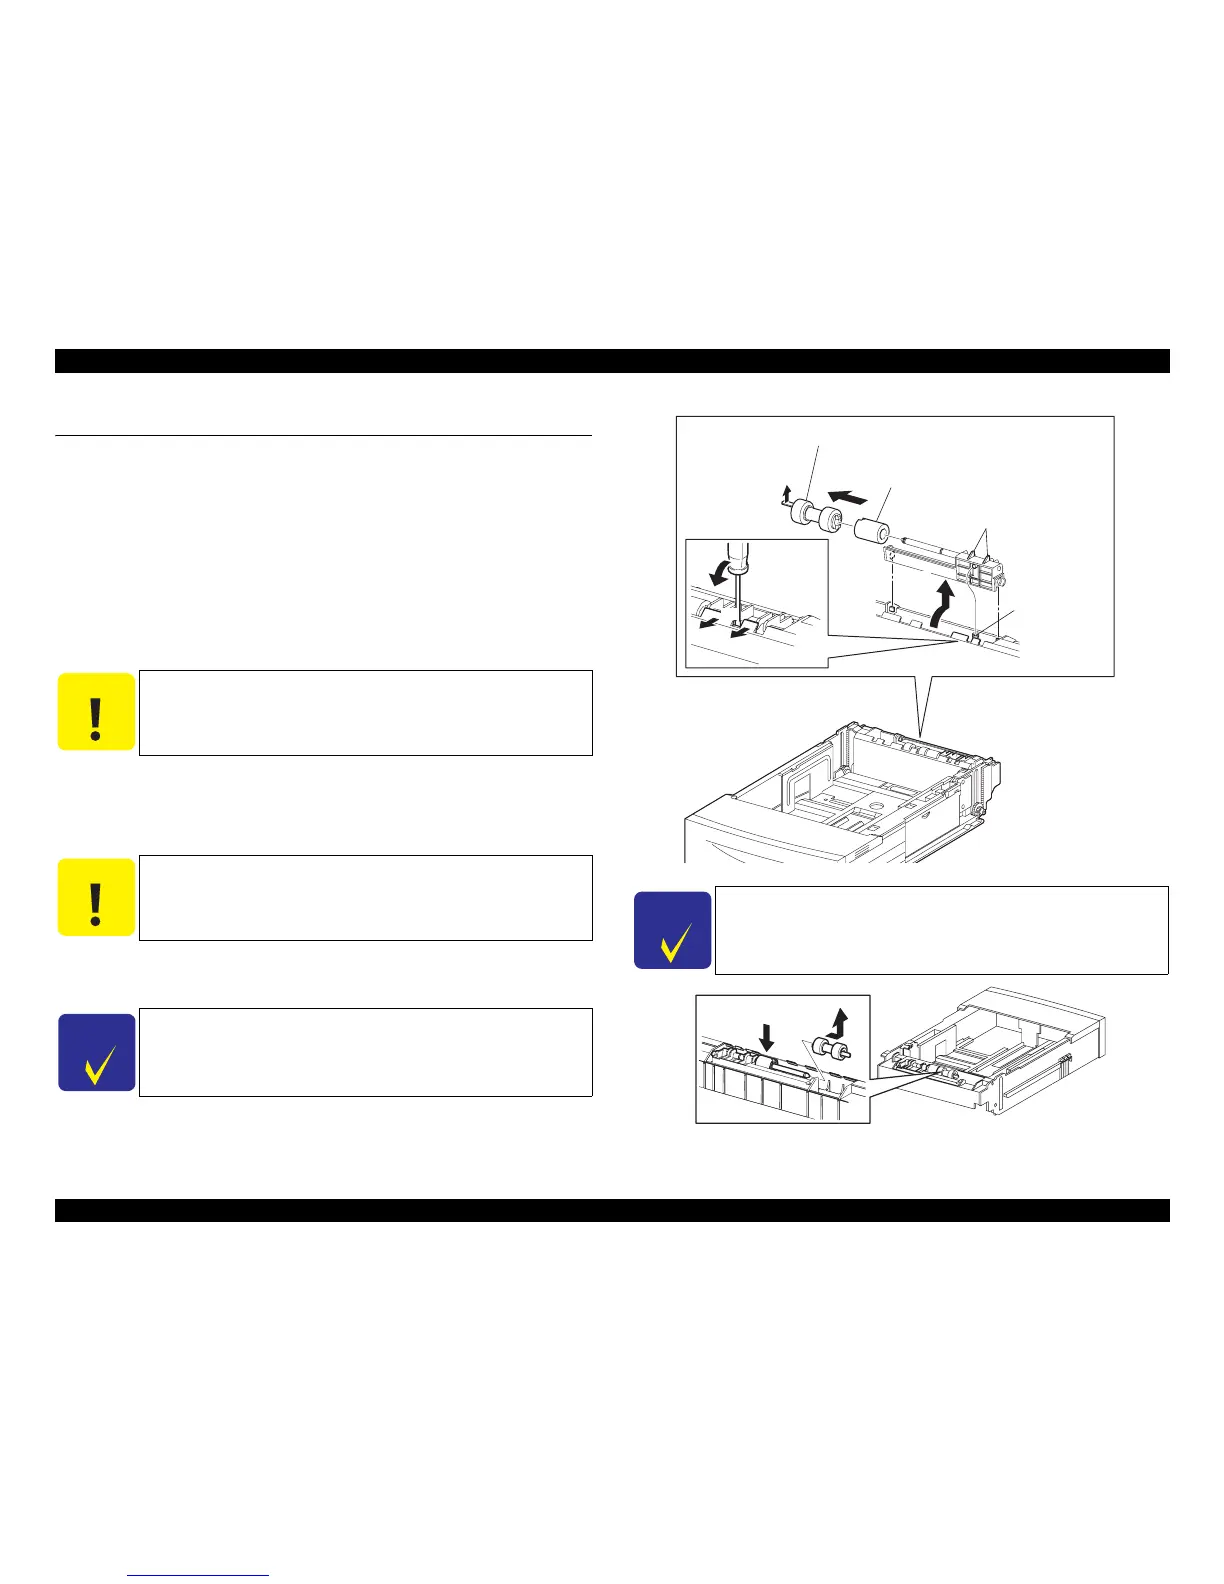
Removal
1. Pull the 550 PAPER CASSETTE out of the printer body.
2. Using a screwdriver or the like, release the hooks securing the HOLDER
RETARD to the 550 PAPER CASSETTE.
3. Lift and remove the HOLDER RETARD in the direction of the arrow.
4. Release the hooks of the ROLL ASSY RETARD and remove it from the SHAFT
RETARD.
Installation
1. Install the ROLL ASSY RETARD to the SHAFT RETARD, and secure it with the
hooks.
2. Move the HOLDER RETARD in the direction opposite to the arrow, and install it
to the 550 PAPER CASSETTE.
3. Install the 550 PAPER CASSETTE to the printer body.
Figure 4- 23. ROLL ASSY RETARD Removal
Figure 4- 24. ROLL ASSY RETARD Removal
C A U T I O N
In removal, take care not to hold any rubber portion of the
ROLL ASSY RETARD.
When removing the HOLDER RETARD, be careful not to
mislay the SPRING RETARD.
C A U T I O N
When installing it, take care not to hold any rubber portion of
the ROLL ASSY RETARD.
Engage the hooks of the ROLL ASSY RETARD with the
grooves in the SHAFT RETARD properly.
C H E C K
P O I N T
After installation, push down the HOLDER RETARD and release
your hand. At this time, make sure that the HOLDER RETARD
returns to the original position by the spring force of the SPRING
RETARD.
C H E C K
P O I N T
Besides the above procedure, the ROLL ASSY RETARD can also
be removed by pushing down the HOLDER RETARD.
SPRING RETARD
FRICTION CLUTCH
ROLL ASSY RETARD
HOOKS
4-1)
4-2)
3)
2)
JG3209AA