EPSON EPL-N3000/AcuLaser M4000N Revision C
Disassembly and Assembly Electrical 293
Confidential
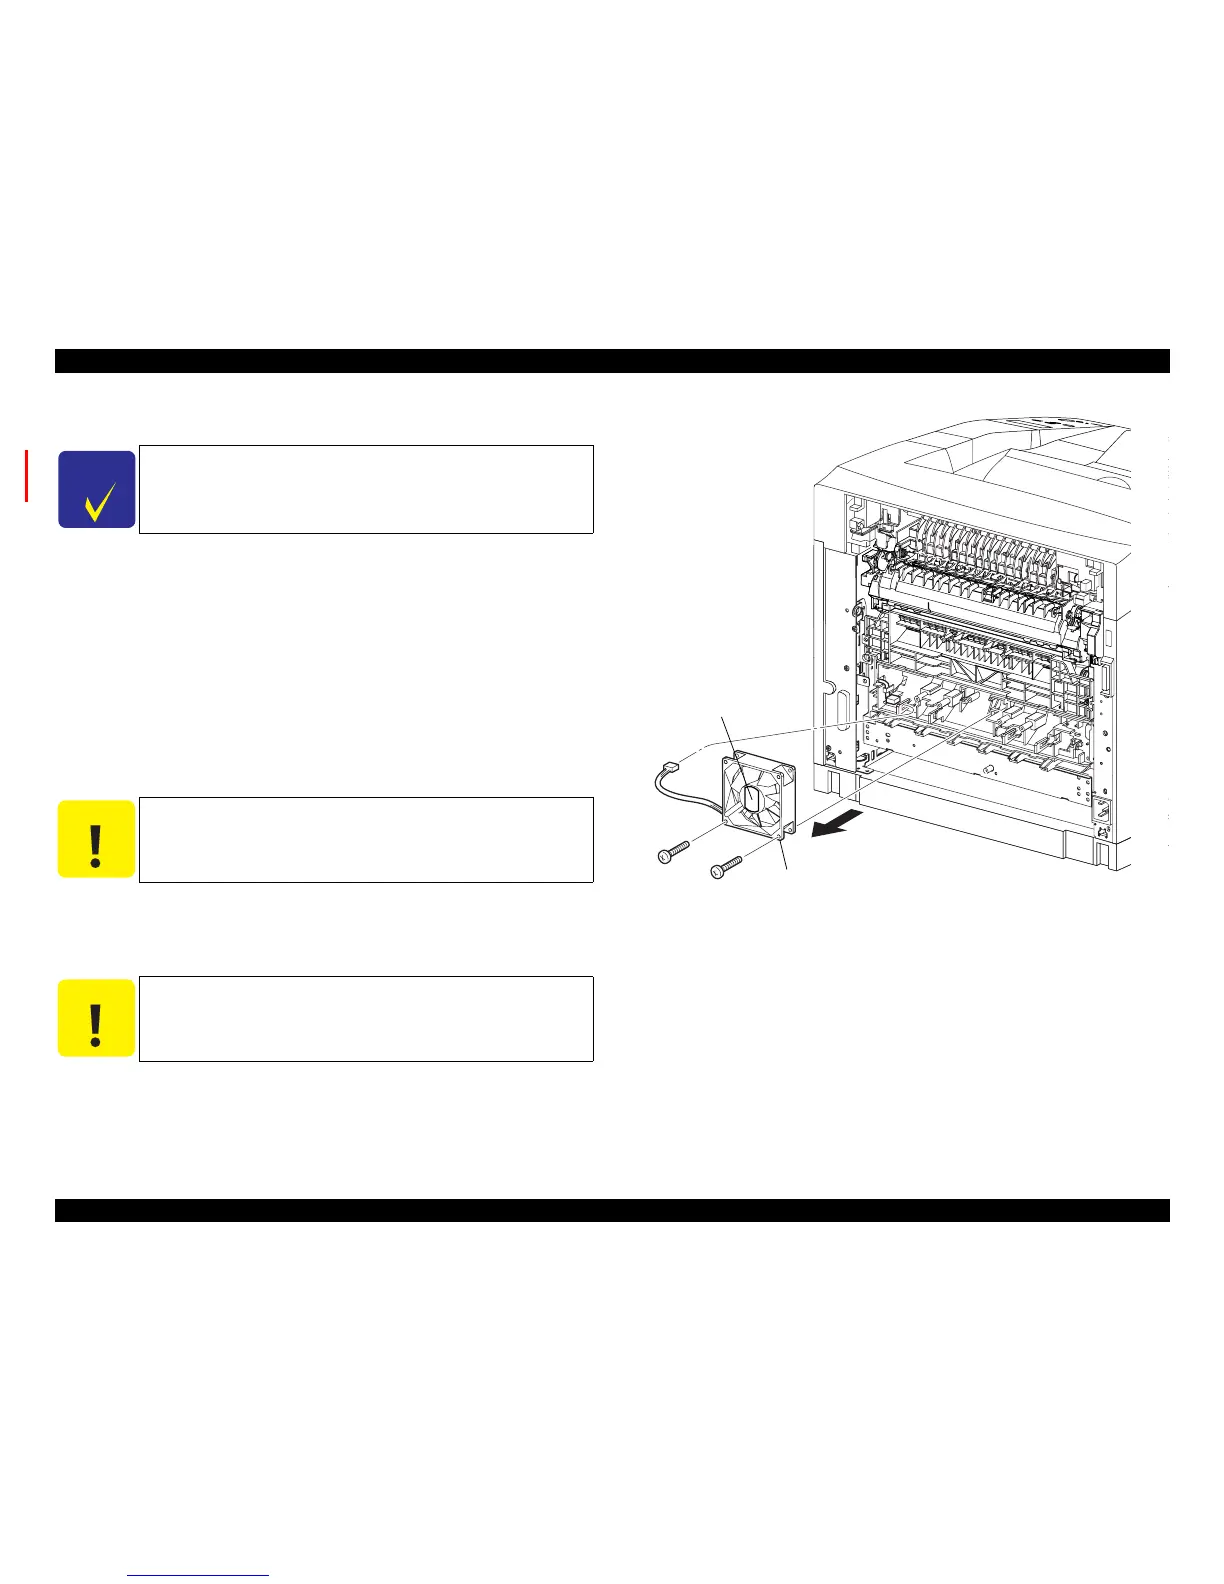
4.10.6 FAN MAIN
Removal
1. Remove the COVER REAR 500. (p.270)
2. Remove the COVER REAR. (p.167)
3. Disconnect the connector (P/J244) of the FAN MAIN from the HARNESS ASSY
TRAY 1.
4. Remove the two screws (silver, tapping, 30mm) securing the FAN MAIN to the
frame, and remove the FAN MAIN.
Installation
1. Install the FAN MAIN to the frame with the two screws (silver, tapping, 30mm).
2. Connect the connector (P/J244) of the FAN MAIN to the HARNESS ASSY
TRAY 1.
3. Install the COVER REAR. (p.167)
4. Install the COVER REAR 500. (p.270)
Figure 4- 97. FAN MAIN Removal
C H E C K
P O I N T
Disassembly procedures for this part are different between EPL-
N3000 and AcuLaser M4000N. For AcuLaser M4000N, see
4.14.8
FAN MAIN (AcuLaser M4000N) (p.392).
C A U T I O N
Install the FAN MAIN with its label surface located on the
outside.
When installing the FAN MAIN, be careful so that the harness
is not caught between the FAN MAIN and frame.
C A U T I O N
Pay attention to the difference between the two types of screws and
use them at their correct positions respectively.
JG3022EA
LABEL
FAN MAIN
4)
3)