EPSON EPL-N3000/AcuLaser M4000N Revision C
Disassembly and Assembly Xero 243
Confidential
4.7.3 SHIELD PLATE ROS
Removal
1. Remove the COVER REAR 500. (p.270)
2. Remove the COVER REAR. (p.167)
3. Remove the COVER LEFT. (p.169)
4. Remove the COVER RIGHT. (p.168)
5. Remove the COVER EXIT 500. (p.261)
6. Remove the 500 EXIT ASSY. (p.262)
7. Remove the COVER TOP, CONTROL PANEL. (p.170)
8. Remove the COVER FRONT. (p.172)
9. Remove the DUCT FRONT, FAN SUB. (p.241)
10. Remove the FUSER ASSY. (p.253)
11. Remove the ROS ASSY. (p.239)
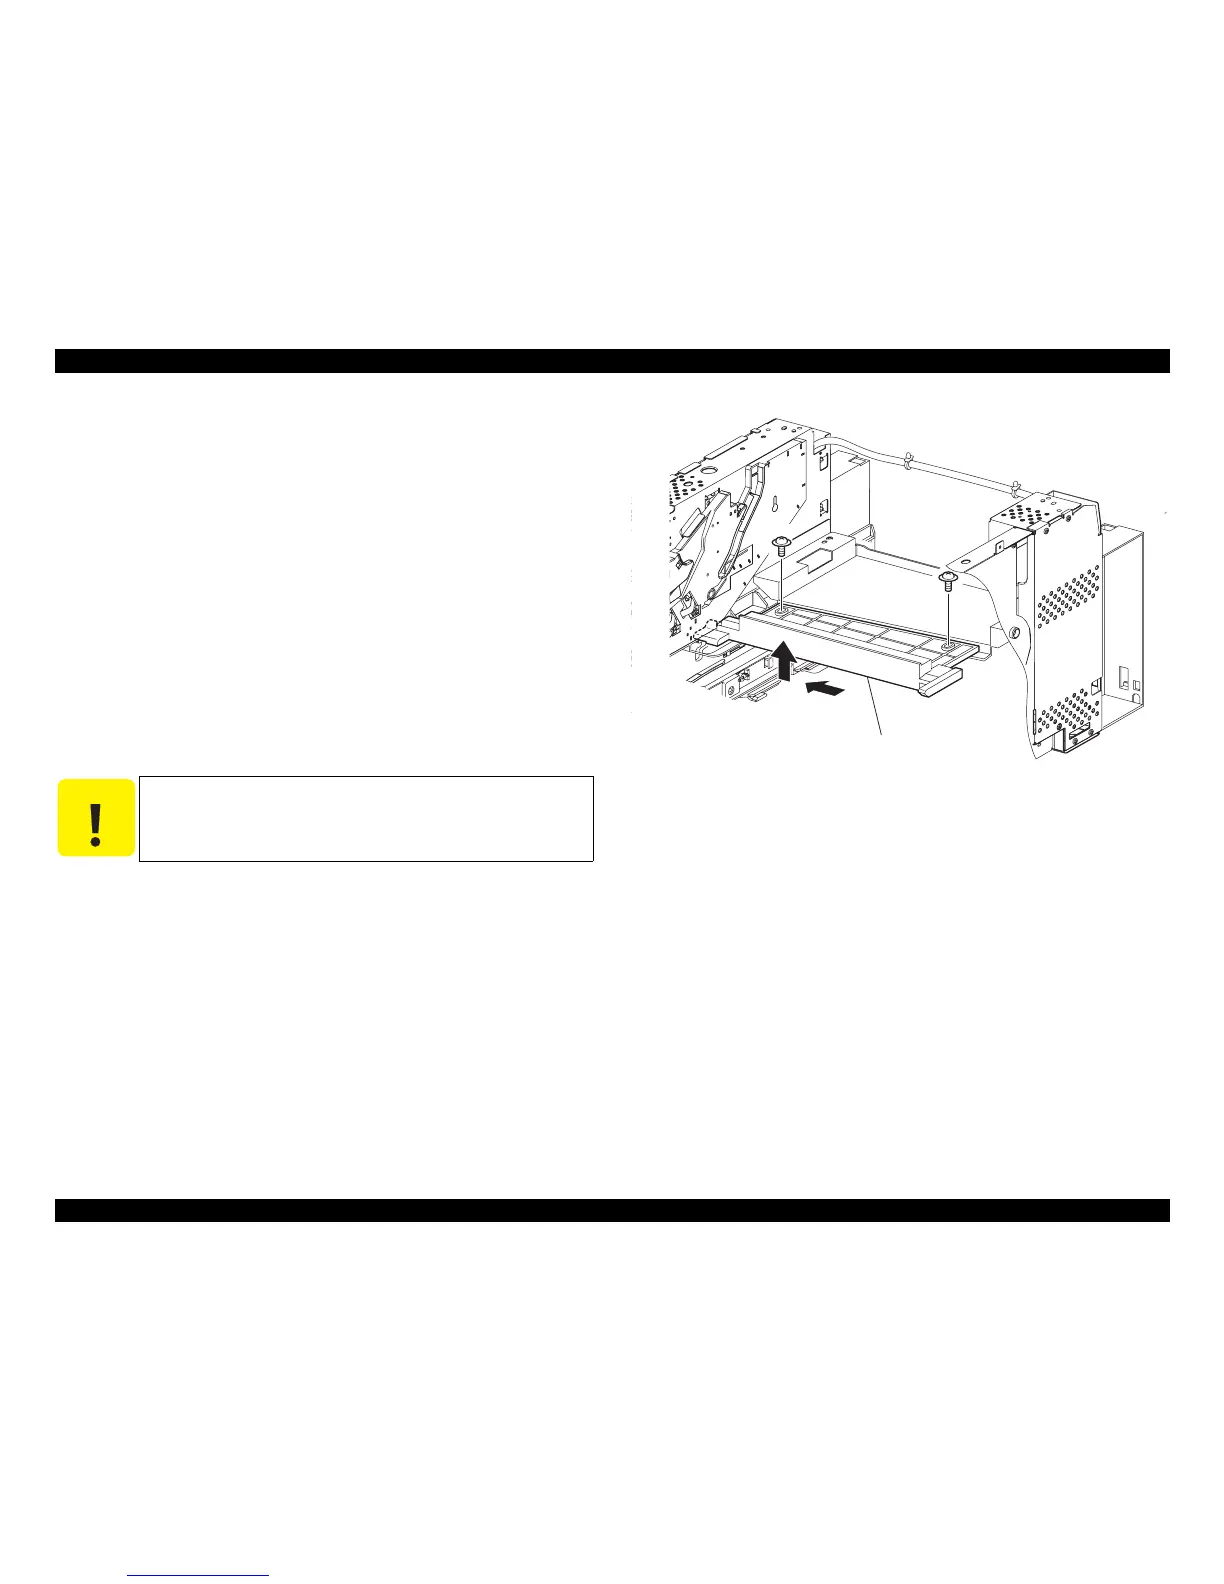
12. Remove the two screws (black, with collars, 8mm) securing the SHIELD PLATE
ROS to the frame.
13. Move and remove the SHIELD PLATE ROS in the direction of the arrow.
Figure 4- 61. SHIELD PLATE ROS Removal
C A U T I O N
Never give impact to the ROS ASSY with a screwdriver or the like.
JG3158AB
SHIELD PLATE ROS
12)
13)