EPSON EPL-N3000/AcuLaser M4000N Revision C
Disassembly and Assembly Xero 256
Confidential
4.7.11 PWBA ASSY ANT
Removal
1. Remove the COVER REAR 500. (p.270)
2. Remove the COVER REAR. (p.167)
3. Remove the FUSER ASSY. (p.253)
4. Remove the COVER LEFT. (p.169)
5. Remove the COVER RIGHT. (p.168)
6. Remove the COVER EXIT 500. (p.261)
7. Remove the 500 EXIT ASSY. (p.262)
8. Remove the COVER TOP, CONTROL PANEL. (p.170)
9. Remove the COVER FRONT. (p.172)
10. Remove the BTR ASSY. (p.254)
11. Remove the DUCT FRONT, FAN SUB. (p.241)
12. Remove the GUIDE ASSY CRU R. (p.257)
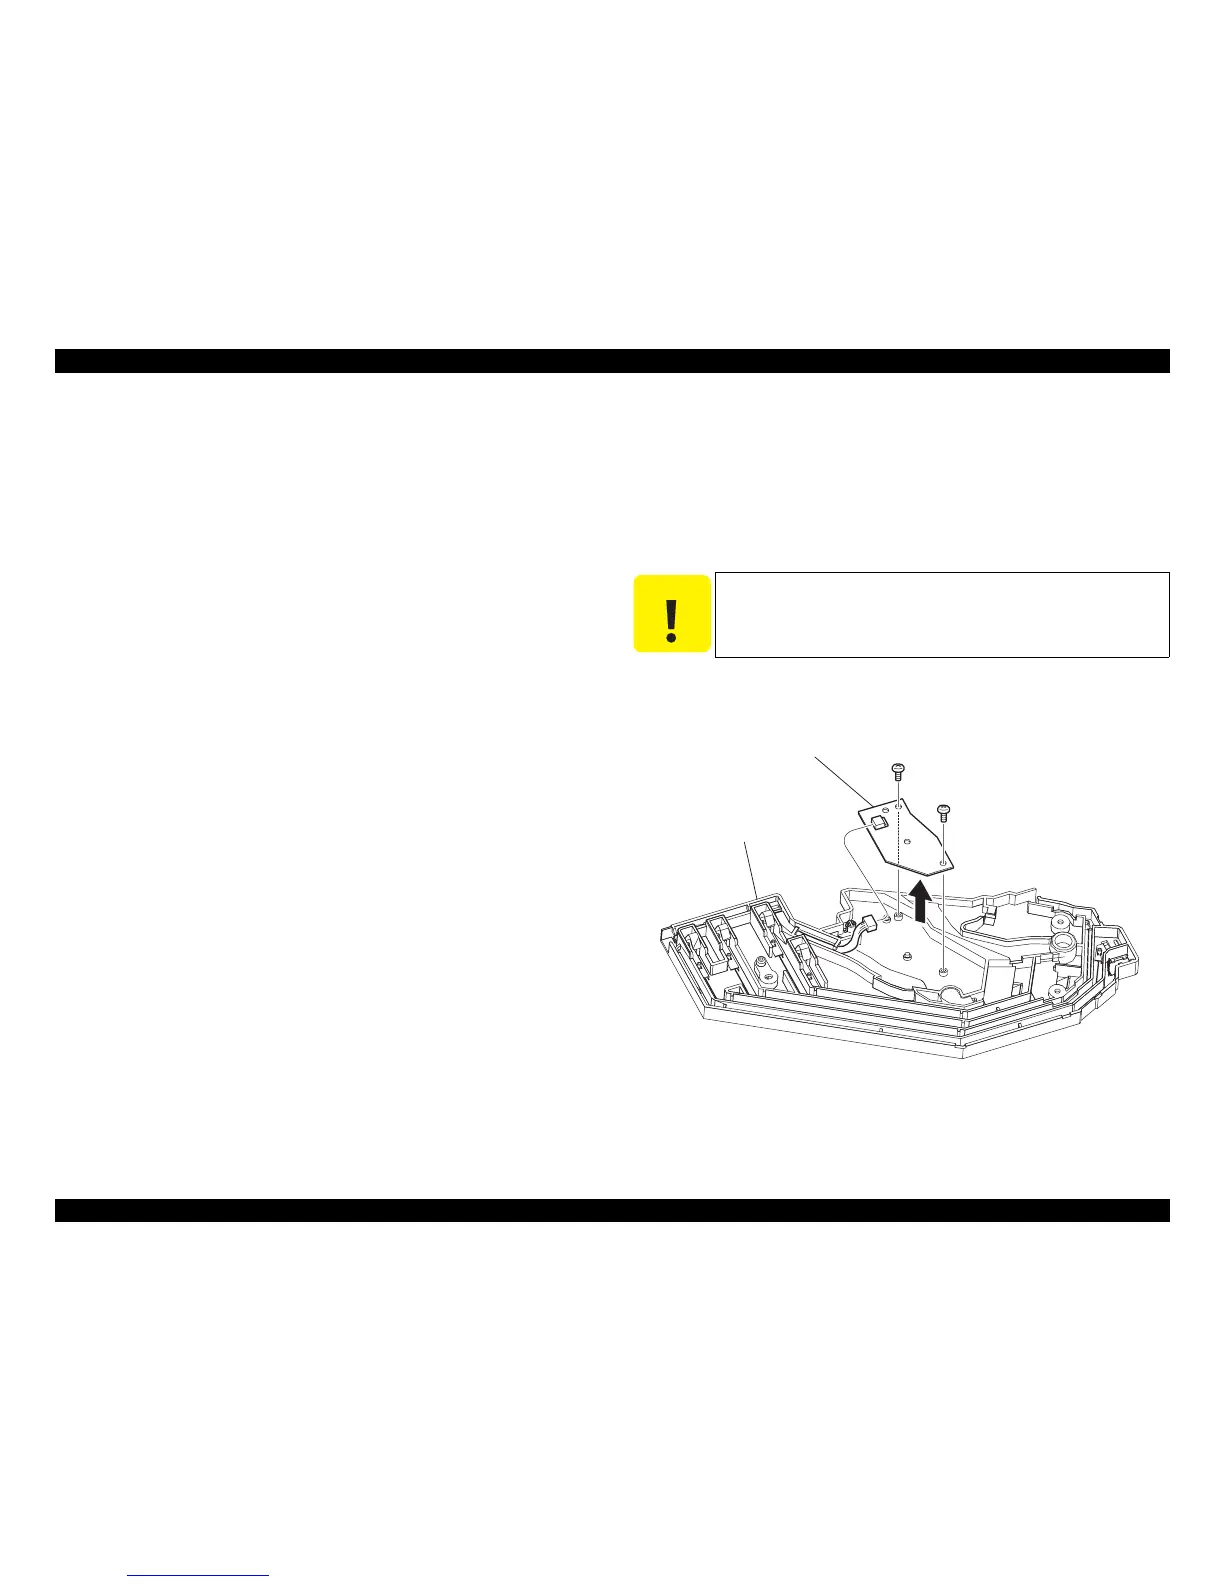
13. Remove the two screws (gold, tapping, 6mm) securing the PWBA ASSY ANT to
the GUIDE ASSY CRU R.
14. Remove the PWBA ASSY ANT.
15. Insert the lower boss on the connector of the HARNESS ASSY FUSER into the
frame.
Installation
1. Connect the connector of the HARNESS ASSY ANT to the connector (P/J150) of
the PWBA ASSY ANT.
2. Install the PWBA ASSY ANT to the GUIDE ASSY CRU R with the two screws
(gold, tapping, 6mm).
3. Install the GUIDE ASSY CRU R. (p.257)
4. Install the DUCT FRONT, FAN SUB. (p.241)
5. Install the COVER FRONT. (p.172)
6. Install the COVER TOP, CONTROL PANEL. (p.170)
7. Install the 500 EXIT ASSY. (p.262)
8. Install the COVER EXIT 500. (p.261)
9. Install the COVER RIGHT. (p.168)
10. Install the COVER LEFT. (p.169)
11. Install the FUSER ASSY. (p.253)
12. Install the COVER REAR. (p.167)
13. Install the COVER REAR 500. (p.270)
14. Install the BTR ASSY. (p.254)
Figure 4- 69. PWBA ASSY ANT Removal
C A U T I O N
Pay attention to the difference between the two types of screws and
use them at their correct positions respectively.
JG3068AA
PWBA ASSY ANT
GUIDE ASSY CRU R
13)
15)
14)