EPSON EPL-N3000/AcuLaser M4000N Revision C
Disassembly and Assembly Option Duplex 342
Confidential
4.12 Option Duplex
4.12.1 Option Duplex
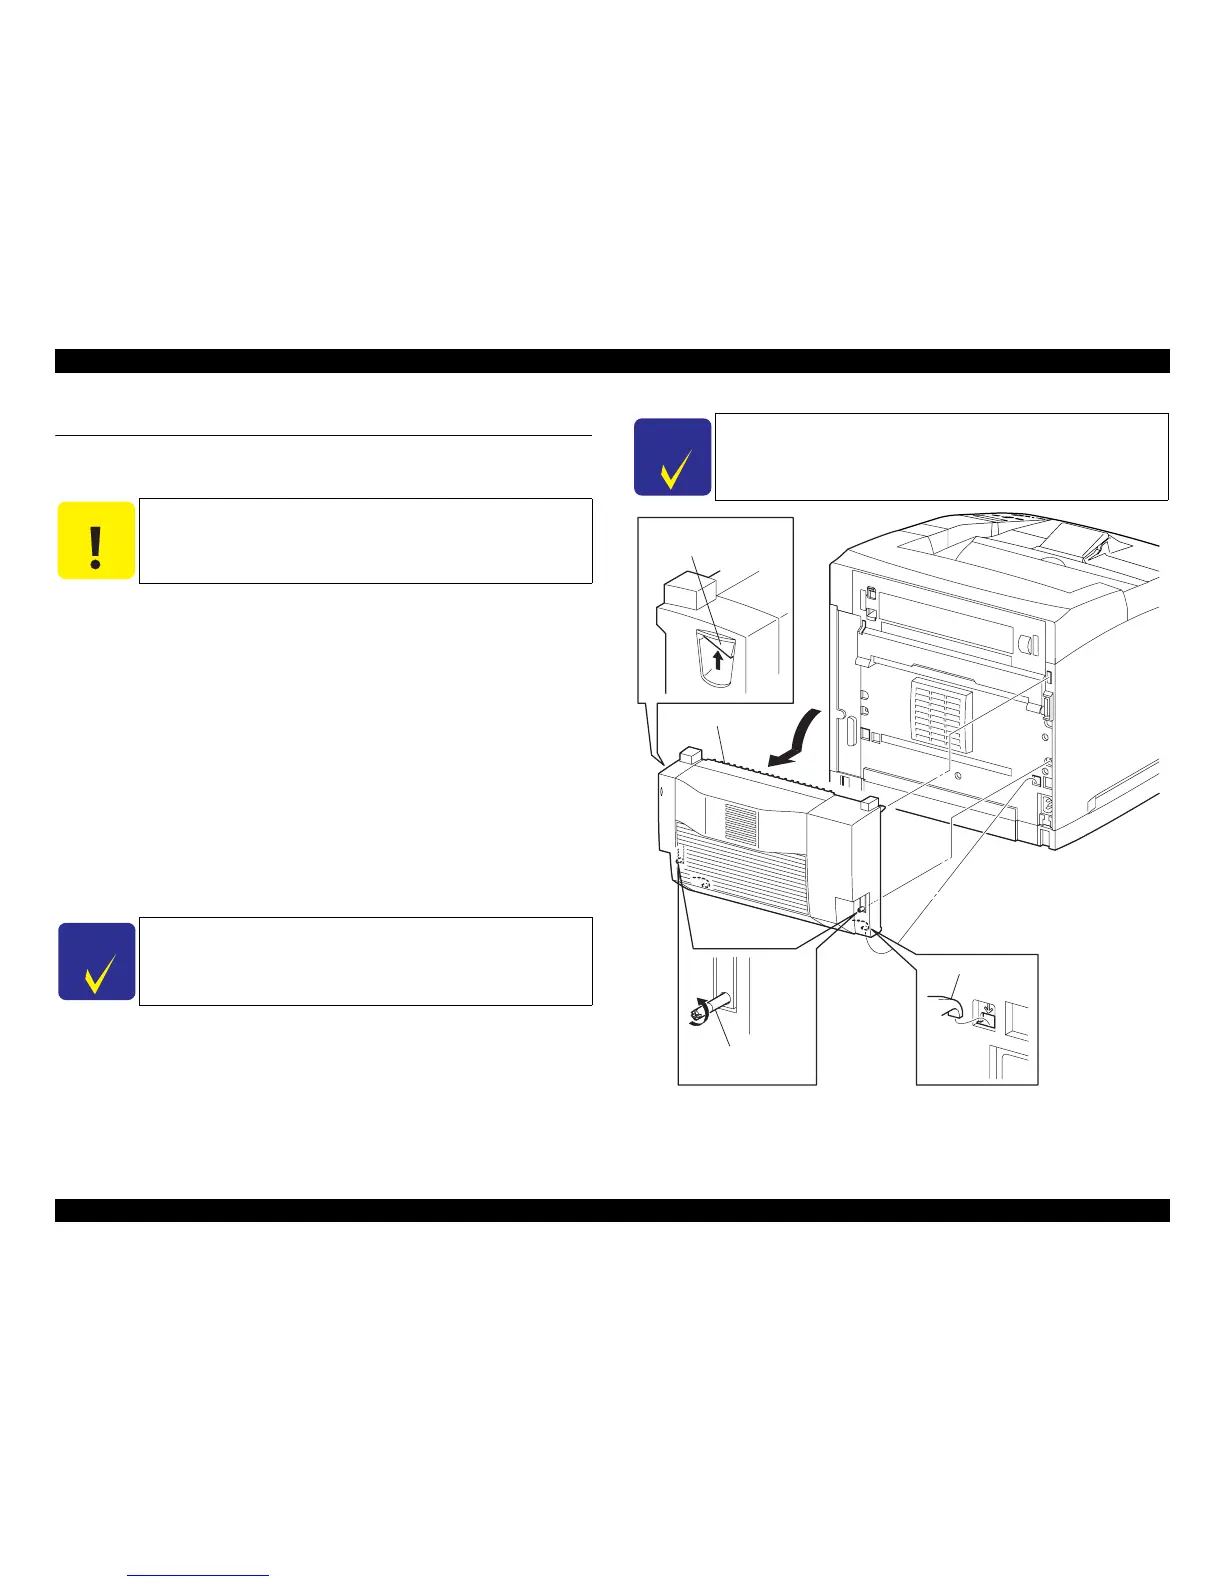
Removal
1. Loosen the two pieces of SCREW THUMB securing the Option Duplex.
2. Push down the LEVER LATCH RIGHT and release the hooks of the LEVER
LATCH RIGHT and LEVER LATCH LEFT.
3. Tilt the Option Duplex to the front, and remove the connector (P/J2750) of the
HARNESS ASSY DUP from the printer body.
4. Disengage the left and right bosses of the HSG LOWER DUP.
5. Release the two hooks at the bottom of the HSG LOWER DUP, and remove the
Option Duplex from the printer body.
Installation
1. Insert the two hooks at the bottom of the HSG LOWER DUP into the holes of the
printer body.
2. Press the Option Duplex against the printer body, connect the connector (P/J2750)
of the HARNESS ASSY DUP, and engage the bosses. At this time, the Option
Duplex is locked to the printer body by the LEVER LATCH RIGHT and LEVER
LATCH LEFT.
3. Tighten the two SCREWs THUMB to fix the Option Duplex to the printer body.
Figure 4- 143. Option Duplex Removal
C A U T I O N
Carry out removal/installation work with care not to drop the
Option Duplex.
C H E C K
P O I N T
When installing the Option Duplex, securely insert the two hooks at
its bottom into the holes of the printer body.
C H E C K
P O I N T
Securely tighten the SCREWs THUMB to fix the Option Duplex
tightly.
JG3601EA
LEVER LATCH RIGHT
Option Duplex
SCREW THUMB
HOOK
2)
5-2)
5-1)
1)