EPSON EPL-N3000/AcuLaser M4000N Revision C
Troubleshooting Troubleshooting for Individual Units 141
Confidential
3.4.36 S/W REAR COVER
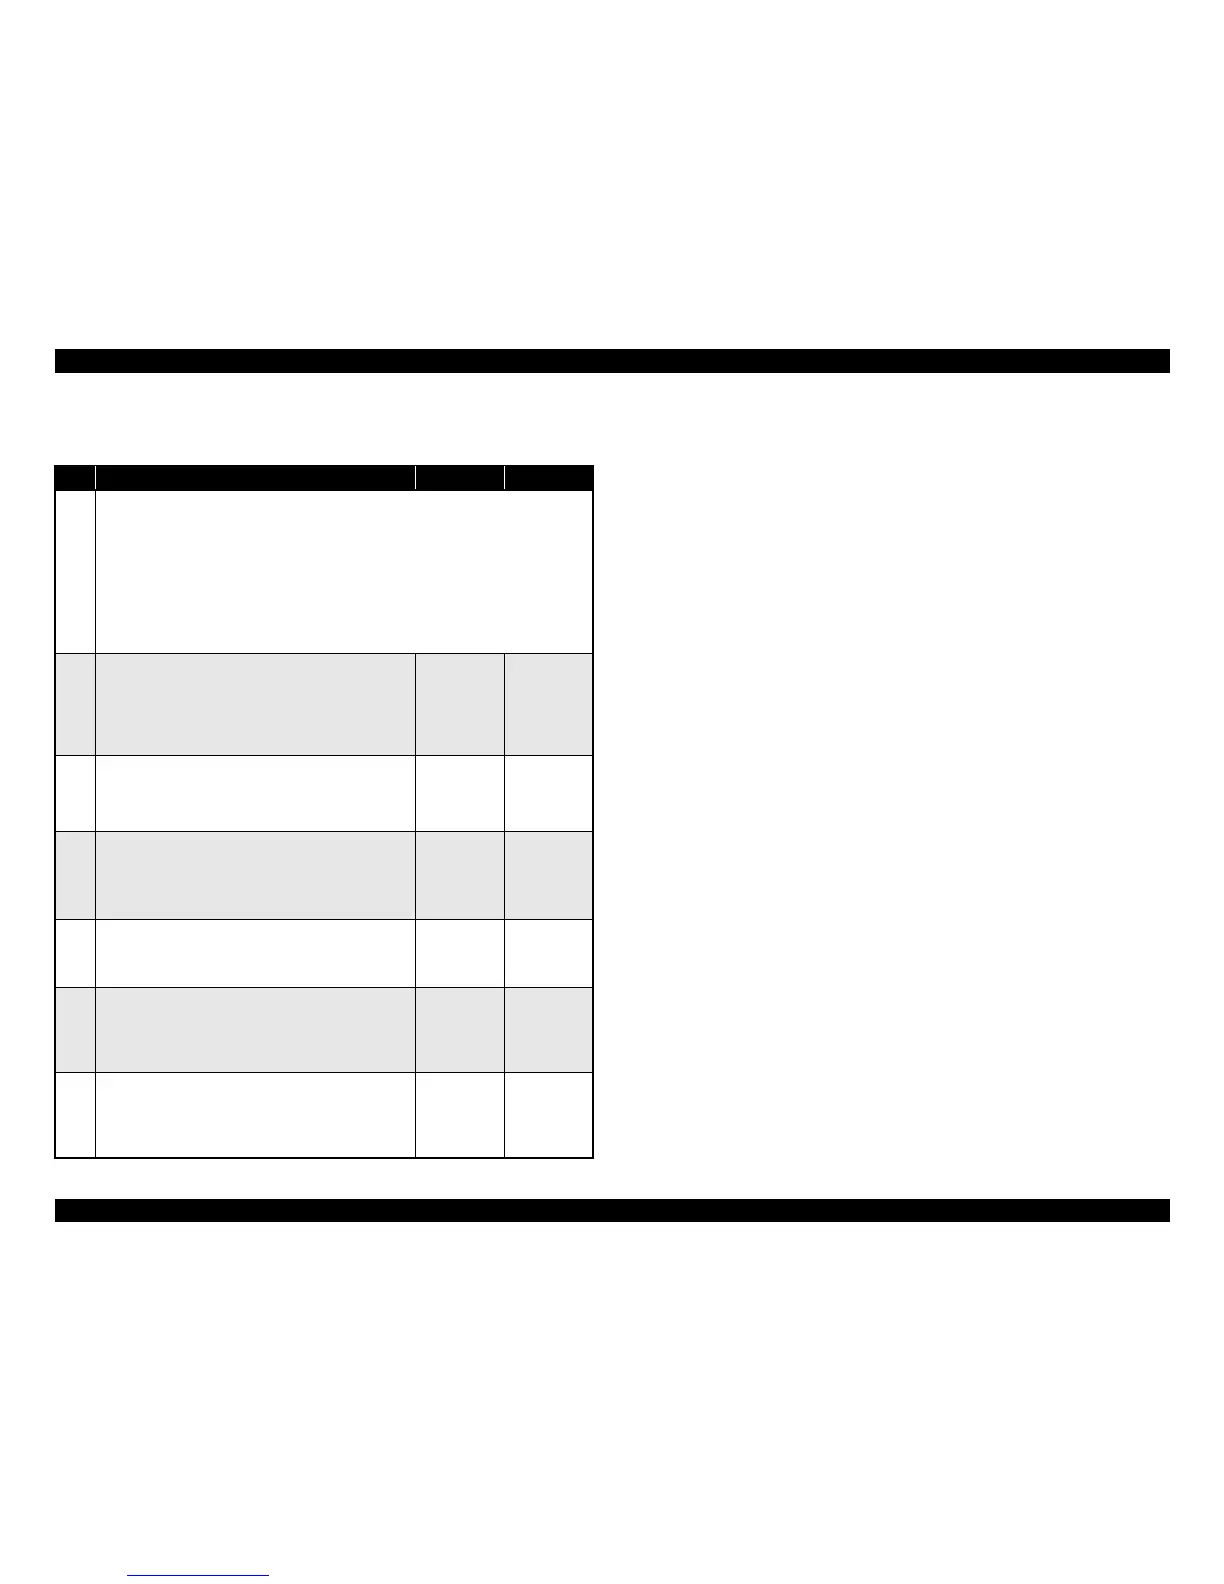
Table 3-95. Troubleshooting for S/W REAR COVER
Step Action and Question Yes No
Parts below can be the source of this error (Chapter 4 Disassembly and Assembly)
• S/W REAR COVER
• HARNESS ASSY REAR COVER
•PWBA OCT (p.368)
• HARNESS ASSY OCT2
•HVPS/MCU (p.301)
•LVPS (p.287)
• HARNESS ASSY OCT1
1
Continuity of S/W REAR COVER (1)
1. Disconnect the S/W REAR COVER.
♦Is there continuity between J740-2 ↔ J740-1 when
the S/W REAR COVER is pushed, and no
continuity when it is released?
Go to Step 2
Replace the S/
W REAR
COVER
2
Continuity of HARNESS ASSY REAR COVER
1. Disconnect the HARNESS ASSY REAR COVER.
♦Is there normal continuity between J74 ↔ J740?
Go to Step 3
Replace the
HARNESS
ASSY REAR
COVER
3
HARNESS ASSY OCT2
1. Disconnect P/J 70 on the PWBA OCT
2. Disconnect the HARNESS ASSY OCT2.
♦Is there normal continuity between J70 ↔ J3070?
Go to Step 4
Replace the
HARNESS
ASSY OCT2
4
Continuity of HARNESS ASSY OCT1
1. Disconnect the HARNESS ASSY OCT1.
♦Is there normal continuity between J30 ↔ J3070?
Go to Step 5
Replace the
HARNESS
ASSY OCT1
5
S/W REAR COVER (2)
1. Remove the Imaging Cartridge.
♦Is the voltage between J30-4 ↔ P/J30-3 on the
HVPS/MCU 3.3 VDC?
Go to 3.4.32
PWBA OCT
(p.139)
Go to Step 6
6
Continuity of HVPS/MCU
1. Disconnect P/J30 on the PWBA OCT.
♦Is there normal continuity between P30-4 ↔ P11-
16?
Go to 3.4.1
LVPS (p.111)
Replace the
HVPS/MCU