EPSON EPL-N3000/AcuLaser M4000N Revision C
Disassembly and Assembly Xero 247
Confidential
4.7.5 INTERLOCK S/W 24V, INTERLOCK S/W 5V
Removal
1. Remove the COVER REAR 500. (p.270)
2. Remove the COVER REAR. (p.167)
3. Remove the FUSER ASSY. (p.253)
4. Remove the COVER LEFT. (p.169)
5. Remove the COVER RIGHT. (p.168)
6. Remove the COVER EXIT 500. (p.261)
7. Remove the 500 EXIT ASSY. (p.262)
8. Remove the COVER TOP, CONTROL PANEL. (p.170)
9. Remove the COVER FRONT. (p.172)
10. Remove the BTR ASSY. (p.254)
11. Remove the DUCT FRONT, FAN SUB. (p.241)
12. Remove the ROS ASSY. (p.239)
13. Remove the SHIELD PLATE ROS. (p.243)
14. Remove the GUIDE TRAY LEFT. (p.236)
15. Remove the MOTOR COVER. (p.277)
16. Remove the SHIELD PLATE LVPS. (p.285)
17. Remove the GUIDE CRU LEFT. (p.245)
18. Remove the COVER GUIDE CRU and HARNESS ASSY FUSER. (p.251)
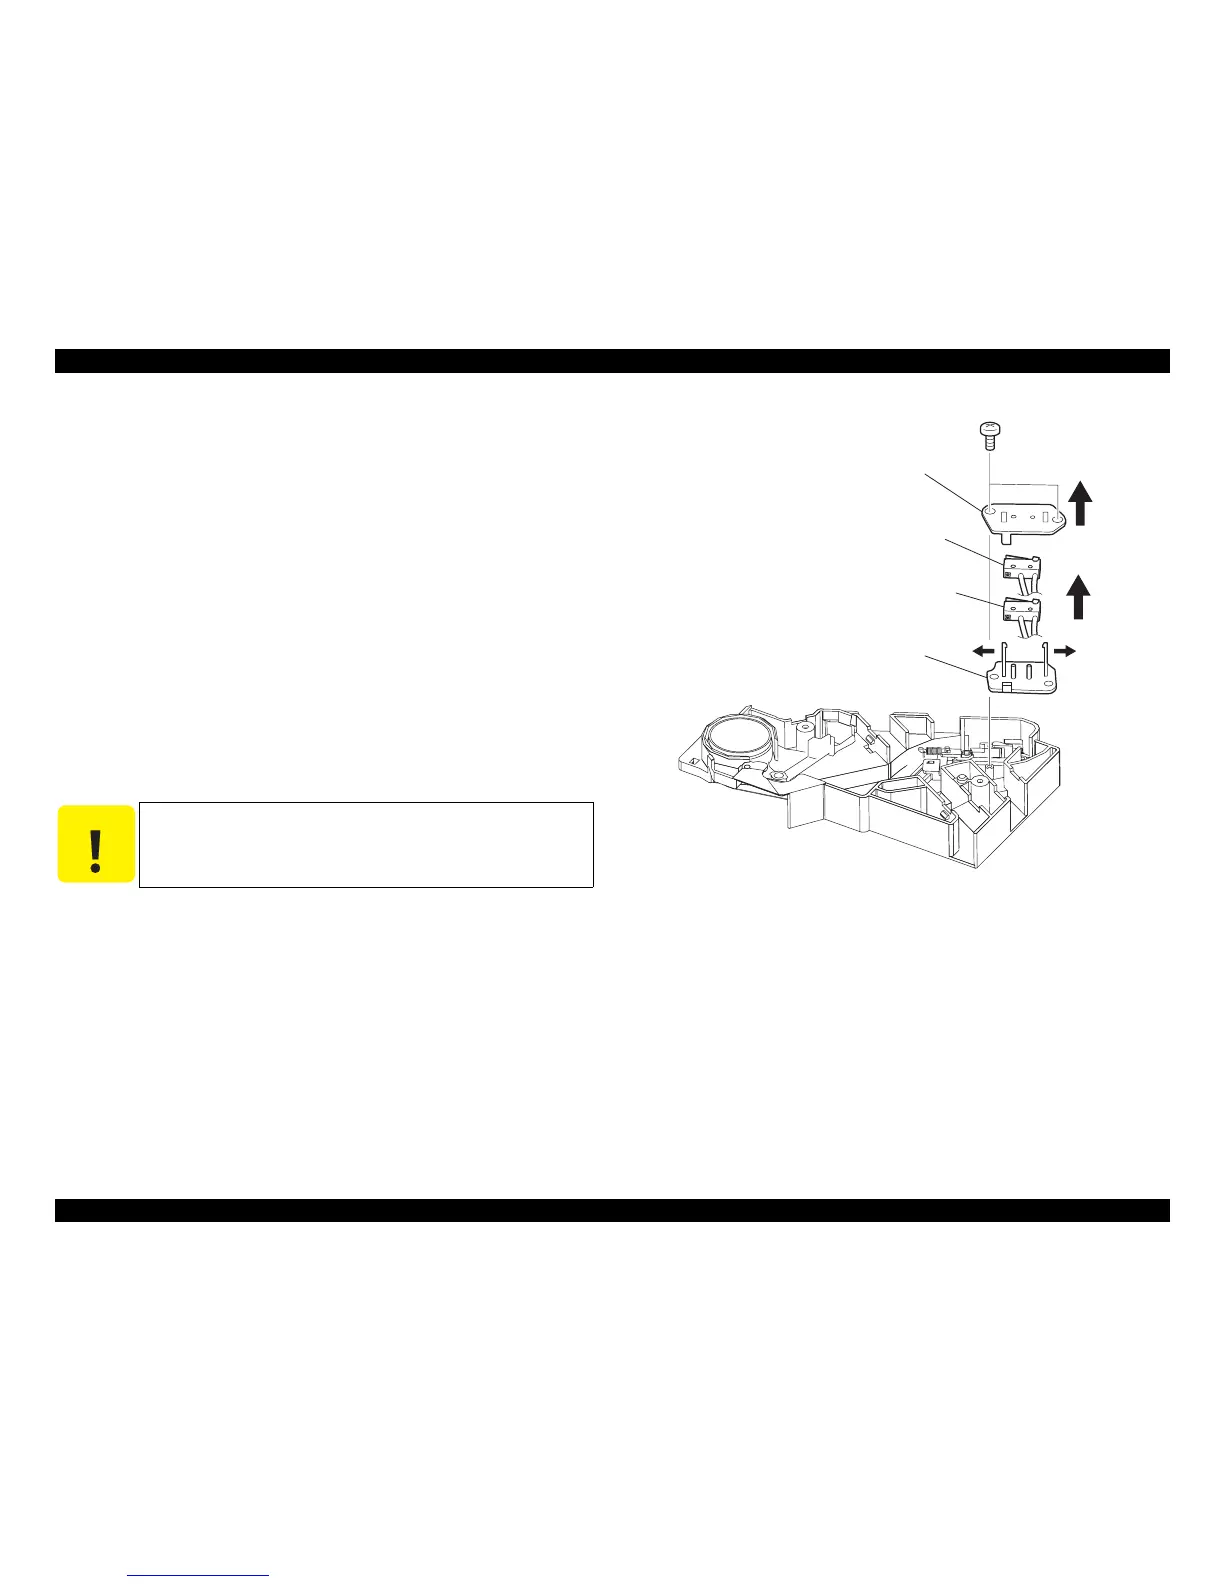
19. Remove the two screws (gold, tapping, 6 mm) securing the HOLDER I/L SW2.
20. Remove the HOLDER I/L SW2.
21. Release the hooks of the HOLDER I/L SW1, and remove the INTERLOCK S/W
24V and INTERLOCK S/W 5V.
Figure 4- 63. INTERLOCK S/W 24V, INTERLOCK S/W 5V Removal
C A U T I O N
Never give impact to the ROS ASSY with a screwdriver or the like.
JG3061A