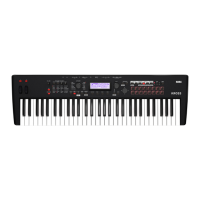
Audio Recorder Setup Recording control
193
Recording procedure
1. Insert an SD card into the SD card slot
2. Select the source that you want to record
• KROSS program, combination, or favorite
• Sequencer song
• Audio signal from the MIC IN jack or LINE IN jack (see page
5)
3. Hold down the EXIT button ( ) and press the
AUDIO REC (PLAY/PAUSE) button ( ) to
access the AUDIO RECORDER SETUP window.
4. Press the Rec Control button to enter the record-standby
condition
5. Press a key or the Rec Control button to start recording
* The recording start method will depend on the Auto setting (see
page 194)
6. Press the Stop/Reset button to stop recording
For more information, please see “Recording and playing audio”
on page 101 of the Operation Guide.
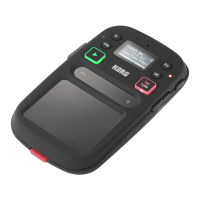
Audio Recorder Setup
In the audio recorder setup window you can adjust settings for the
audio recorder.
• Hold down the EXIT button ( ) and press the AUDIO
REC (PLAY/PAUSE) button ( ) to open the
window.
Audio Take [NEW, Currently No./Multi-track No.]
New: A state where no recording has occurred yet.
Currently No./Multi-track No.: When you record, the left side
indicates the currently selected take, and the right side indicates
the number of multi-track recordings. You can use Undo to go
back to a previous recording.
Time Location [0:00:00...2:59:59]
Indicates the location within the audio song. From the left, this
shows hours, minutes, and seconds.
During recording or playback, pressing the PAGE+ (Stop/Reset)
button will stop and take you back to the location where you
started recording or playing (except if you started from pause).
When stopped, pressing the PAGE+ (Stop/Reset ) button will
take you to the beginning (0:00:00) of the song.
If you want to move the location, use the cursor buttons ◄►▲▼
to select Time Location, and press the ENTER button (the ▲▼
symbols are shown beside the value). Use the cursor buttons ▲▼
or the VALUE dial to specify the location, and press the ENTER
button to move there.
You can’t change the location during recording or in the record-
pause state.
Status/Trigger
Indicates the state of the audio recorder, such as recording,
playing, or stopped. Refer to Status in “Audio recorder button
operation list” on page 192.
If Auto (Auto Rec Start) is set to something other than Off, this
will indicate “TRIG.”
Level Meter
INPUT: Indicates the level of the external audio that's being input
to the KROSS.
OUTPUT: Indicates the level of the sound being output from the
L/R jacks (the sound of the KROSS, the external audio input, and
the playback of the audio recorder). During recording, this will
show the recording level.
Audio Song [000...199: Audio Song Name/Media Info.]
Selects a song.
Tip: To create a new audio song, use the “Create New Audio
Song” function (see page 195).
The following messages related to the SD card are also shown.
NO MEDIA: No SD card is inserted.
UNFORMATTED: The format of the SD card could not be
recognized.
NO AUDIO SONG: There are no audio songs.
Note: If the SD card is locked (write protected), a different error
message “Media write protected” will appear if you perform an
operation that writes to the SD card, such as recording. (see
“Messages” on page 135)
Status/TriggerTime Location Level Meter
Audio Song
Audio Take
Undo Stop/Reset Rec Control

 Loading...