1.
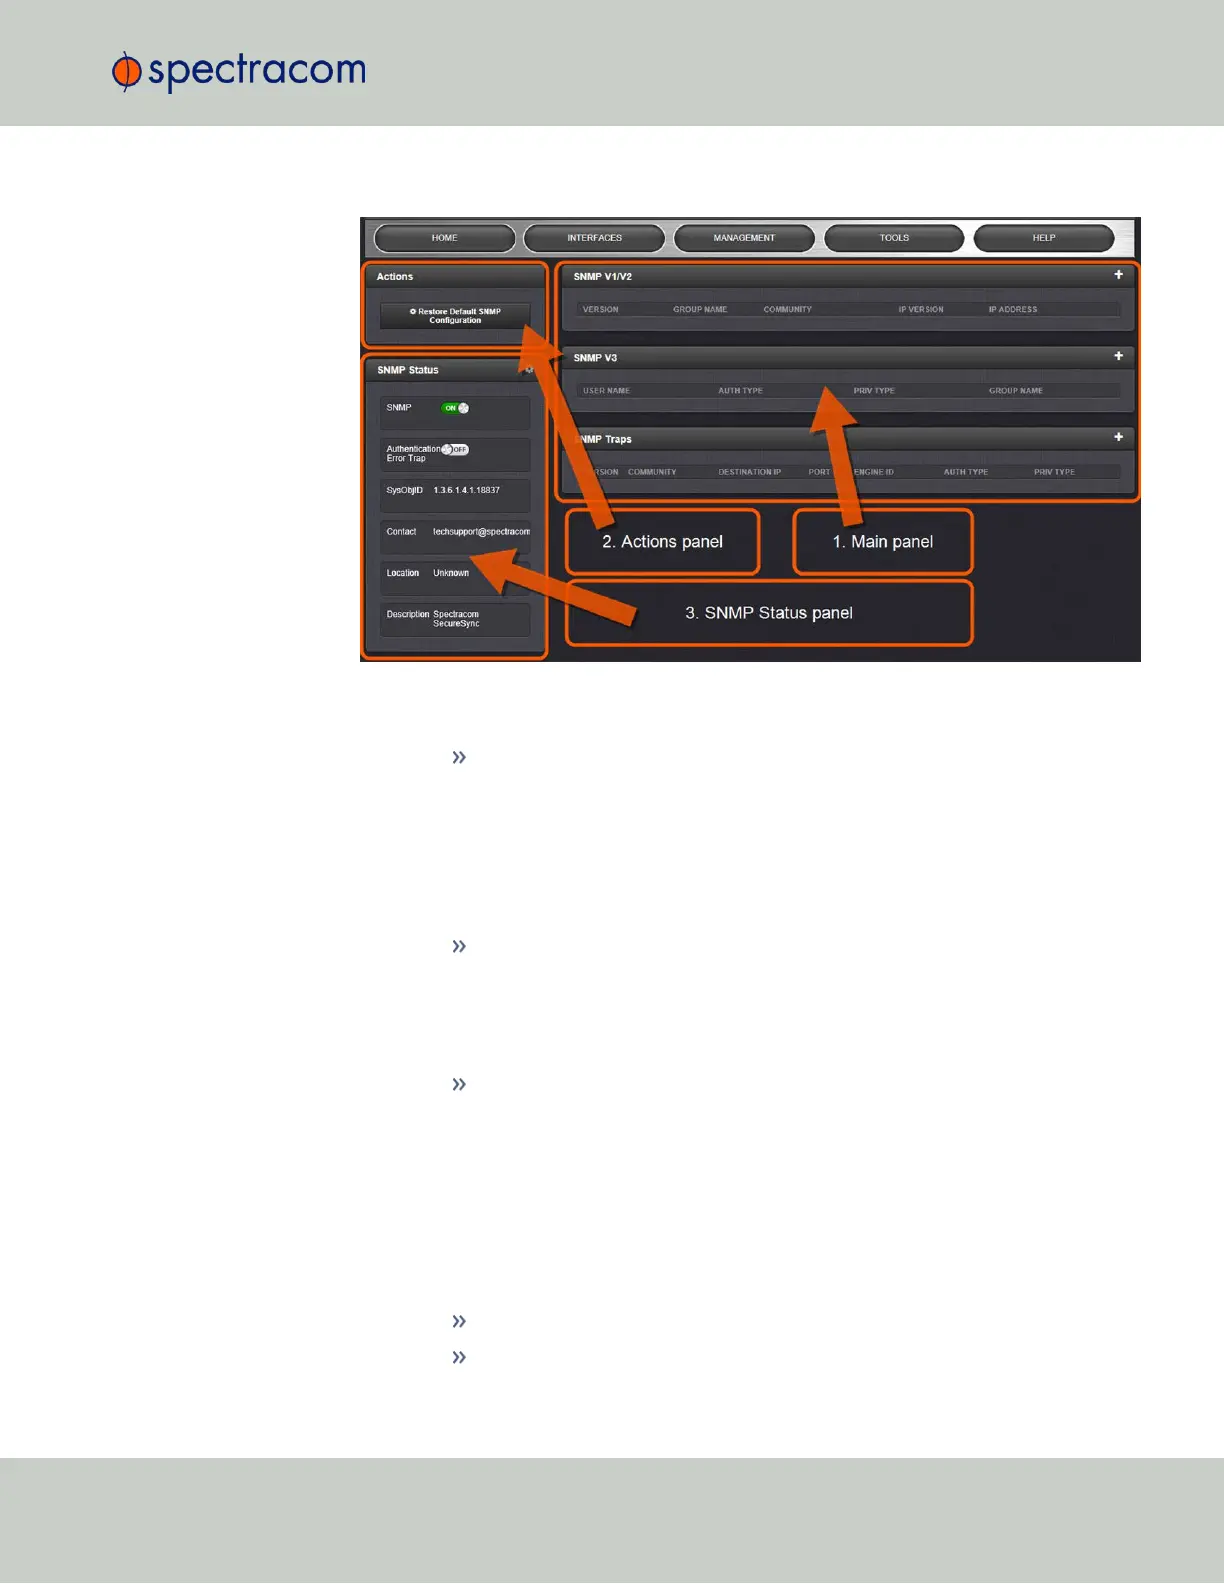
Navigate to MANAGEMENT > NETWORK: SNMP Setup. The SNMP screen will display:
The SNMP screen is divided into 3 panels:
1.
The Main panel, which is subdivided into 3 displays:
SNMP V1/V2: This panel allows configuration of SNMP v1 and v2c com-
munities (used to restrict or allow access to SNMP). This tab allows the con-
figurations for SNMP v1 and v2c, including the protocols allowed,
permissions and Community names as well as the ability to permit or deny
access to portions of the network. Clicking on the “+” symbol in the top-
right corner opens the SNMP V1/V2c Settings for Access Screen. See
"SNMP V1/V2c" on page88.
SNMP V3: This panel allows configuration of SNMP v3 functionality,
including the user name, read/write permissions, authorization passwords
as well as privilege Types and Passphrases. Clicking on the “+” symbol in
the top-right corner opens the SNMP V3 Screen. See "SNMP V3" on
page90.
SNMP Traps: This panel allows you to define different SNMP Managers
that SNMP traps can be sent to over the network. This allows for SNMP
Managers in different geographical areas to receive the same SNMP traps
that Managers in other areas also receive. Clicking the PLUS icon in the
top-right corner opens the SNMP Traps Settings Screen. See also "SNMP
Traps" on page91 and "Setting Up SNMP Notifications" on page244.
2.
The Actions panel, which contains the Restore Default SNMP Configuration button.
3.
The SNMP Status panel, which offers:
An SNMP ON/OFF switch.
An Authentication Error Trap ON/OFF switch.
2.13 Configuring Network Settings
CHAPTER 2 • SecureSync User Reference Guide Rev. 26
85